How to Upgrade to Antidote 10 on Mac

1 — Before installing Antidote 10, you need to remove the previous edition of Antidote. Make sure that Antidote is closed. Right-click on the Antidote icon in the dock. The menu you see on the right will appear, select Quit.
Note — Antidote 10 cannot coexist with an older edition of Antidote on the same computer.

2 — In the Finder, open the Go menu and select Applications.

3 — Find the Antidote application and select it.

4 — Drag and drop the Antidote icon into the Trash.
5 — Access your Client Portal.

6 — In your Client Portal, click the Download button linked to your Antidote 10 license.

7 — Select your platform (macOS) and click Download at the bottom of the window. The download may take a few minutes.

8 — Once the download is finished, open your Downloads folder and select the Antidote 10 disk image.

9 — Double-click on the Antidote 10 disk image.

10 — Double-click on the installer (the flask icon in the centre of the window) and begin the installation.

11 — Click Continue when the following window appears.

12 — Take the time to read the different sections of the installer. Once you have finished a section, click Continue.

13 — Click Agree to accept the terms of the license agreement.

14 — In the Installation Type section, click Install.

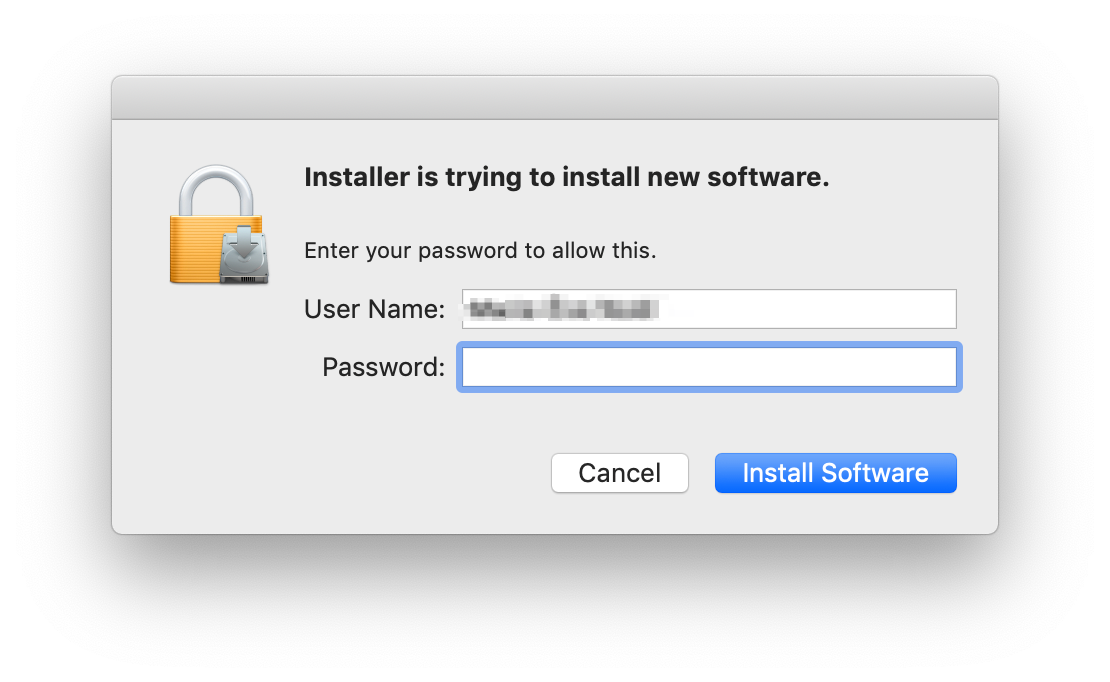
15 — In order to install Antidote on your Mac, you will need administrator permissions. Enter your computer’s password and then click Install Software.

16 — Antidote 10’s installation is now complete, but you still need to integrate it with your other software applications. In the Install with your other software window, click Install.
Note — The installer may ask you to quit certain applications in order to integrate them with Antidote 10. Quit them and click Continue.

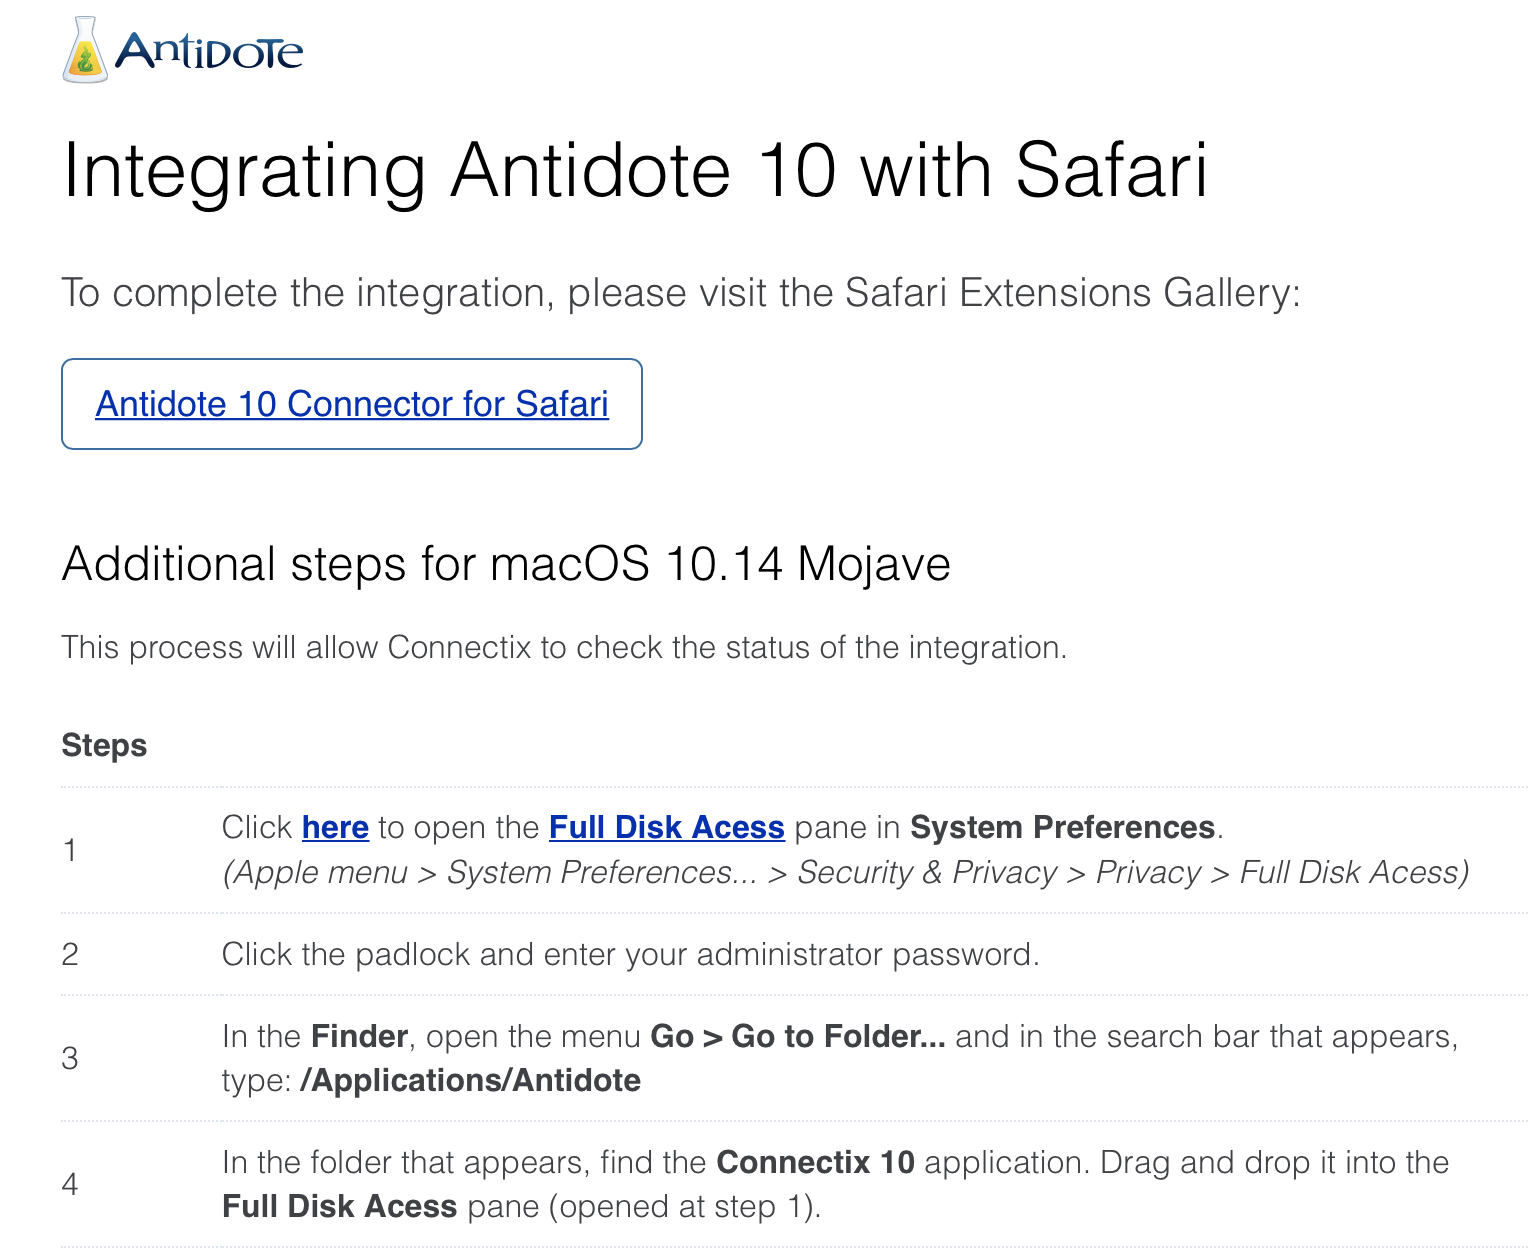
17 — Some software requires that Antidote be installed manually. Click Continue to proceed with the installation. A web page will open for each required manual installation.

18 — Follow the instruction for each application.

19 — Antidote 10 is now integrated with your software. You can find it in the Applications folder.

20 — Open Antidote to proceed with the activation. Enter your ID and password. Click Log In.

21 — Enter your administrator password to begin the activation, then click Install Helper. The helper is responsible for managing the activation.

22 — Once Antidote has been activated, personalize your synchronization options and click Save. If you are unsure, these options can be changed afterwards. You can now use Antidote 10.
Recommandations
In order to keep Antidote 10 up to date, regularly install the available updates. To check if there are any updates available for your version of Antidote 10, open the Help menu and select Search for updates…

If there are several updates to install, simply install them one after the other until the message below appears, confirming that you have the most recent version of Antidote.

To learn more about using Antidote with your different software, see the page Using with your other software.