Steps for Configuring SAML Authentication with Google Cloud
If your organization uses Google Cloud’s Identity Platform, follow this detailed procedure to set up the SAML protocol. This process has three parts:
A. Preparing the Client Portal
B. Configuring SAML in Google Cloud
C. Configuring SAML in the Client Portal
A. Preparing the Organization’s Client Portal
-
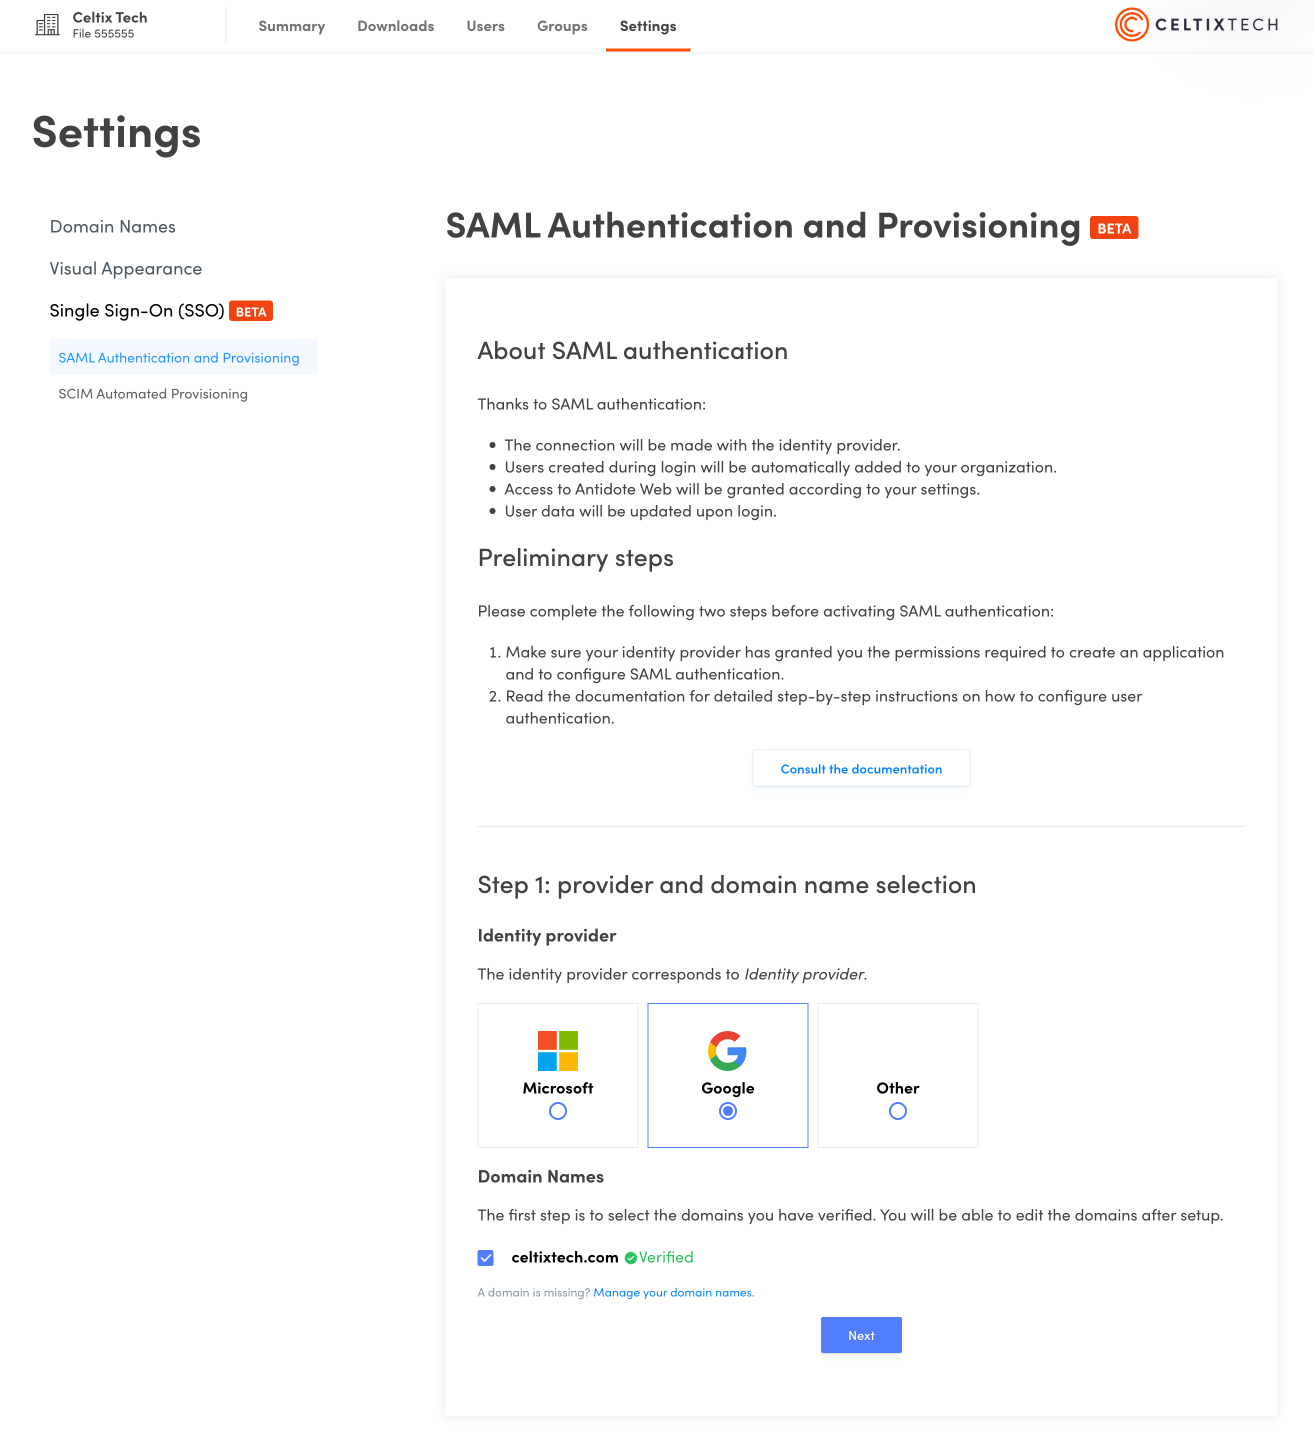
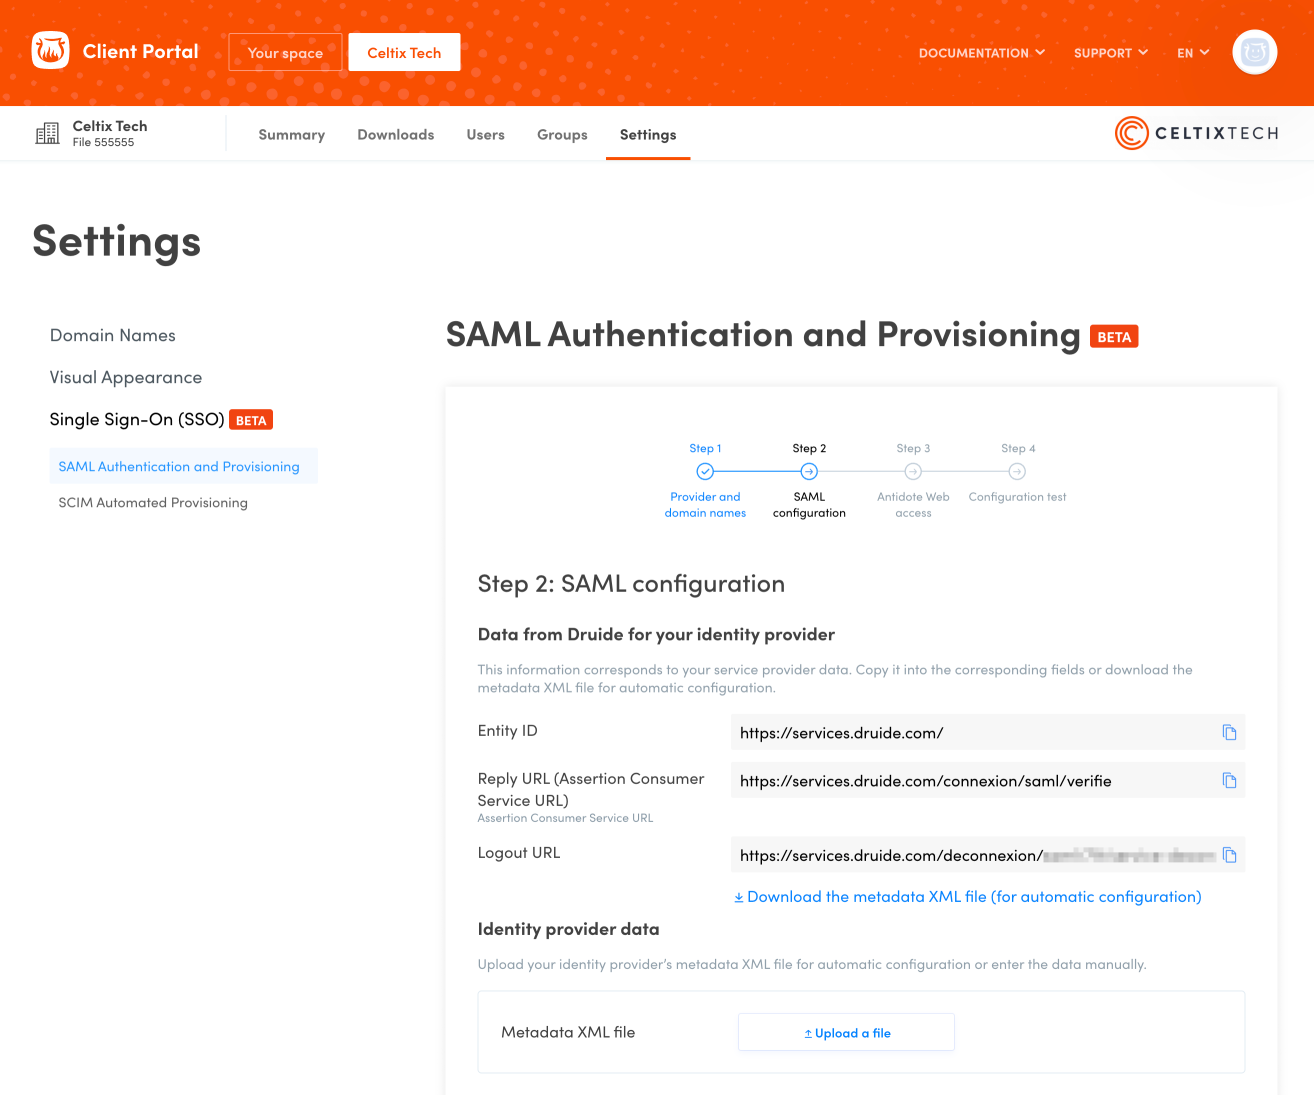
Log in to your organization’s Client Portal and click the Settings tab at the top of the page.
-
Make sure you have already added and verified all the domain names you need for SAML authentication. If you need to add a new one, follow the instructions in the Domain Names section of this guide.
-
 12
12
-
Click SAML Authentication and Provisioning in the Settings menu on the left.
-
Begin step 1 of the configuration process as indicated on the screen. Select Google as your identity provider.
-
Select the domain name or names that you would like to tie in to the authentication process.
-
Click Next.
-
 3456
3456
- Leave this window open and start configuring Google Cloud in a new browser window. You will need to copy-paste some of the information under Data from Druide for your identity provider in the following steps.
-
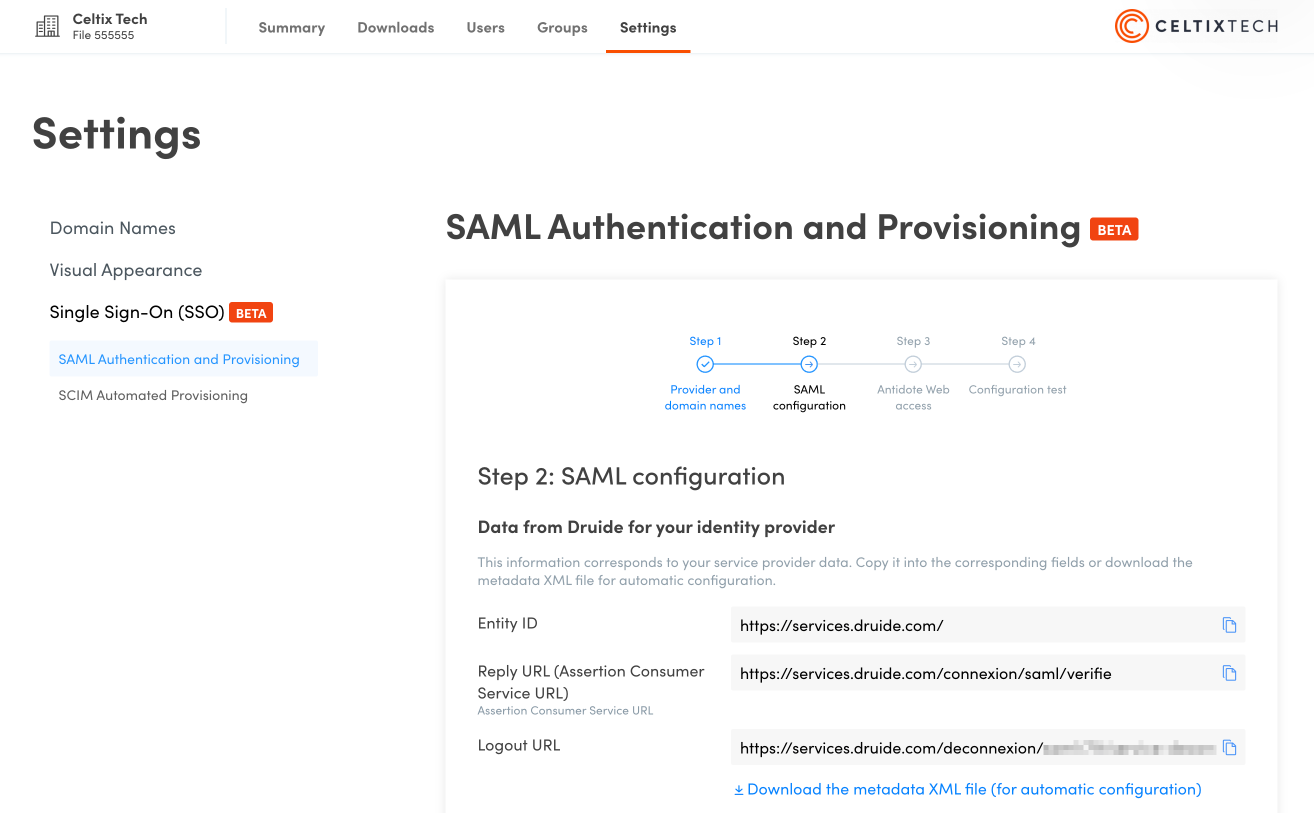 Entity IDReply URL
-
B. Configuring SAML in Google Cloud
-
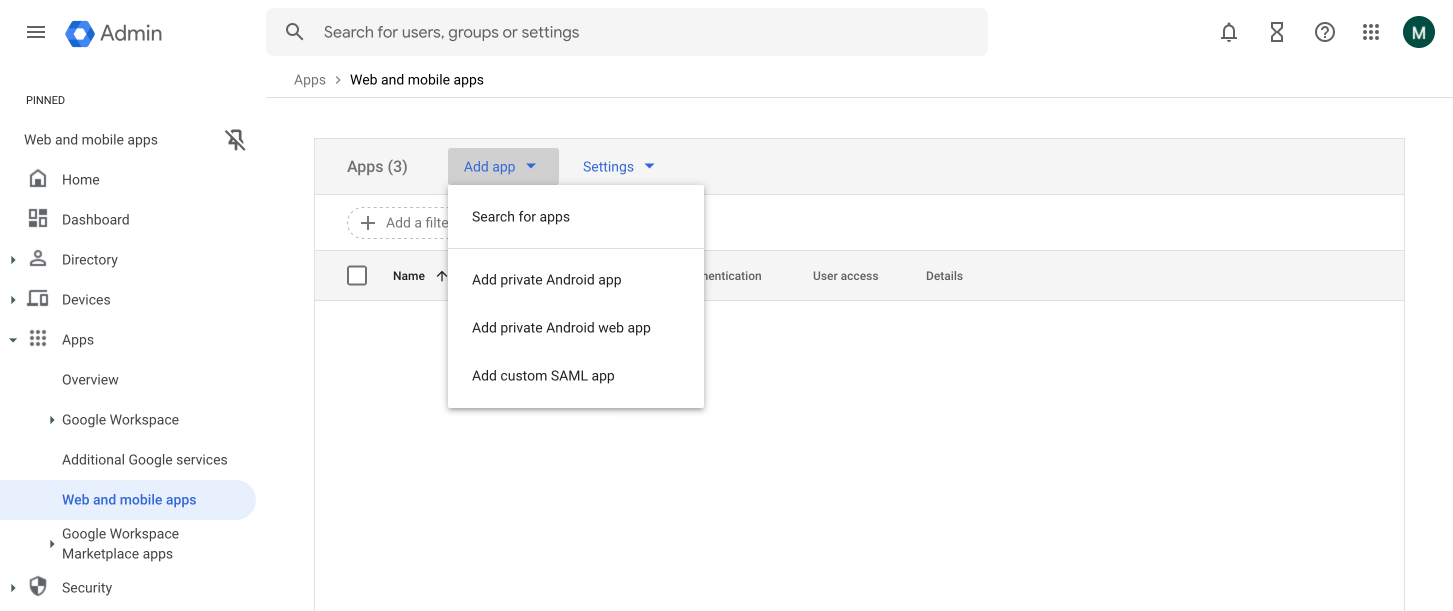
Log in to your Google Admin Console. In the menu on the left, click Apps (A) and then Web and mobile apps (B).
-
 1A1B
1A1B
-
-
Click Add app (A) and choose Add custom SAML app (B) from the drop-down menu to launch the setup wizard.
-
 2A2B
2A2B
-
-
Name the application (A) and click Continue (B).
-
 3A3B
3A3B
-
-
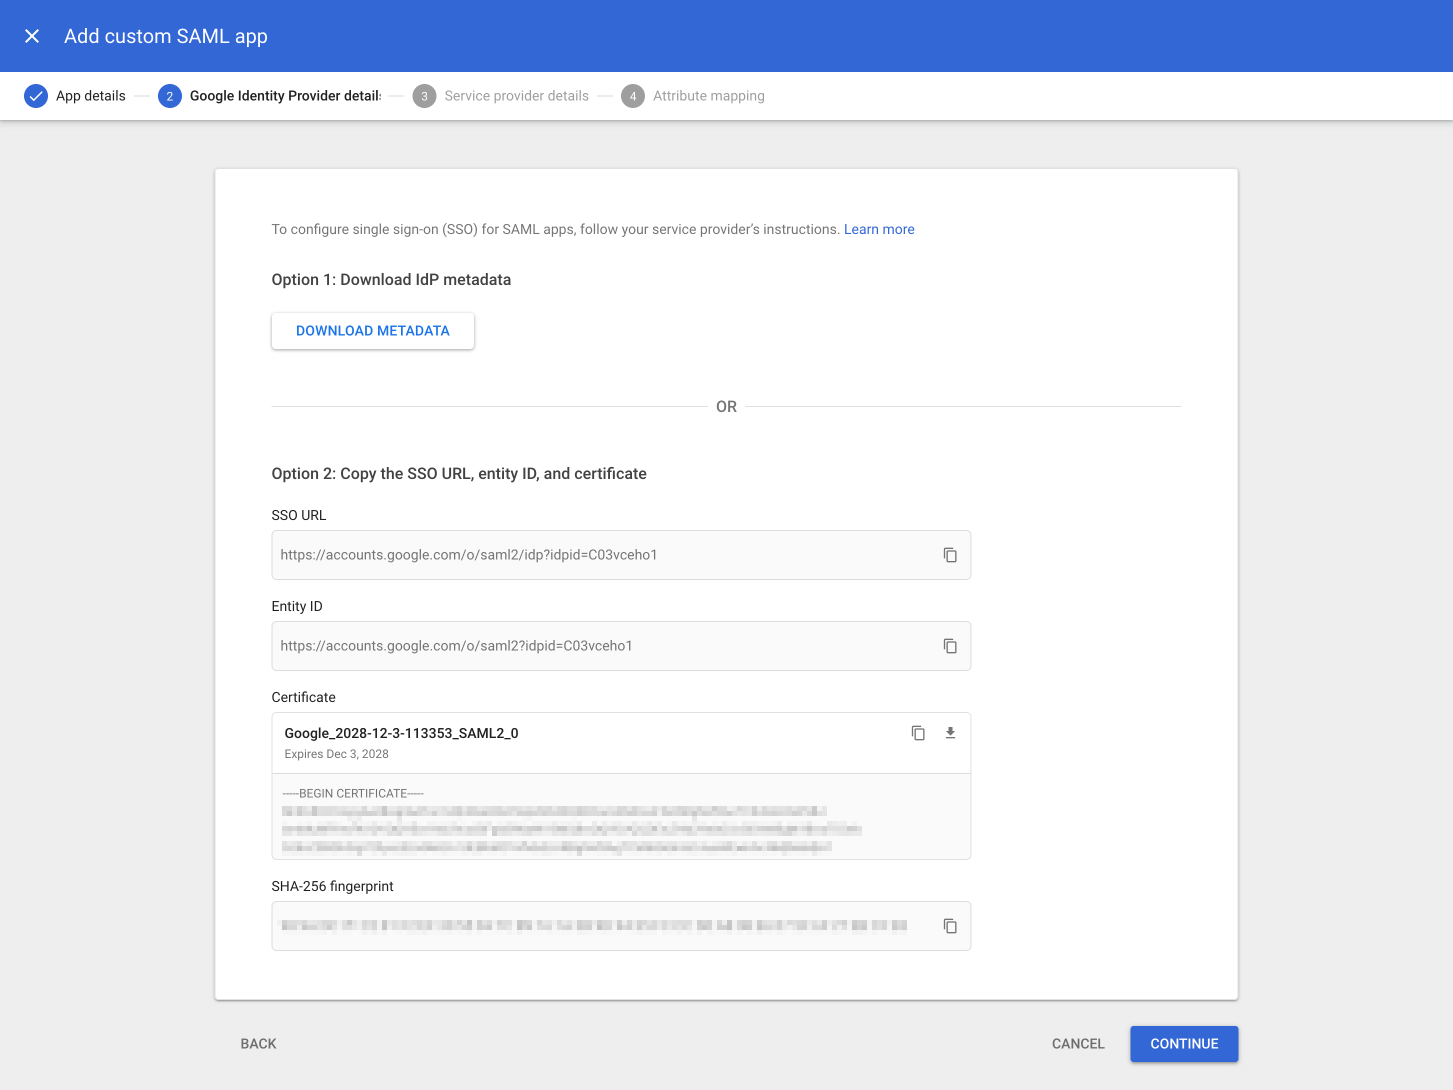
Click Download Metadata (A) to save the IdP metadata file (which contains the certificate), then click Continue (B).
-
 4A4B
4A4B
-
-
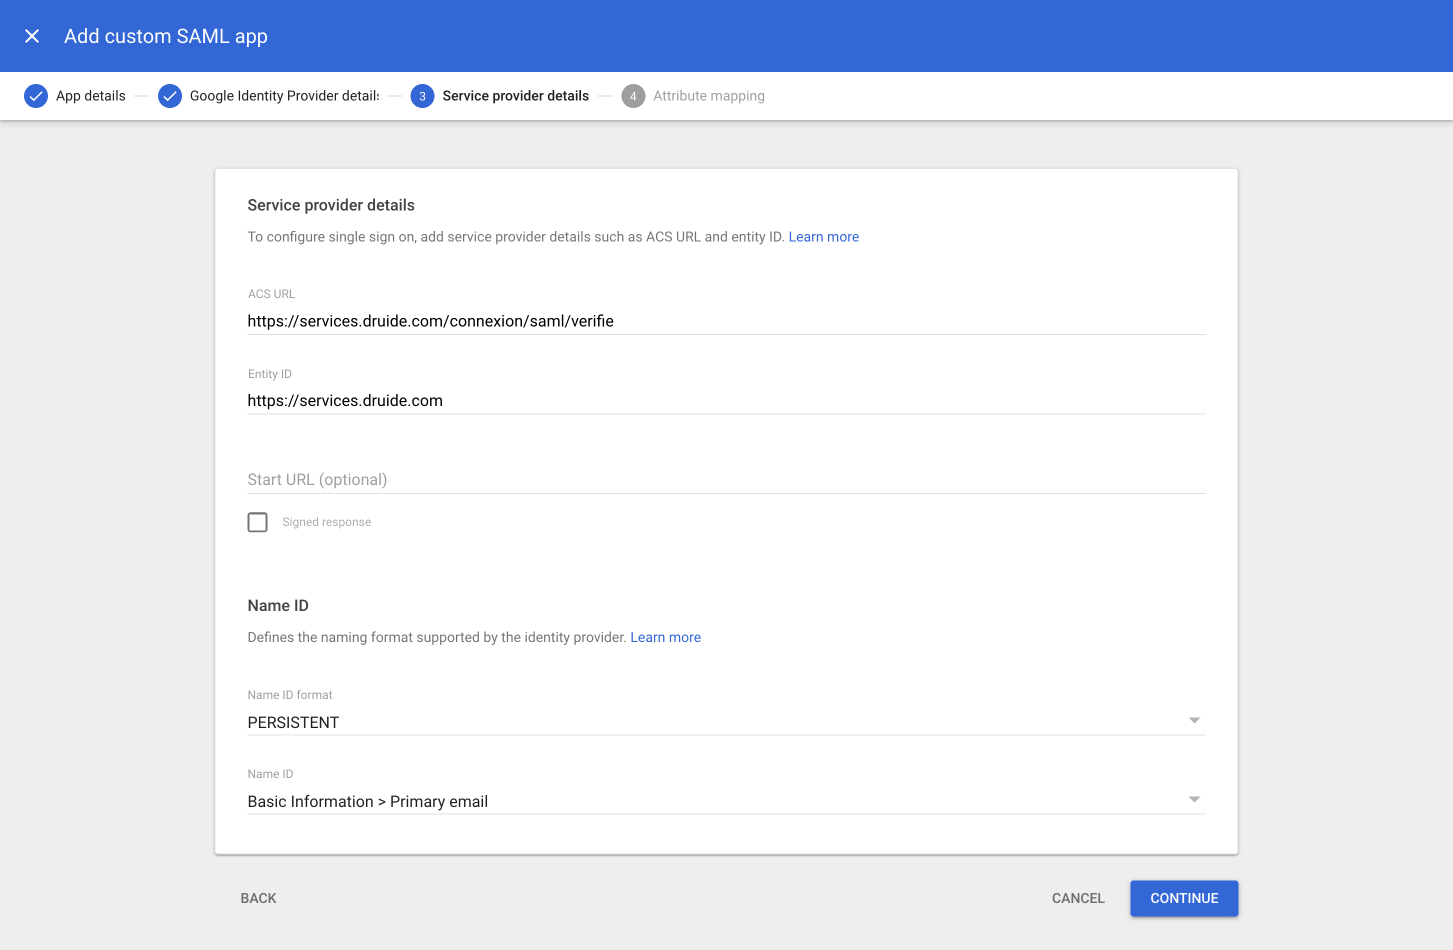
Refer back to step 7 in section A of this procedure and return to the window in which you were preparing the Client Portal. On the Service provider details screen in Google Cloud’s setup wizard:
A. Copy the Reply URL (Assertion Consumer Service URL) from the Client Portal and paste it under ACS URL.
B. Copy the Entity ID URL from the Client Portal and paste it under Entity ID.
-
Check off the Signed response box only if you want the entire SAML authentication response to be signed. If the box is left unchecked, only the assertion within the response will be signed.
Important — If you check off the Signed response box, authentication will fail unless you also configure the signature verification settings in the Client Portal to Require a signature for requests and responses.
-
Choose PERSISTENT from the drop-down menu under Name ID format.
-
Choose Basic information > Primary email from the drop-down menu under Name ID.
-
Click Continue.
-
 5A5B6789
-
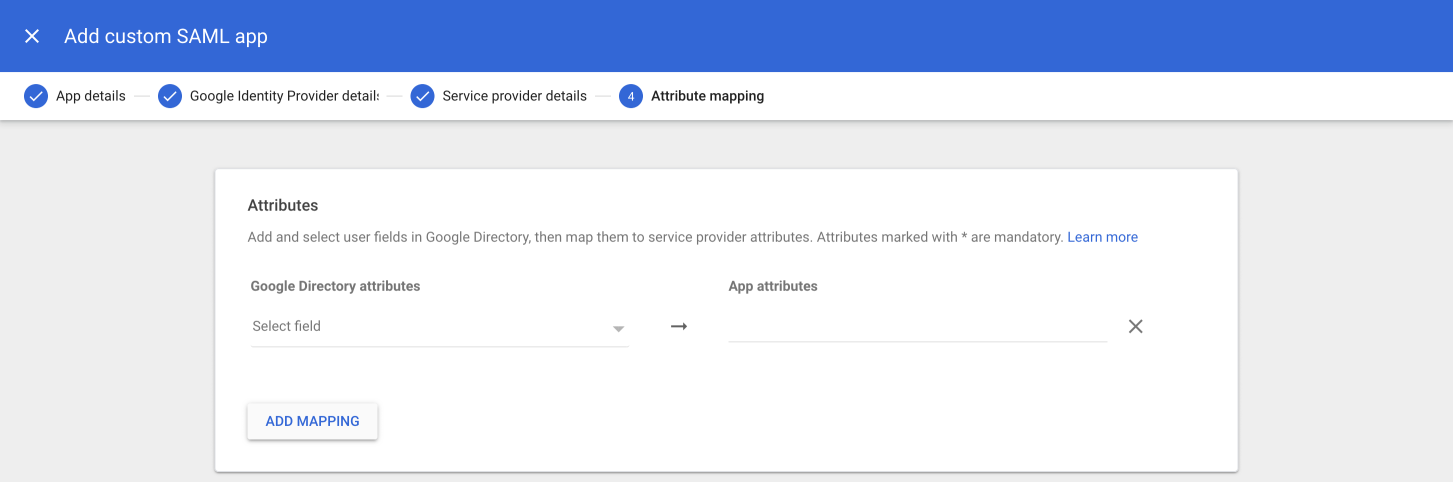
On the next screen, click Add Mapping (A), then click the Select field menu under Google Directory attributes (B) to define each of the user attributes in Google Directory.
-
 10A10B
-
-
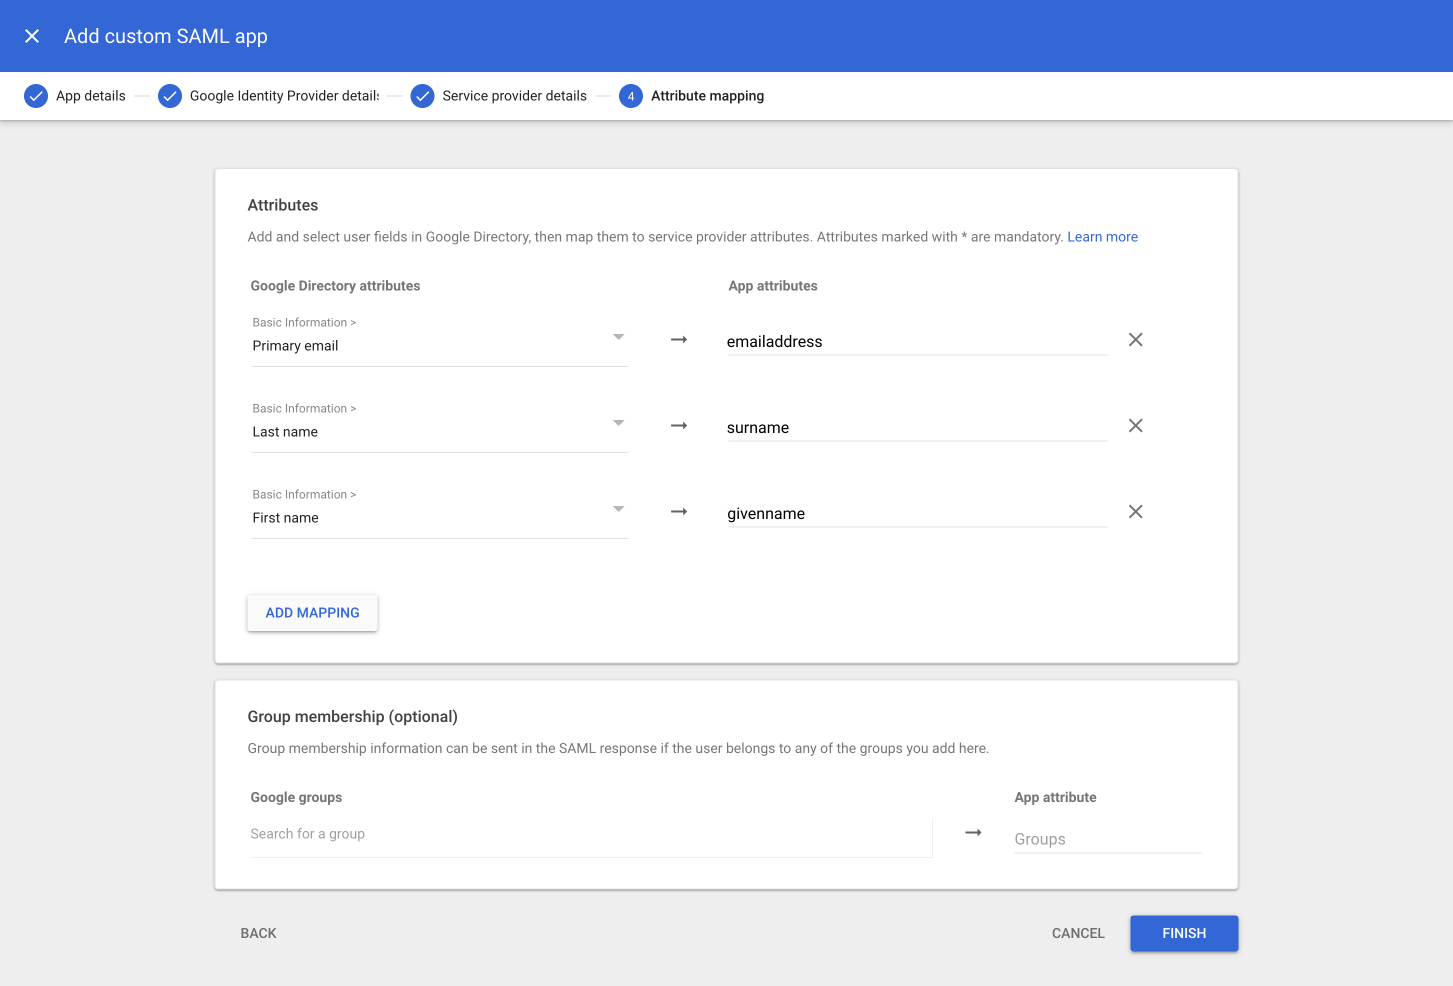
Select the appropriate fields and copy-paste the corresponding required user attributes under App attributes as follows:
A. Select Basic Information > Primary email and map it to emailaddress.
B. Select Basic Information > Last name and map it to surname.
C. Choose Basic Information > First name and map it to givenname.
-
Click Finish.
-
 11A11B11C12
-
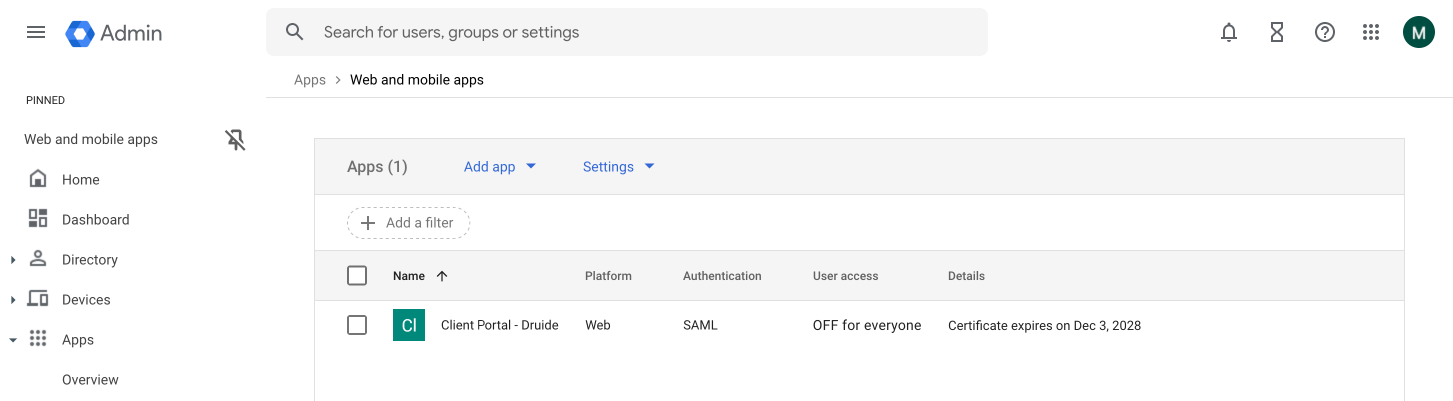
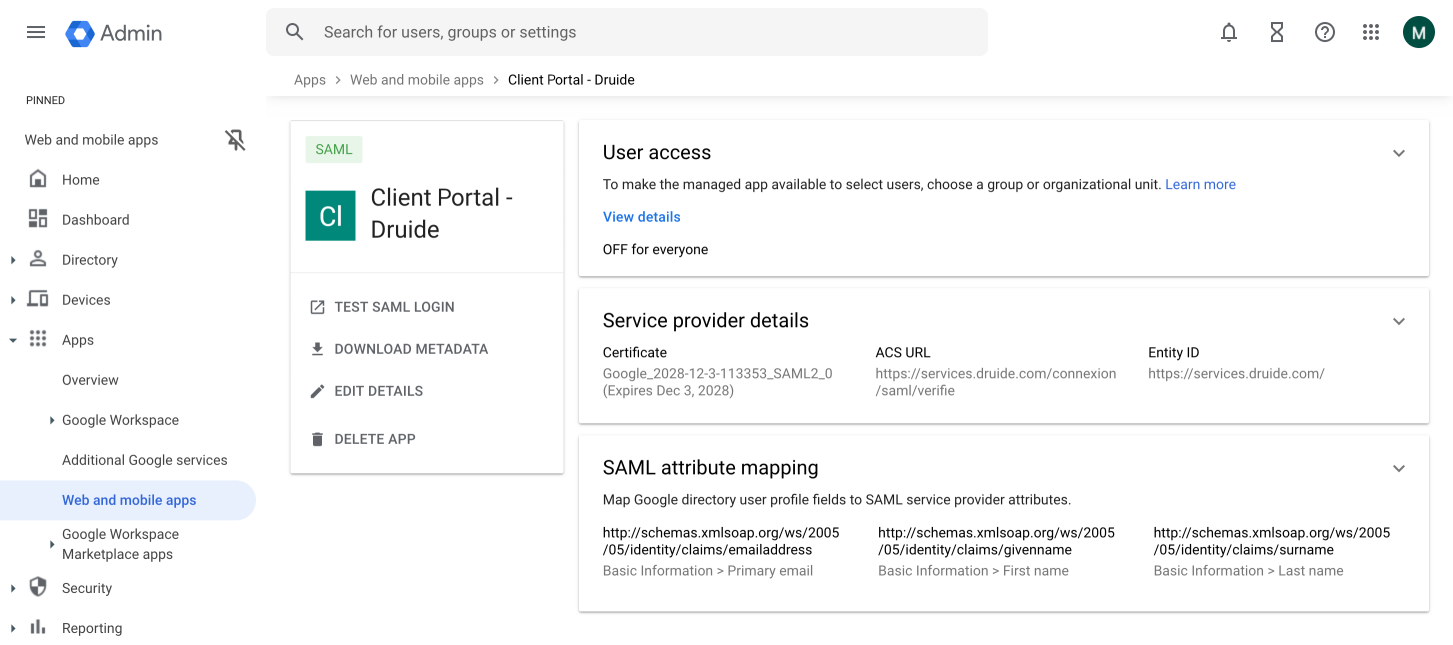
Select the app you just created from the list under Web and mobile apps.
-
 13
13
-
-
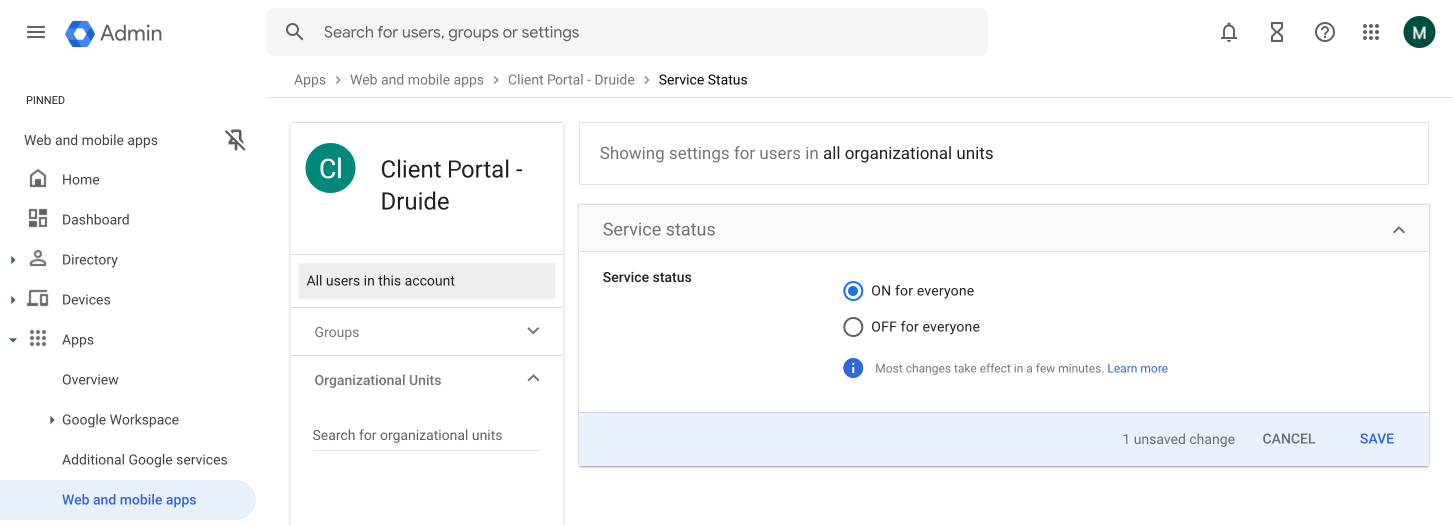
Click the User access tile.
-
 14
14
-
-
Click the radio button next to ON for everyone (A), then click Save (B).
-
 15A15B
-
C. Configuring SAML in the Client Portal
-
Return to the Client Portal window and the Step 2: SAML Configuration screen. Click Upload a file and select the IdP metadata file you just downloaded from Google Cloud.
-
 1
1
-
-
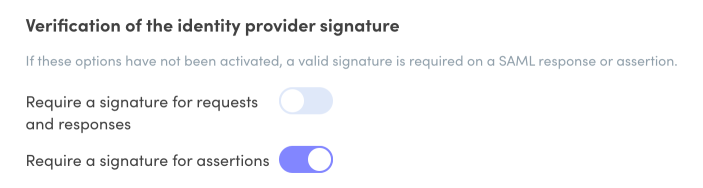
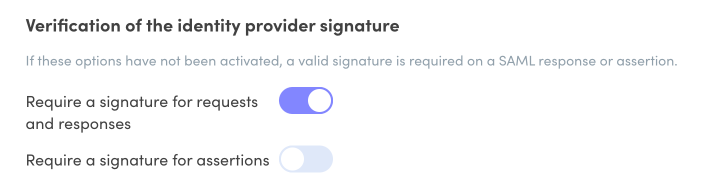
Adjust the settings under Verification of identity provider signature according to whether or not you checked off the Signed response box in step 6 of section B.
Warning — The signature verification settings here must match those defined in Google Cloud or SAML authentication will fail.
- Signed response unchecked — Make sure the switches in the Client Portal are set to the default configuration:
-
 OnOff
OnOff
-
- Signed response checked off — Make sure you toggle the switches in the Client Portal to match the configuration shown below:
-
 OnOff
OnOff
-
- Signed response unchecked — Make sure the switches in the Client Portal are set to the default configuration:
-
Optionally, assign a Resource person to receive technical details in case of login or configuration issues (recommended).
-
Click Next.
-
 34
34
- If your organization has one or more active subscriptions to Antidote Web, choose how you would like to manage Antidote Web access. You have three options:
Manual managementChoose this option to activate SAML authentication without automatically granting access to Antidote Web. You can grant users access to Antidote Web from the Users tab in the Client Portal.
Impose access to Antidote Web upon loginChoose this option to automatically grant access to Antidote Web to all users who log in with SAML authentication. If your organization has multiple subscriptions, specify which one should be used. If a user already has access to another subscription, their subscription will be changed the next time they log in.
Grant Antidote Web access to users who do not have access upon logging inChoose this option to grant Antidote Web access to users who do not already have it. For example, this option is useful if your organization already has a subscription, and you want new users to have access to a different subscription than those who already hold one.
Note — If you intend to set up SCIM automated provisioning later, please note that the Antidote Web access management settings defined by that configuration will override the options described here. Learn more >
-
Click Next once you have made your choice.
-
 56
56
-
-
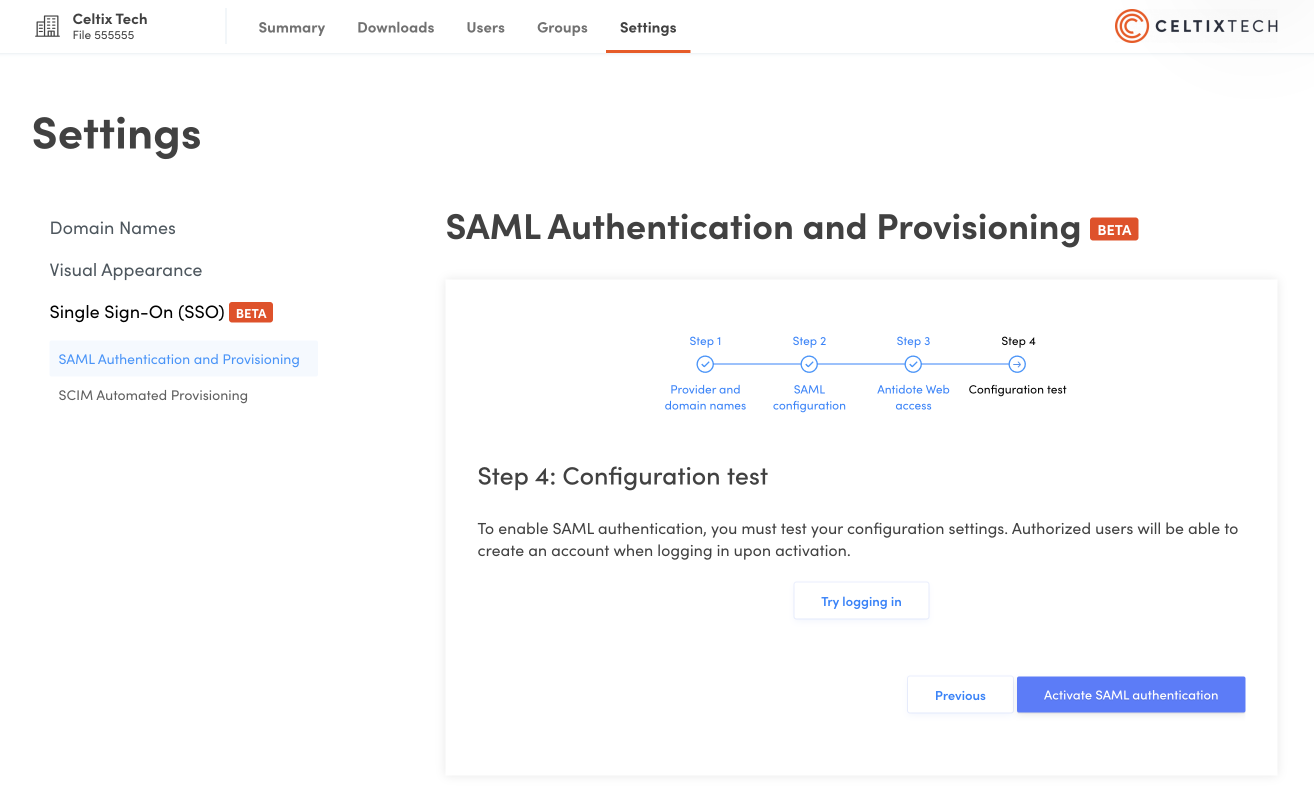
On the next screen, click Try logging in. The result of the test will appear in a new window, confirming a successful connection or providing an error report if the connection fails.
-
Finally, click Activate SAML authentication.
-
 78
78