First Synchronization Procedure BETA
Preliminary steps in Azure
Synchronization with the Client Portal involves two data types in Azure: groups and roles. Preliminary steps are used to prepare the data. Once synchronization has been activated, you can modify synchronized accounts in groups and with roles in Azure.
Creating a group or groups with users who you want to access Antidote Web
When configuring synchronization, you will grant users access to Antidote Web through groups. You don’t need to create new groups if existing groups already contain these users. However, groups within groups (or subgroups) are not covered by synchronization. Ensure that user accounts are at the group’s first level.
Here’s how to create a group in Azure.
- Go to the Groups section. Type this word in the research engine for quicker access.
-
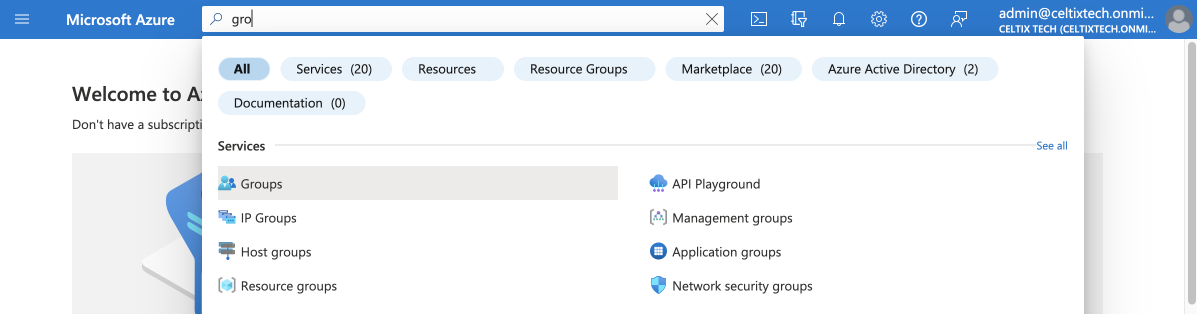 1
1
- Click New group.
-
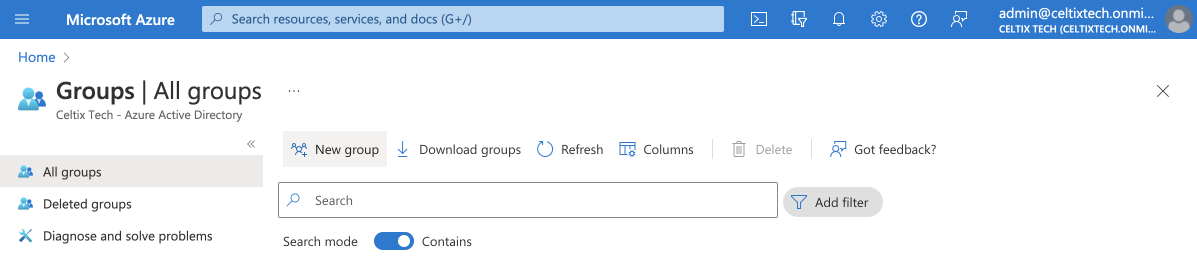 2
2
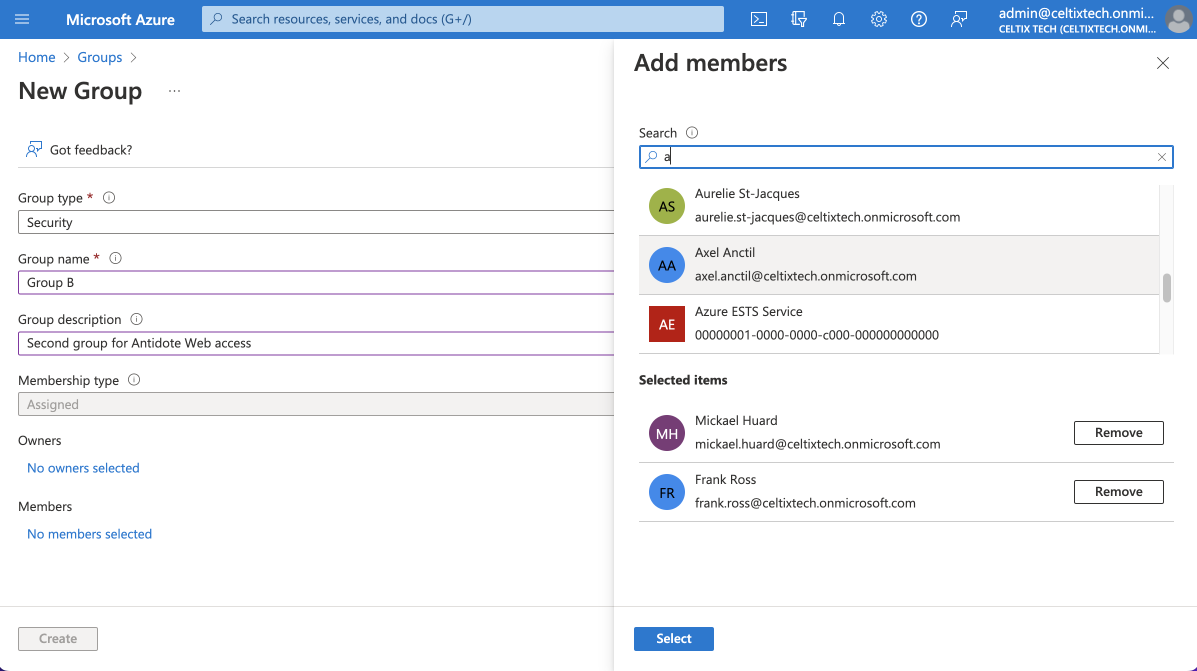
- Fill out the fields:
- The groupe type does not matter.
- Enter a name and description for the group.
- Click No members selected to add members.
- Choose the users whom you wish to grant access to Antidote Web.
- Click Select to add users to the group.
-
 3456
3456
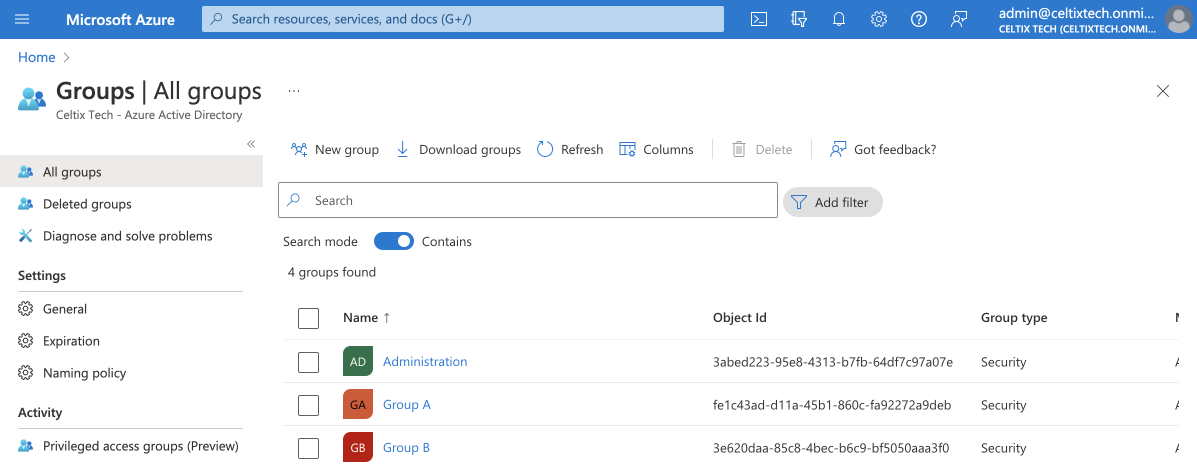
- Return to the group list and refresh the page to display the new group you just created.
Assigning roles to technicians and administrators
You need to have a general administrator account to authorize synchronization. Ensure the account you are using is assigned this role to carry out the synchronization procedure.
When configuring synchronization, you can create a connection between roles in Azure and administrator and technician roles in the Client Portal. You may, for example, choose these Azure roles:
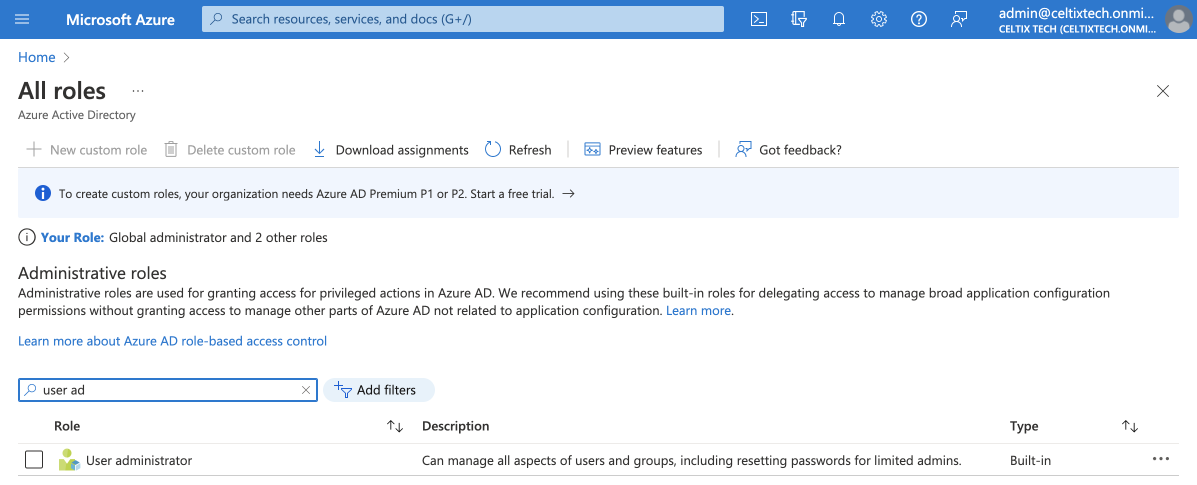
- The User Administrator can manage all aspects of users and groups, including resetting passwords for limited admins.
- The Groups Administrator can create and manage groups and groups settings like naming and expiration policies.
Notes — Because access is managed within groups, you need not assign specific roles to grant access to Antidote Web. — Synchronizing roles is optional; if you wish, you may use manual role management in the Client Portal.
Here’s how to assign roles in Azure.
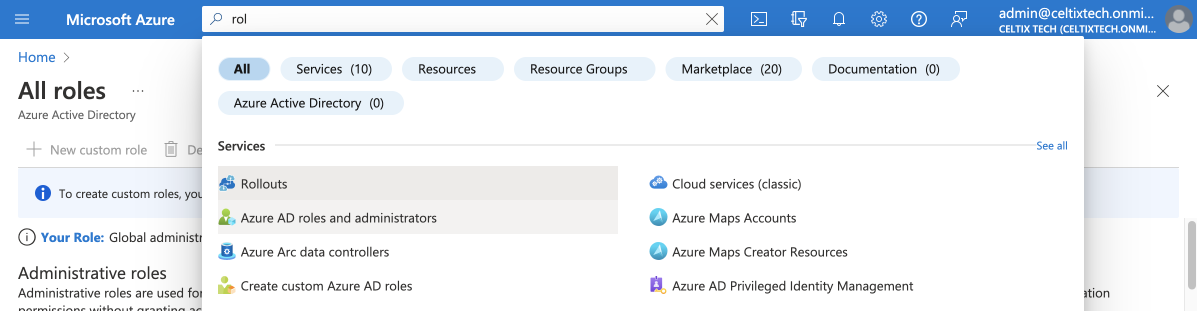
- Go to Azure AD roles and administrators. Type the first letters in the search engine for quicker access.
-
 1
1
- Use the search engine to select a role (for example, User administrator). Click on that role.
-
 2
2
-
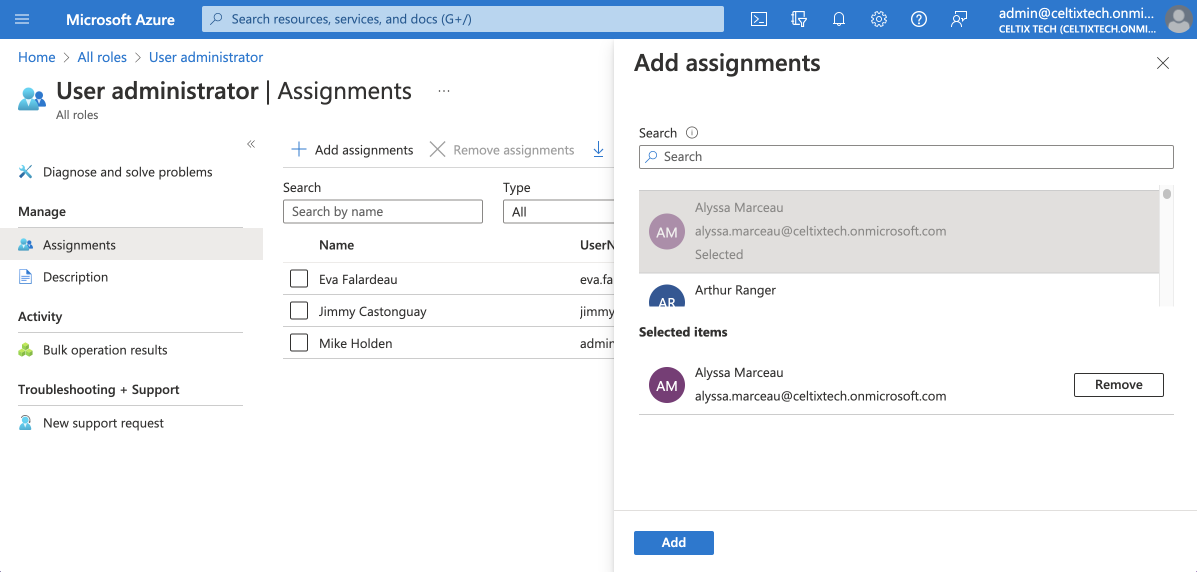
Click Add assignments.
-
Select the accounts for which you would like to assign this role.
-
Click Add to assign roles.
-
 345
345
Accounts assigned with this role will now be displayed in the role list.
Now that preparation in Azure AD has been completed, you may begin configuring synchronization in the Client Portal.
Configuring synchronization in the Client Portal BETA
Five steps are involved in configuring synchronization. Synchronization begins only at the final step. The only step that cannot be reversed is the first; it must be completed with the help of an Azure AD account that has been assigned the role of general administrator.
Start by signing in your Client Portal.
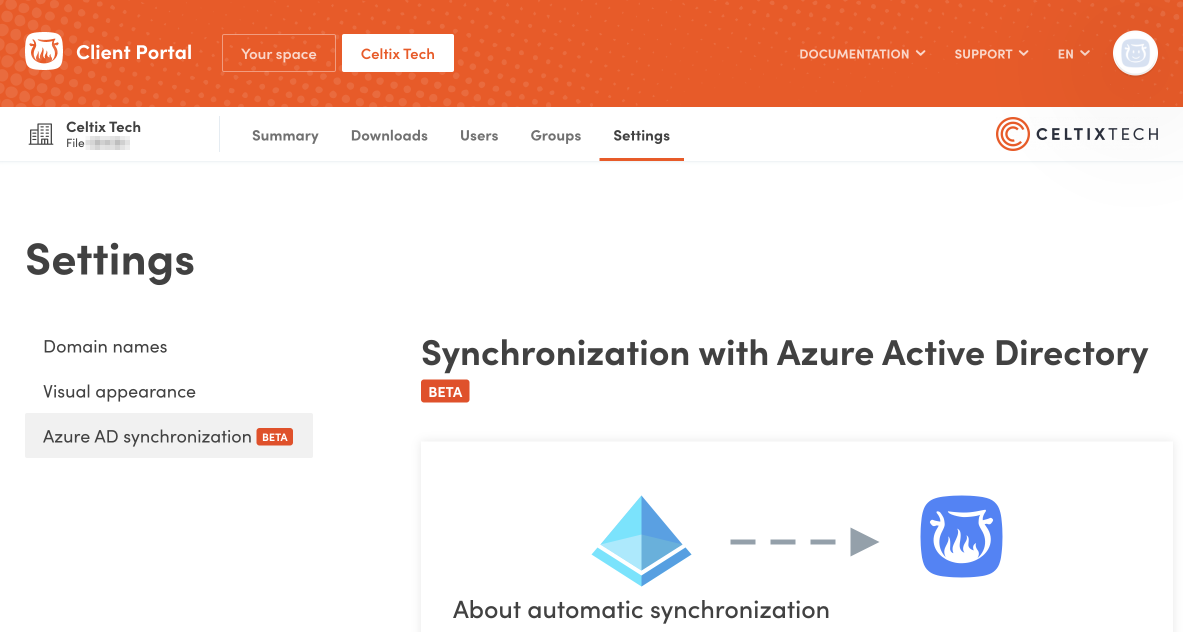
Go to your organization’s section (1), select the Settings tab (2), and select Azure AD synchronization (3).
-
 123
123
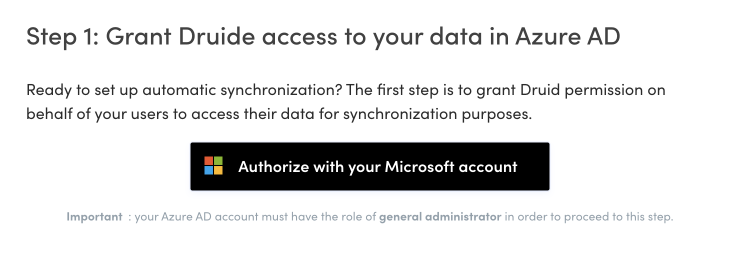
Step 1: Grant Druide access to your data in Azure AD
Click the Authorize with your Microsoft account button at the bottom of the page.
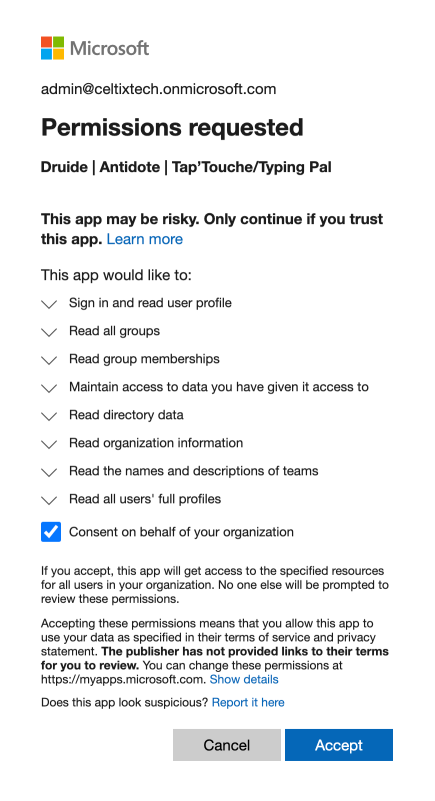
On the next screen, you are asked to authorize Druide to use Azure AD data for synchronization purposes on behalf of users within your organization. Check the box and click Accept.
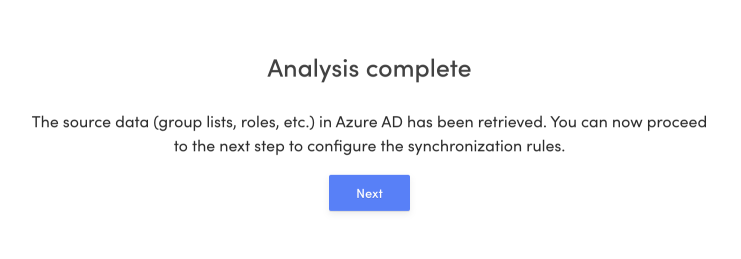
Database recovery in Azure AD, such as group lists and roles, will be automatically launched. When analysis has been completed, click Next.
Step 2: Select the user groups to synchronize
You may either synchronize all user groups in Azure AD or synchronize only some groups.
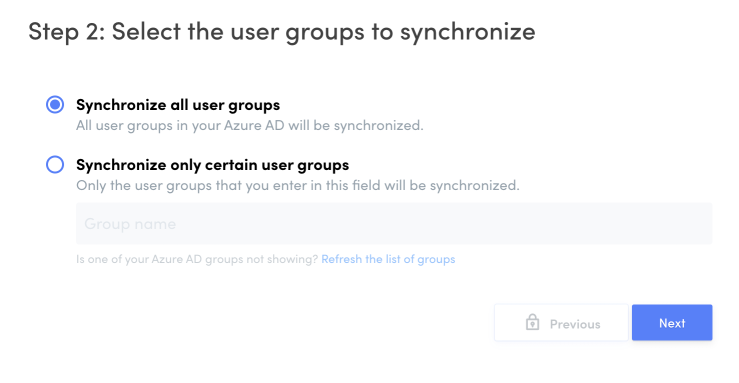
Click the search box or type a few letters of the group name to indicate which groups are to be synchronized. The list of corresponding groups will be displayed. Make your selection.

Click the X next to the name of a group to remove a specific group.
Should a recently created group not appear in the Azure list, click Refresh the list of groups. Data will be updated.
Once you have completed your selection, click Next.
Step 3: Assign administrative roles
You can link roles between Azure AD and the Client Portal.
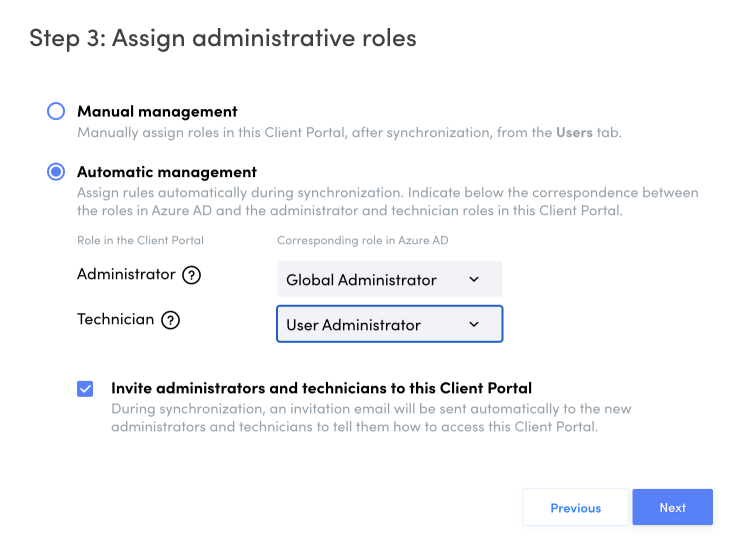
Manual management
Choose manual management if you do not want to synchronize roles. Once initial synchronization has been completed, you may assign roles using the Users tab in the Client Portal. See the account management section in this guide for more information.
Automatic management
Client Portal administrator and technician roles are assigned corresponding roles in Azure during synchronization.
Choose both corresponding roles in the drop-down menu. See the user roles section in this guide for more information about privileges granted to both roles.
Check the box to automatically email invitations during synchronization. New users with a technician or administrator role will receive instructions for accessing the Client Portal. Synchronization takes place every day, not every minute. There may be a slight delay before invitations are sent.
Leave the box unchecked if you choose to email invitations manually. See the article on sending invitations in this guide for information about how to proceed with this step.
Click Next to move to the fourth step.
Step 4: Grant access to Antidote Web
You can grant access to Antidote Web users during synchronization in three ways.
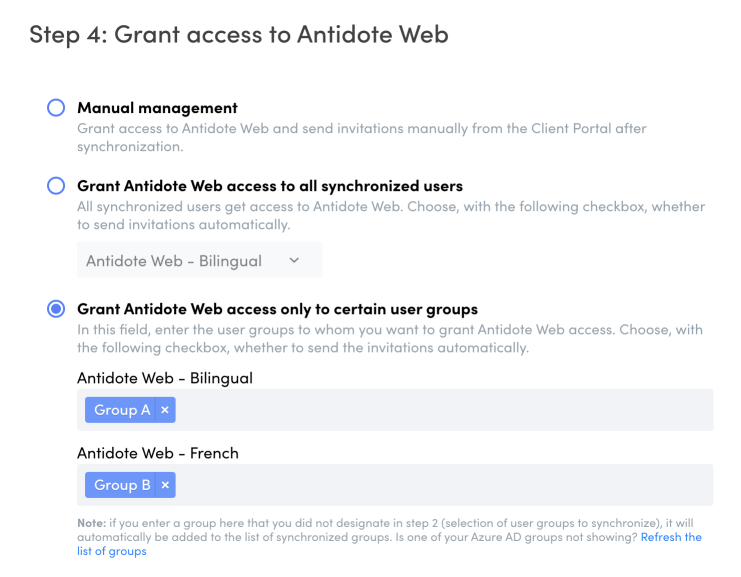
Manual management
Access to Antidote Web is not granted during synchronization. You can achieve this manually at another time by clicking on the Users tab in the Client Portal. See the account management section for information on how to proceed.
Grant Antidote Web access to all synchronized users
All synchronized users will gain access to Antidote Web during synchronization. If your organization has more than one subscription (for example, Antidote Web — English and Antidote Web — Bilingual), select the subscription you would like to use for granting access in the drop-down menu.
Grant Antidote Web access to only certain user groups
Antidote Web access is assigned in relation to the synchronized groups you have selected. This option is especially useful if you have more than one subscription and would like to grant, for instance, access to Antidote Web — Bilingual to one group and access to Antidote Web — English to another.
Click in the field and type a few letters of the group name to enrol groups. The list of corresponding groups will be displayed. Make your selection. At this stage, you may add a group even if you had not chosen to synchronize it at the second step. The group will automatically be added to the synchronized group list.
Should a recently created group not appear in the Azure list, click Refresh the list of groups. Data will once again be recovered.
Click the X next to the name of a group to remove a specific group.
Invite users to connect to Antidote Web
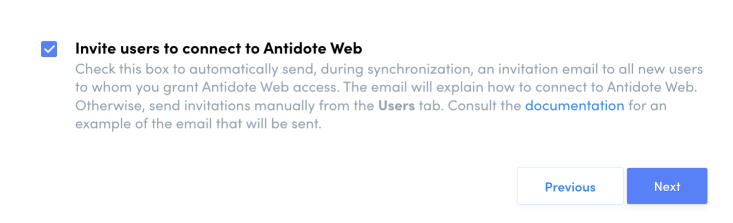
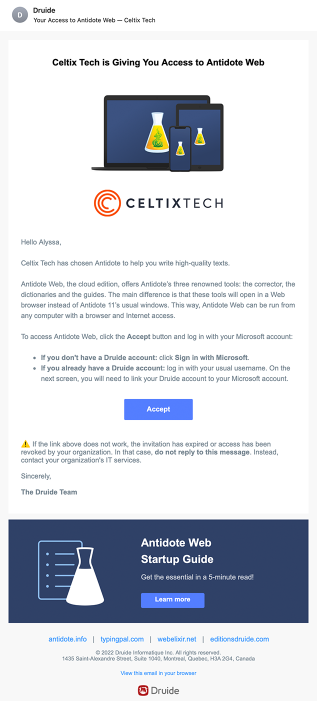
Check this box to automatically email an invitation to new users who have been granted Antidote Web access during synchronization. The email will explain how to log in; see below for an example.
When you choose this option, a mass number of emails may be sent during the first synchronization if you created a number of new users. Subsequently, only additions in Azure to the synchronized groups with Antidote Web access will trigger invitation emails during synchronization.
If you chose to manually select users, an email will not be sent during the initial or subsequent synchronizations.
Leave the box unchecked if you choose to send invitations manually. See the article on sending invitations in this guide to find out how to proceed.
Step 5: Start the synchronization
Now that you have configured the synchronization settings, you may now click Activate the synchronization.
If you checked boxes to automatically send email invitations during the second step, they will be sent to specific users during the initial synchronization.

The first synchronization may take several minutes depending on data size and our servers load at the time. The synchronization operation will not be affected should you need to leave the page. However, you must return to the page later to verify results.
Once synchronization has been completed, a screen will indicate that the operation was successful or will request that you consult an error report. Click OK.
There you have it! Synchronization is now activated and will take place every day.
Why are some users missing in the Client Portal even though groups have been synchronized? Perhaps these users are in an Azure AD subgroup; groups within groups are not included in the synchronization process. Ensure that no subgroups are in the groups you are synchronizing, and all user accounts are at the first level.
The Synchronization with Azure Active Directory page in the Settings tab of your Organization Client Portal now contains details of the configuration you just completed.