You can grant access to Antidote when creating accounts in the Client Portal. This step occurs at different stages depending on how you choose to create accounts.
If you create accounts manually, you can select access when filling out the form.
If you choose to create accounts by invitation, you can select access when filling out the form.
If you choose to import a file to create accounts, you can grant access in the designated column.
Similarly, you can grant users access to Antidote when using automated provisioning to create accounts.
You can determine how to grant access when you configure SAML in the Client Portal, whether with Microsoft’s Entra ID or with Google Cloud.
If you prefer, you can configure these settings in the Organization Client Portal to manage access to Antidote from Entra ID, when setting up SCIM.
After Creating Accounts
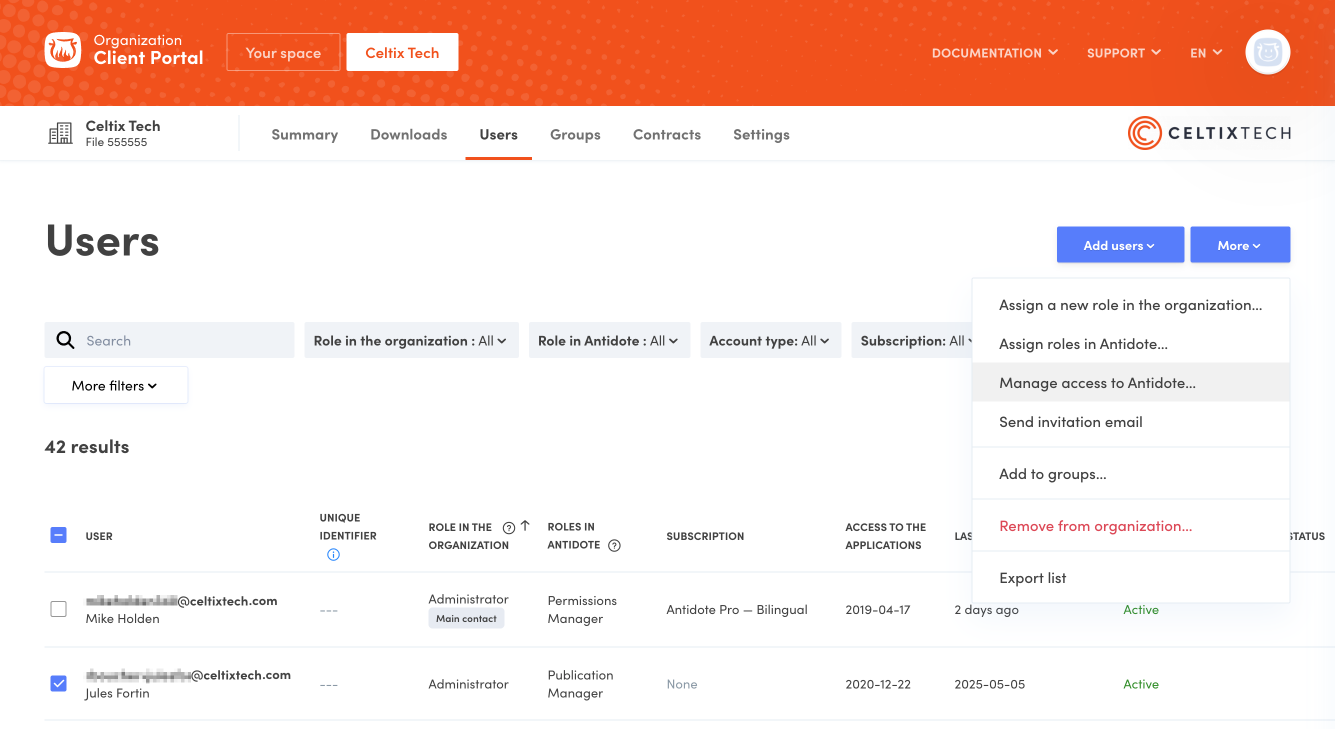
However, if you prefer granting users access to Antidote after creating their account, you can do so in the Client Portal.
Go to the Users tab.
Check the relevant boxes to select users.
Click More to access the drop-down menu.
Select Manage access to Antidote.
1
2
3
4
Choose the desired subscription. For Antidote Web, you simply need to select that option. If you have an Antidote Pro subscription, you have to specify if you want to give users access to Antidote 12, Antidote Web or both.
Click Assign.
5
6
To a Single User
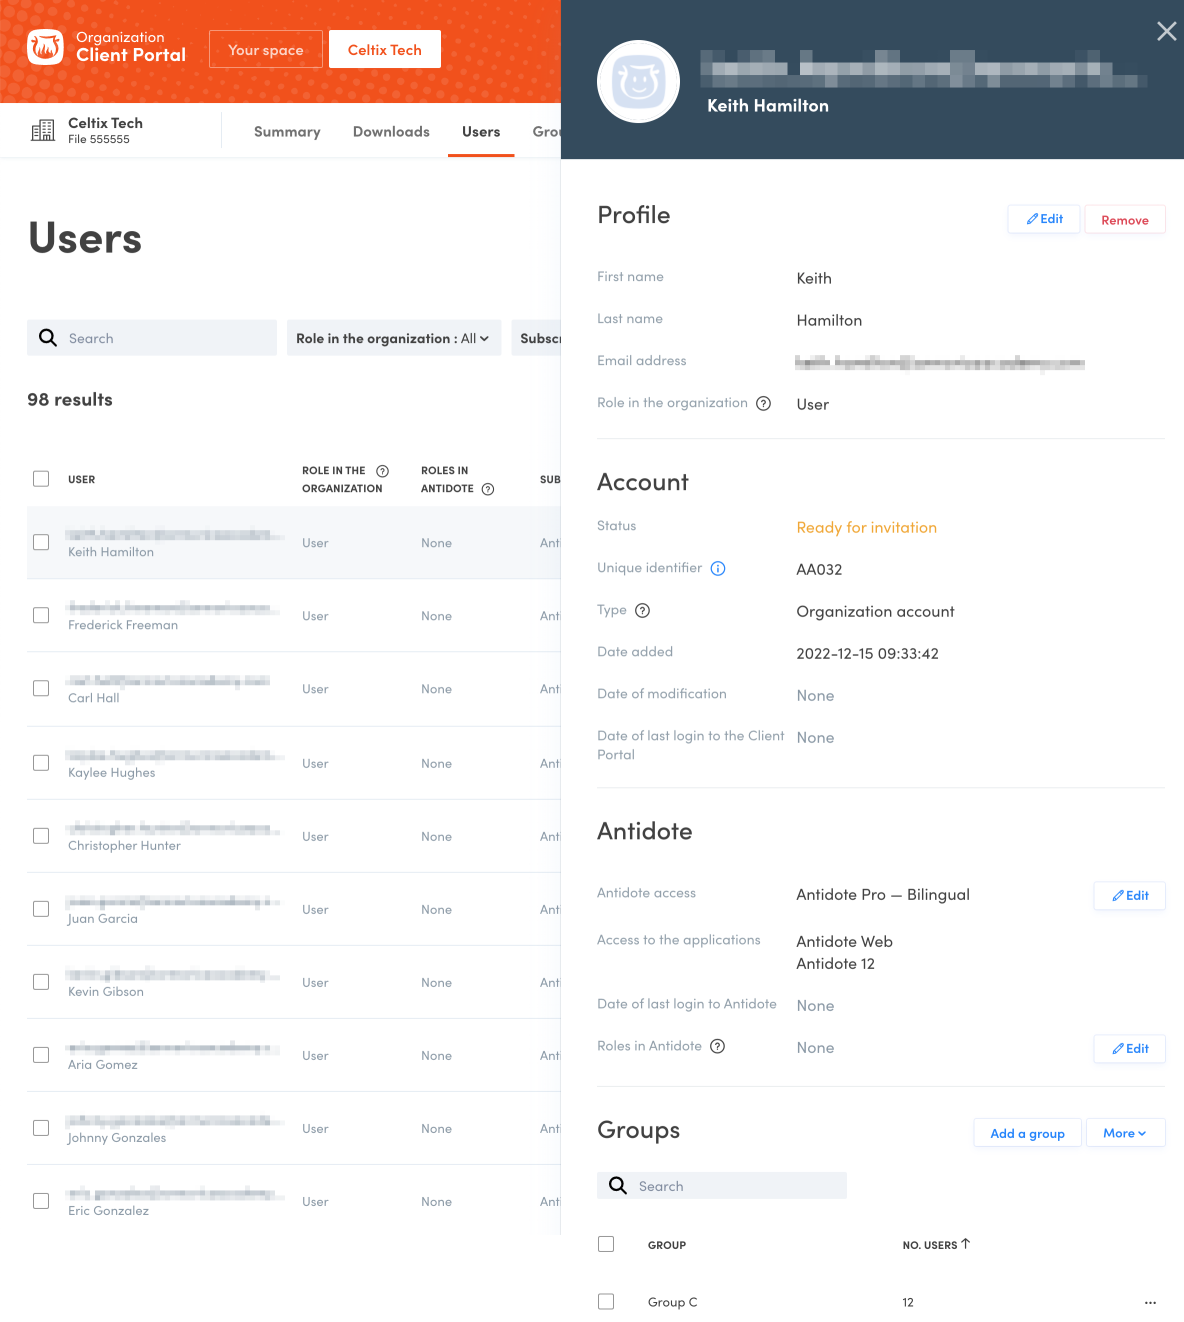
You can also give access to Antidote for one specific user in the details panel or quick menu (⋯).
Details Panel
Click a row in the list of users to open the details panel.
Scroll down to the Antidote section and click the Edit button next to Antidote access.
1
2
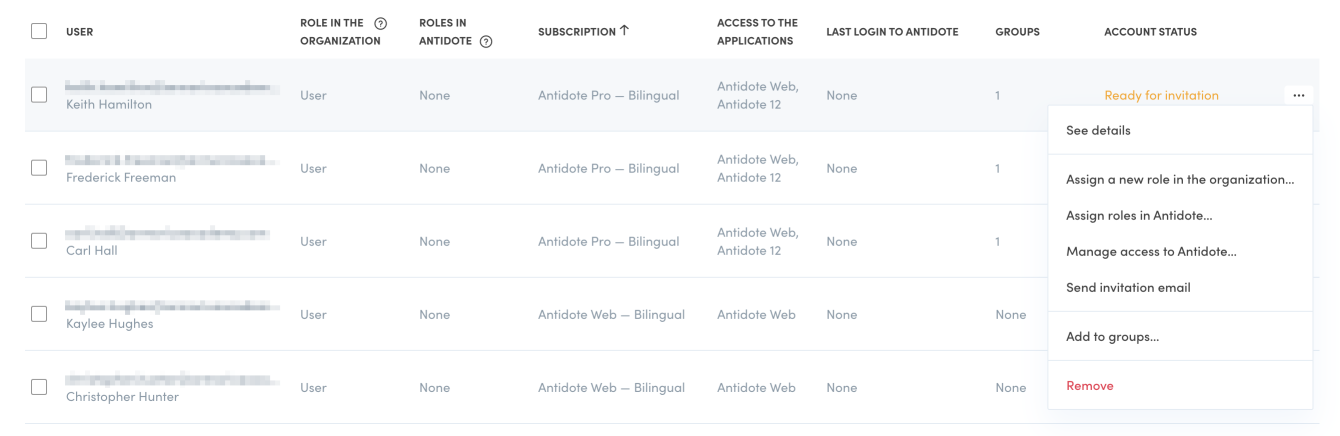
Quick Menu
Click the ellipsis (⋯) at the end of a user’s row to open the quick menu.
Click Manage access to Antidote.
1
2
Note — Antidote access for synchronized accounts may be changed only if manual management has been activated in the automated provisioning settings.
 1234
1234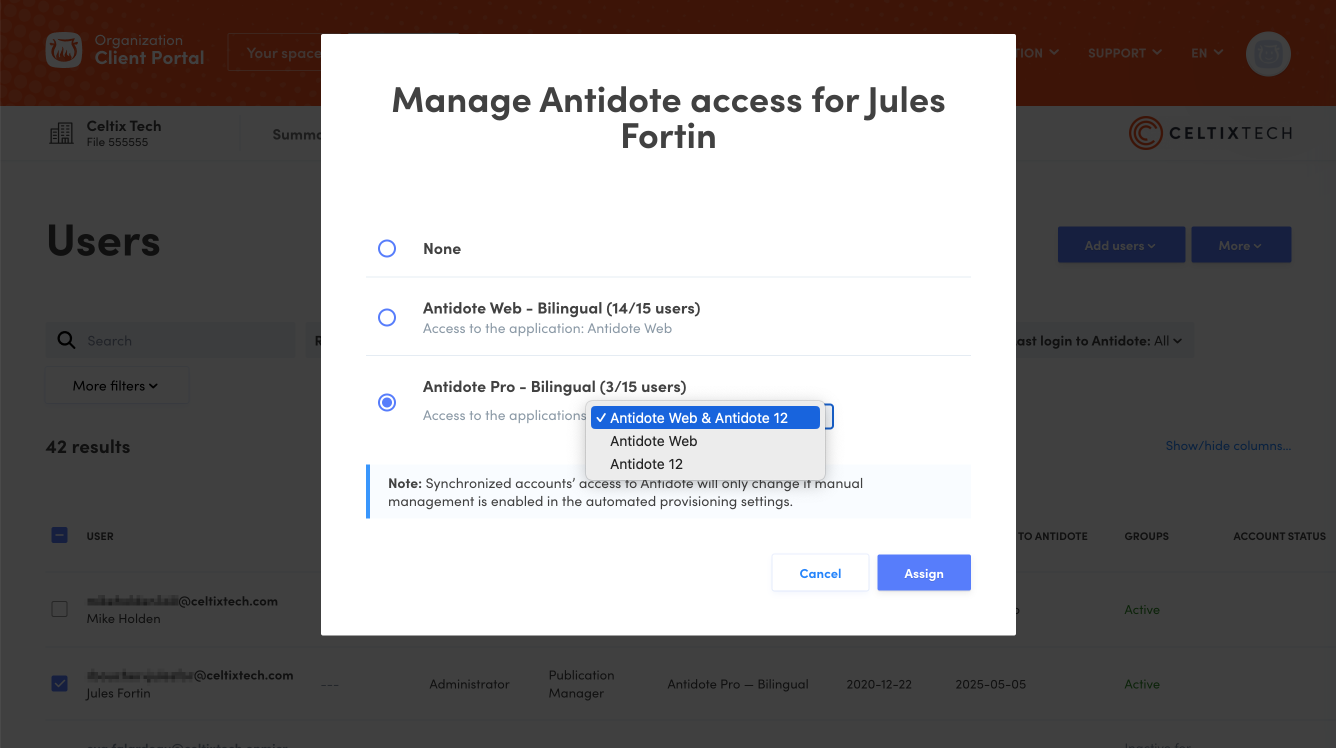 56
56