Configuring SCIM With Entra ID
If your organization uses Microsoft Entra ID, follow these detailed instructions to set up automated provisioning following the SCIM standard. The procedure is shown for this provider as an example; it is similar for other providers.
Requirements
Before you begin, make sure: ✅ you have configured Authentication with SAML; ✅ your organization holds an active Antidote subscription; ✅ your account is assigned the Administrator or Technician role.
The basic procedure consists of three key steps:
B. Linking the Client Portal and Entra ID
C. Configuring Users in Entra ID
The following settings are optional and can be configured according to your preferences:
E. Managing Roles in the Organization
A. Preparing Entra ID
-
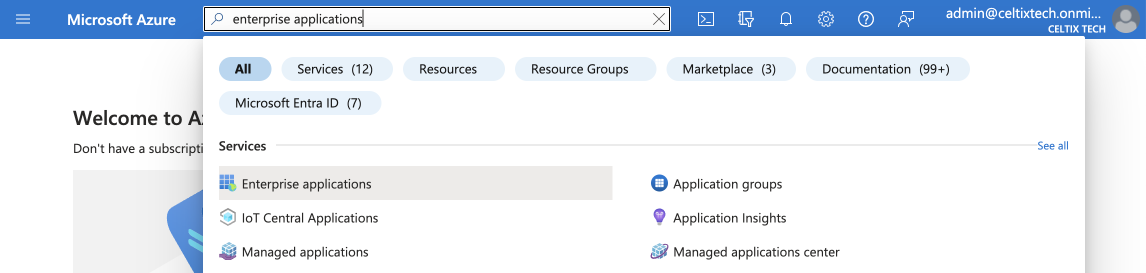
In the Azure portal, go to the Enterprise applications service. You can access it quickly by typing the first few characters in the search field.
-
 1
1
-
-
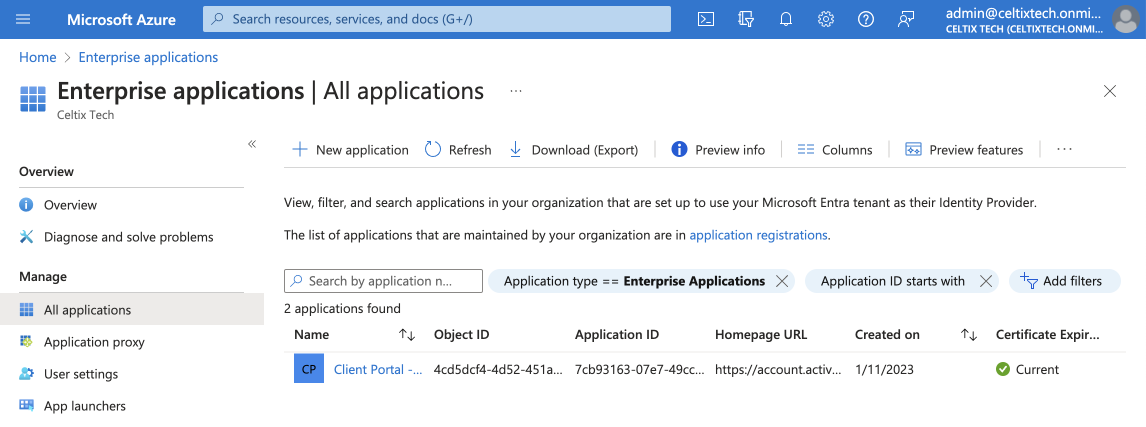
Select the application you created for your Organization Client Portal when you configured the SAML settings.
-
 2
2
-
-
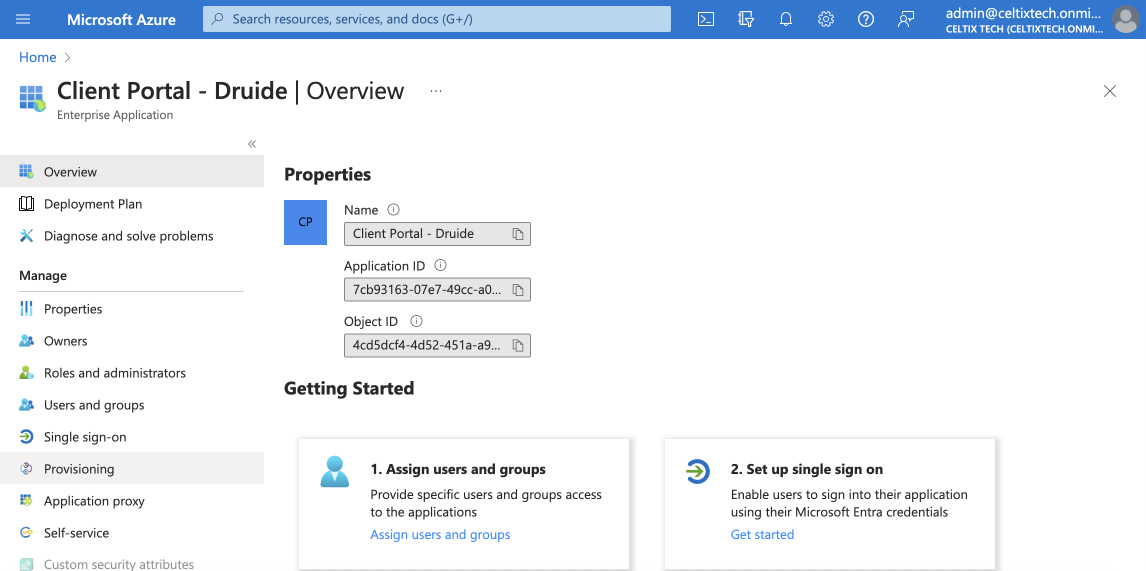
Click Provisioning in the sidebar.
-
 3
3
-
-
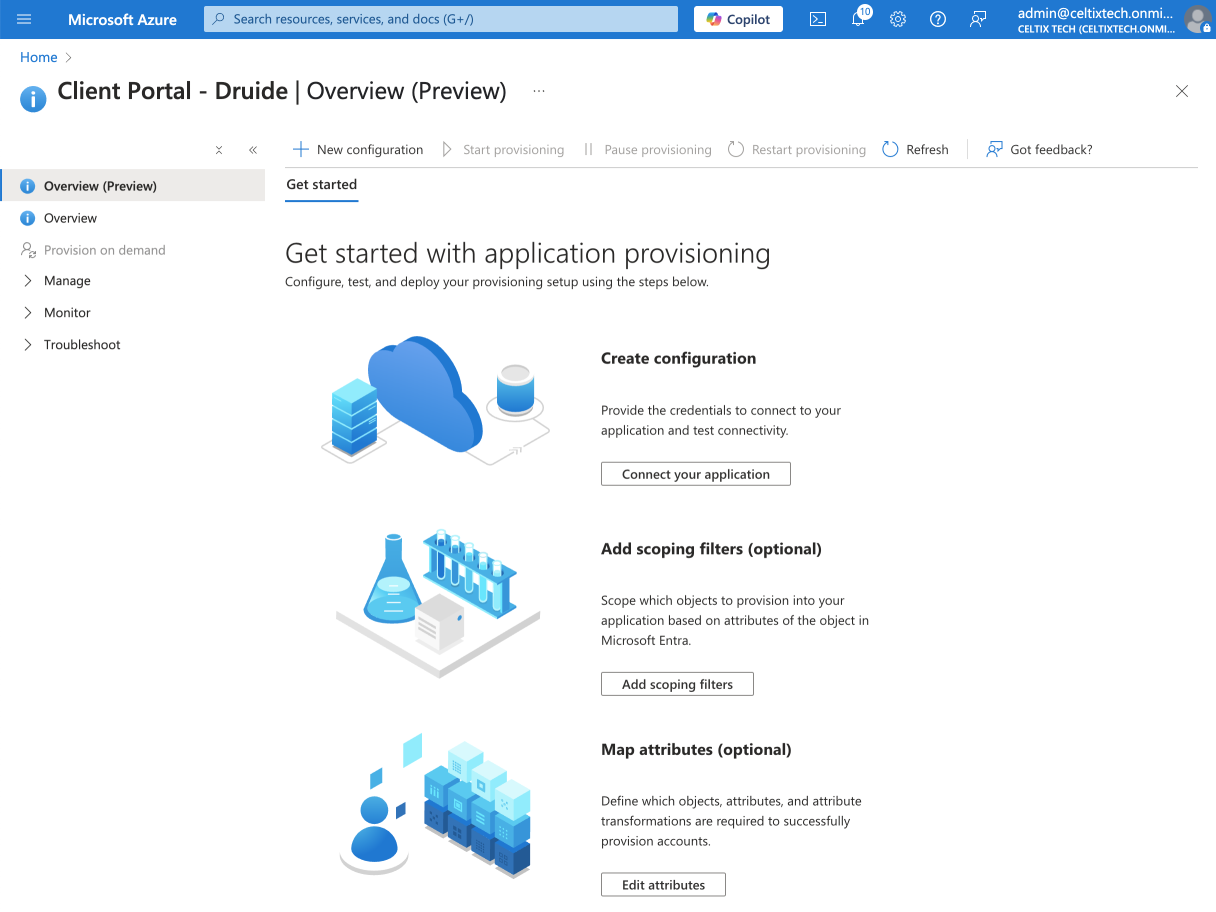
Click the Connect your application button.
-
 4
4
-
-
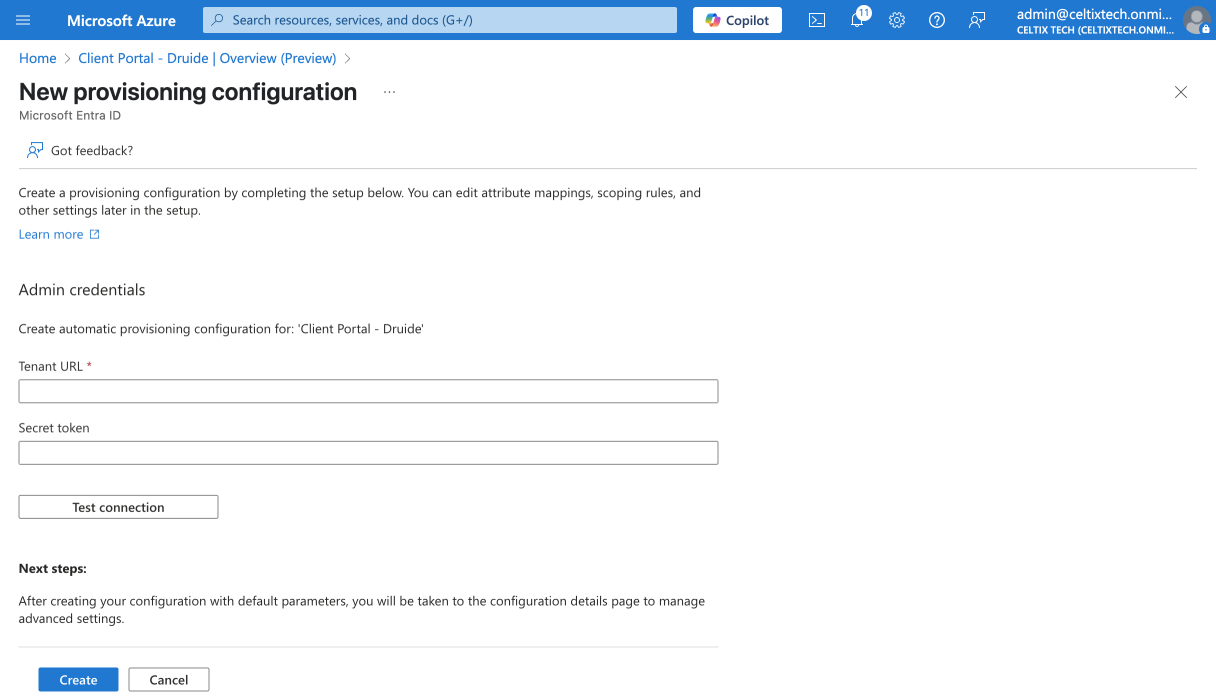
Keep the next window open. You will need to come back to it later to enter information retrieved from the Client Portal. Open a new window to follow the instructions in the next section.
B. Linking the Client Portal and Entra ID
-
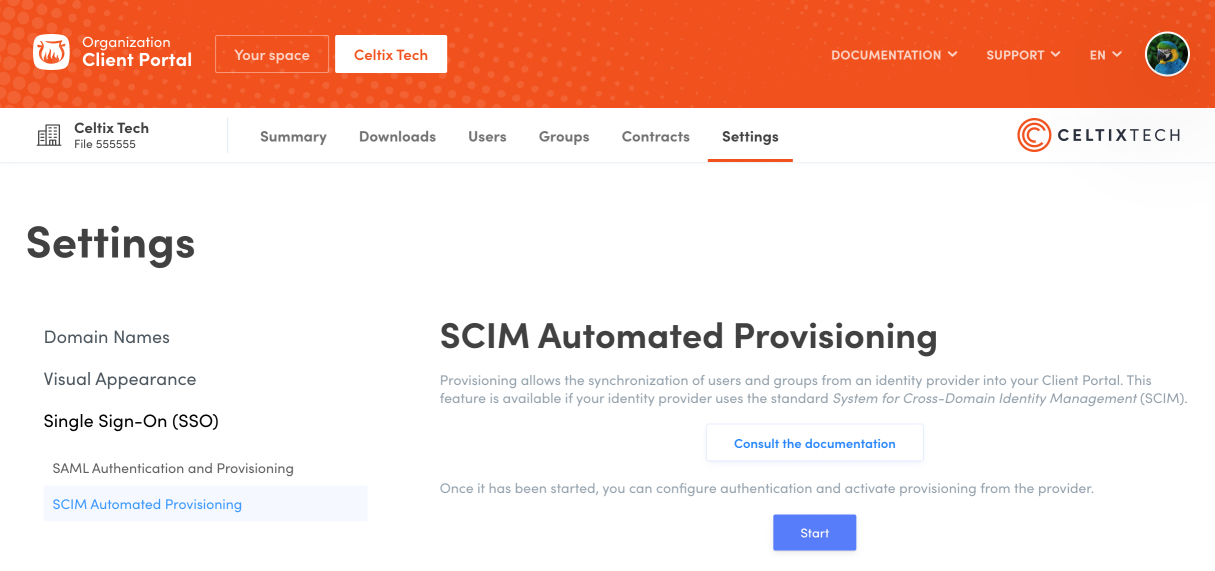
In a new window, log in to the Organization Client Portal and click the Settings tab.
-
Go to the SCIM Automated Provisioning section.
-
Click Start.
-
 123
123
-
-
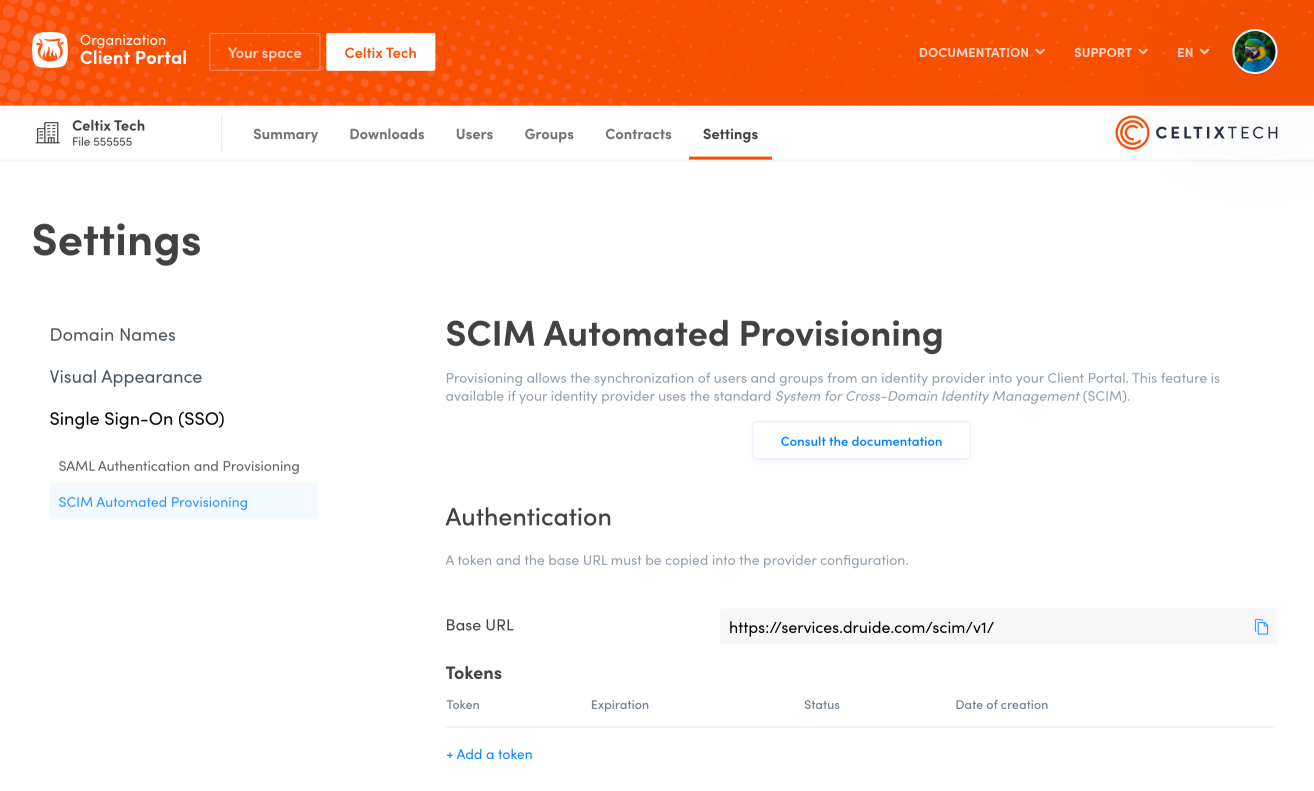
Copy the Base URL by clicking the icon.
-
 4
4
-
-
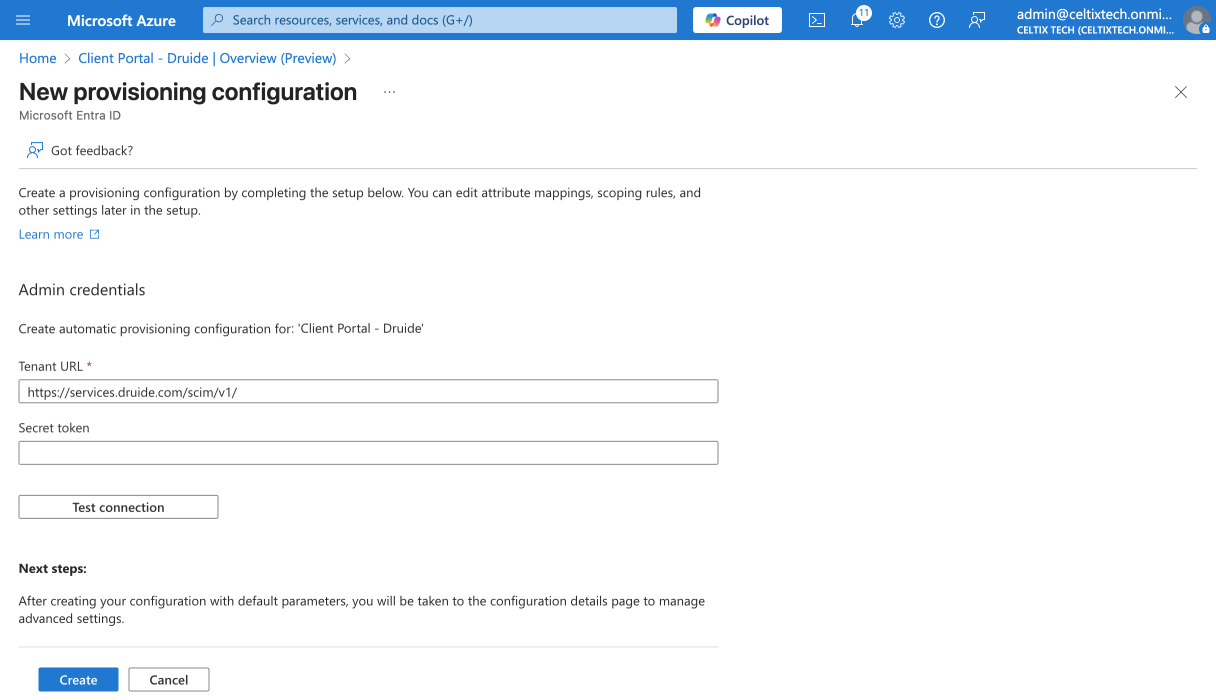
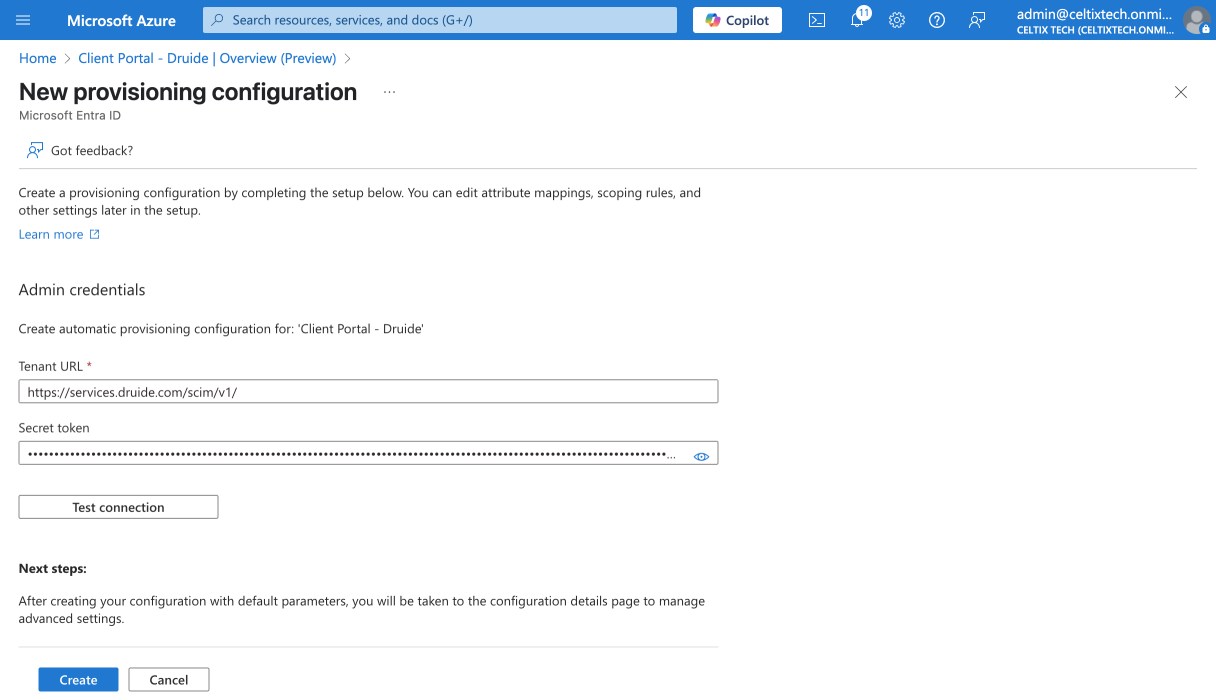
Go back to the Entra ID window from section A, and paste the link into the Tenant URL field.
-
 5
5
-
-
Create a token in the Client Portal by clicking Add a token.
-
6
-
-
Click Add to confirm that you want to create a token.
-
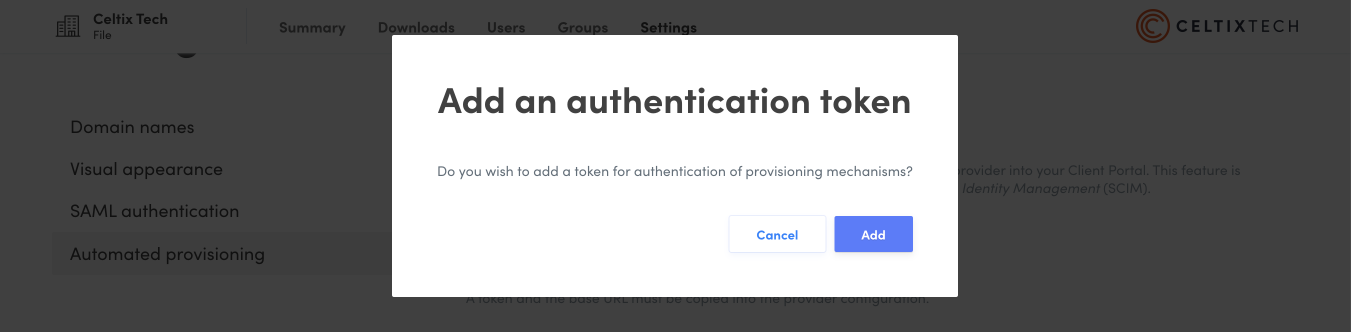 7
7
-
-
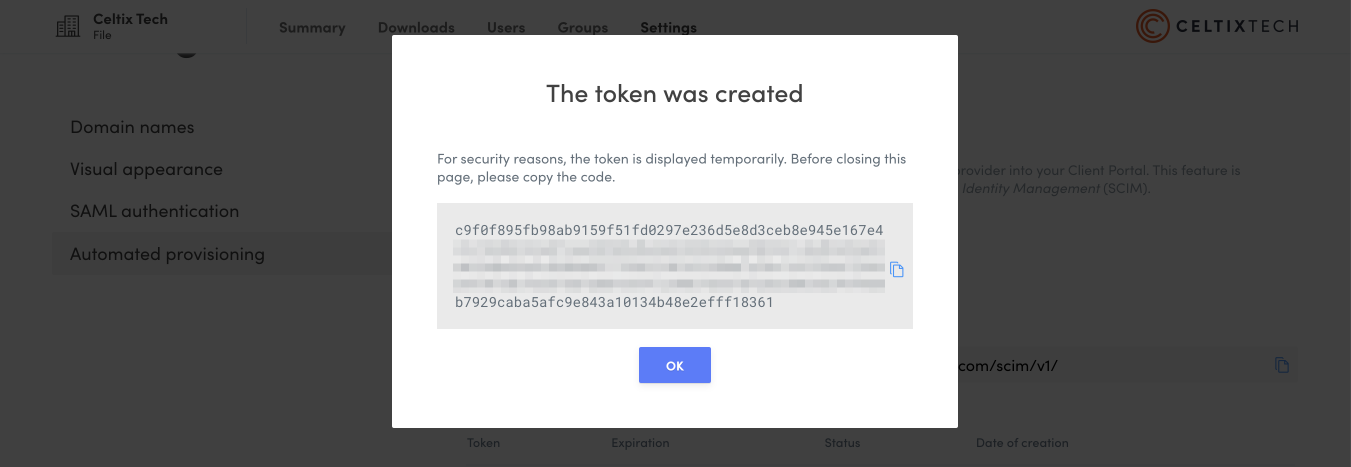
Copy the token that appears on the screen by clicking the icon.
Caution — The token will only appear once. As a security measure, it is not possible to display it again. Make sure you have copied the token before closing the window.
-
 8
8
-
-
Go back to the Entra ID window, and paste the token into the Secret Token field.
-
Click Create.
-
 910
910
-
C. Configuring Users in Entra ID
-
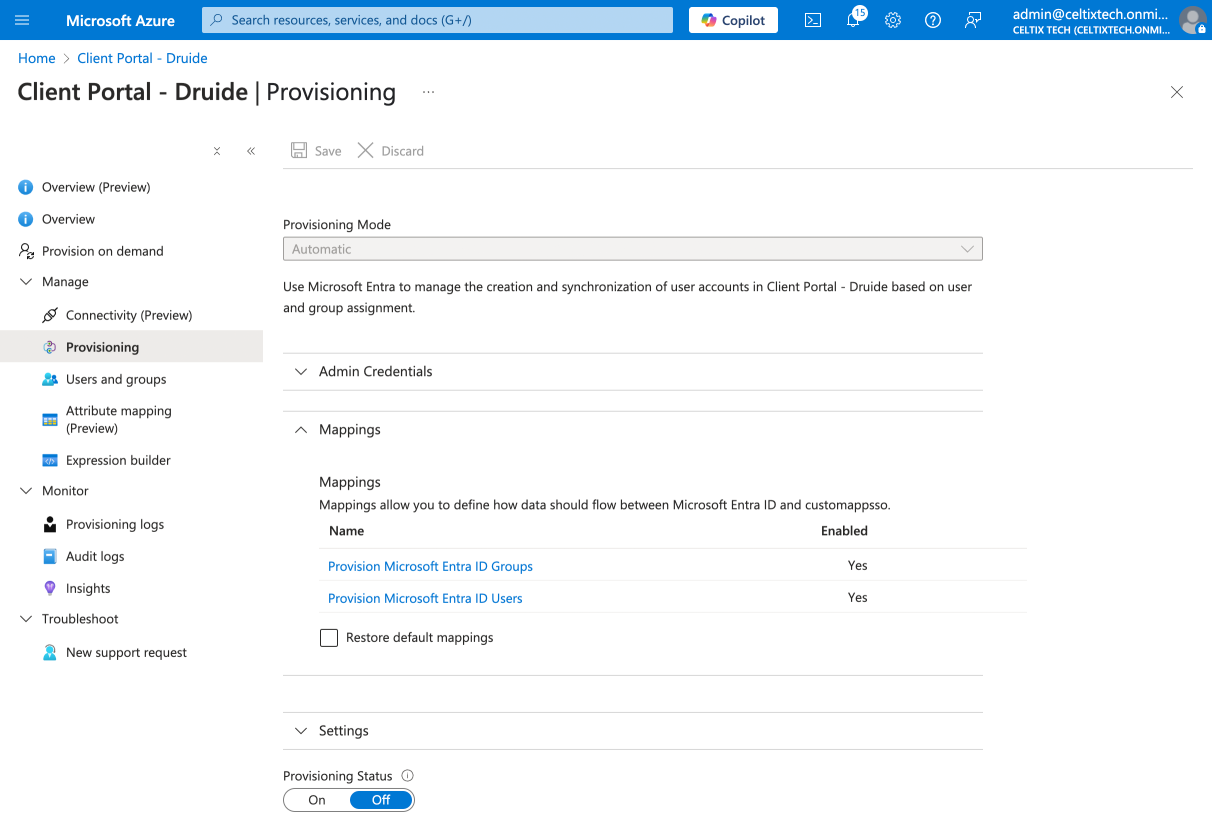
Expand the Manage section in the sidebar.
-
Click Provisioning.
-
 12
12
-
-
Expand the Mappings section.
-
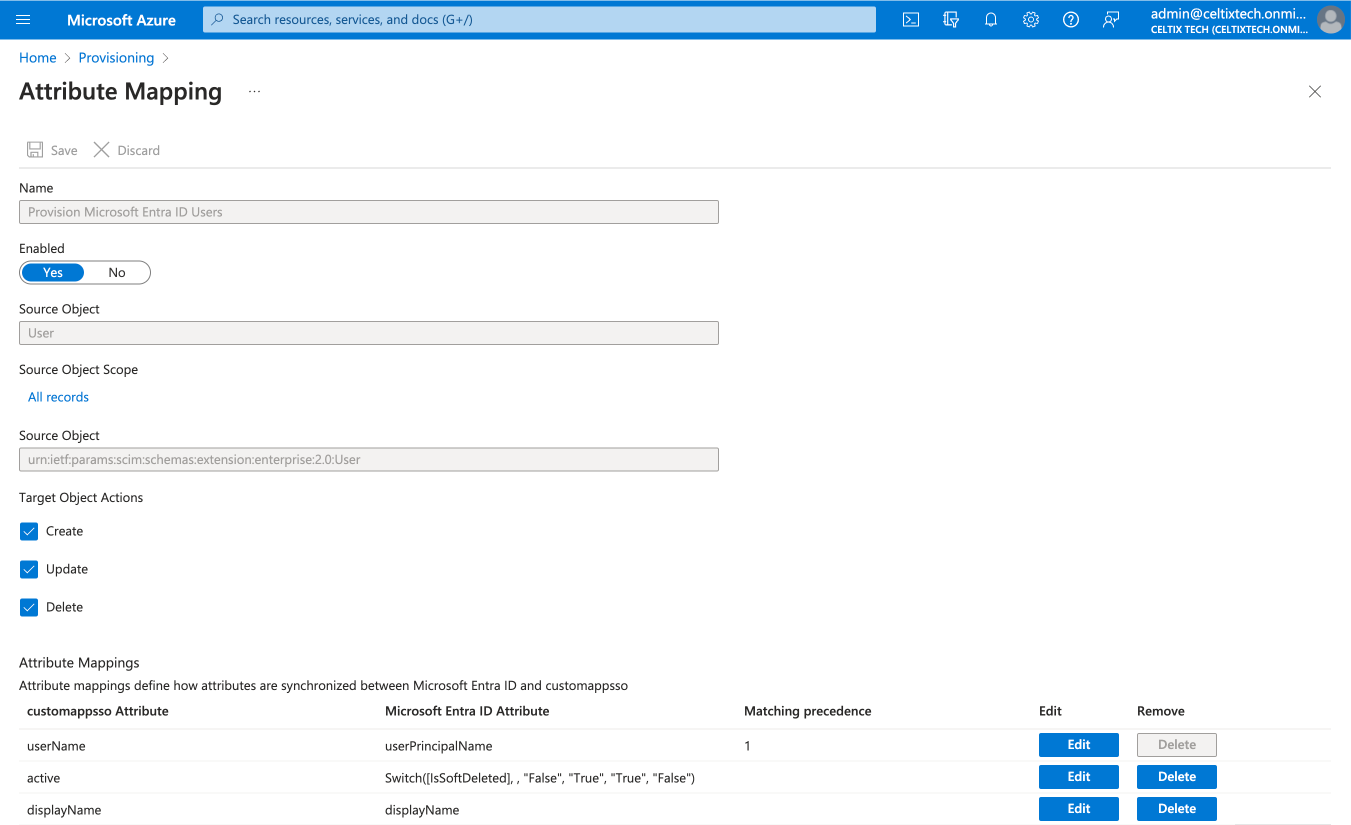
Click Provision Microsoft Entra ID Users.
-
 34
34
-
-
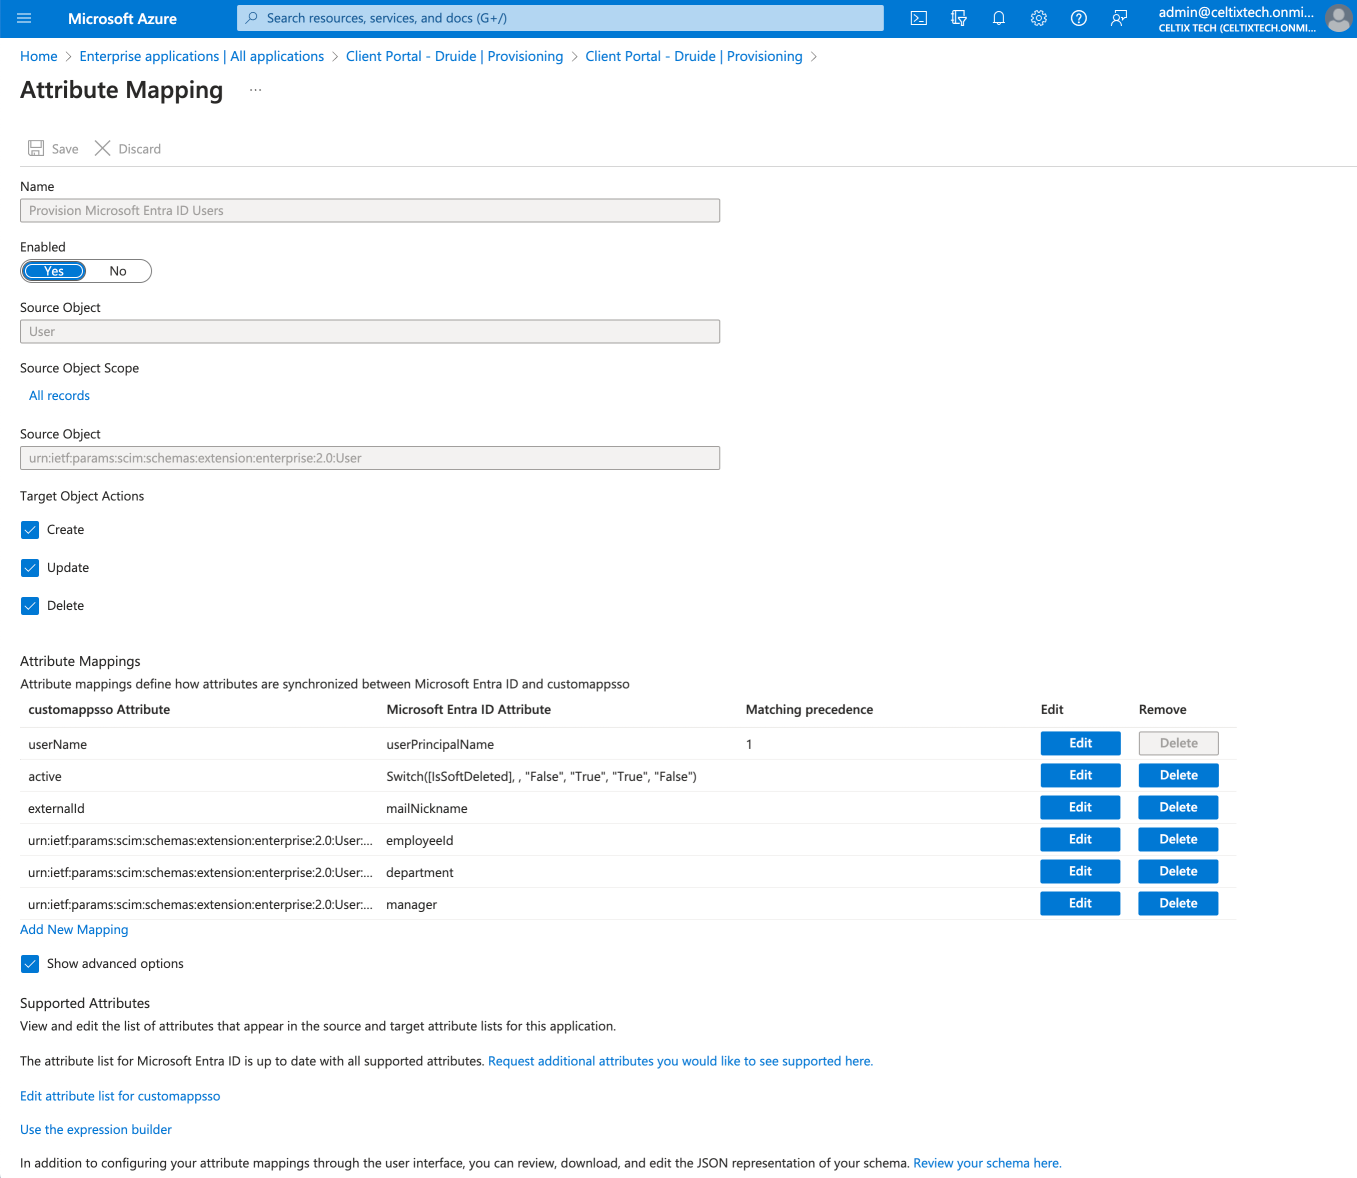
Make sure the source attribute associated with the target attribute userName corresponds to the same email address in your database as the target attribute emailaddress you configured with SAML. In this example, the source attribute is userPrincipleName (in the Microsoft Entra ID Attribute column). If needed, edit the attribute by clicking it.
Warning —The attribute emailaddress configured with SAML and the attribute userName configured with SCIM must use the same email address. Otherwise, a Druide account will be created for each email address, duplicating the user.
To review how you configured SAML, see the Entra ID or Google Cloud procedure.
-
Click Save if you made any changes, then close the panel.
-
 56
56
-
-
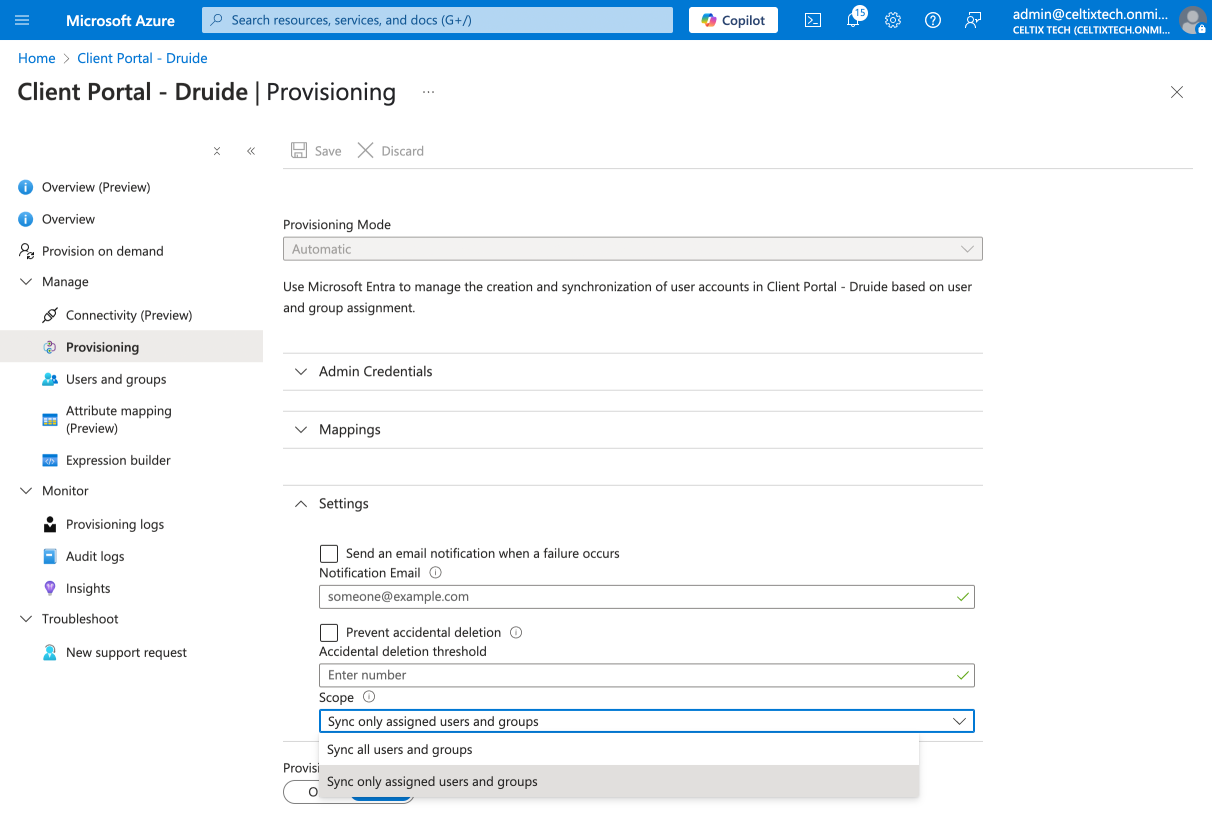
Expand the Settings section.
-
Indicate whether you would like to synchronize all users and groups or only assigned users and groups.
Note — If you plan to manage roles in the organization with provisioning, choose Sync only assigned users and groups. Make sure you assign the application from the Users and groups section. (You can find instructions for adding assignments to the application starting at step 7 of section B under Steps to Configure Authentication with SAML and Entra ID.)
-
Click Save and close the panel.
-
 789
789
-
-
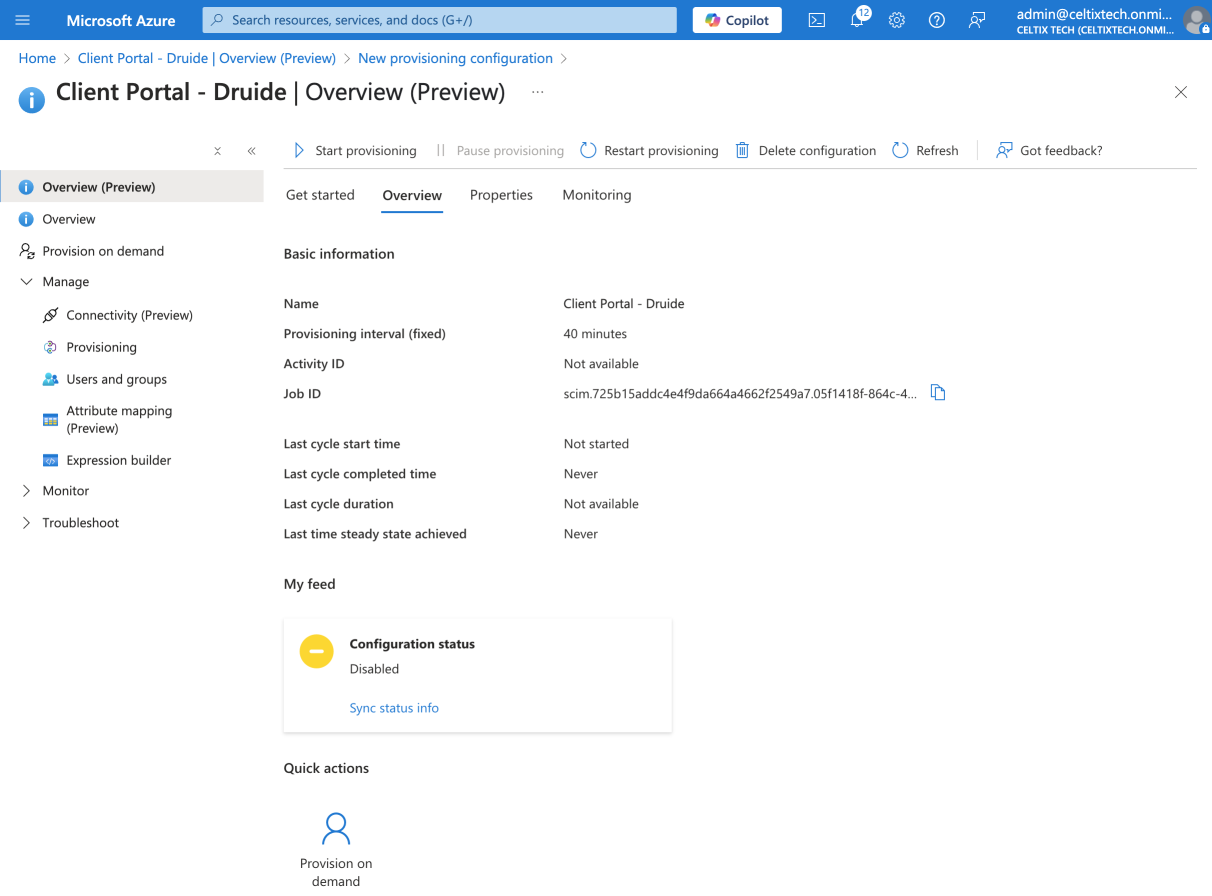
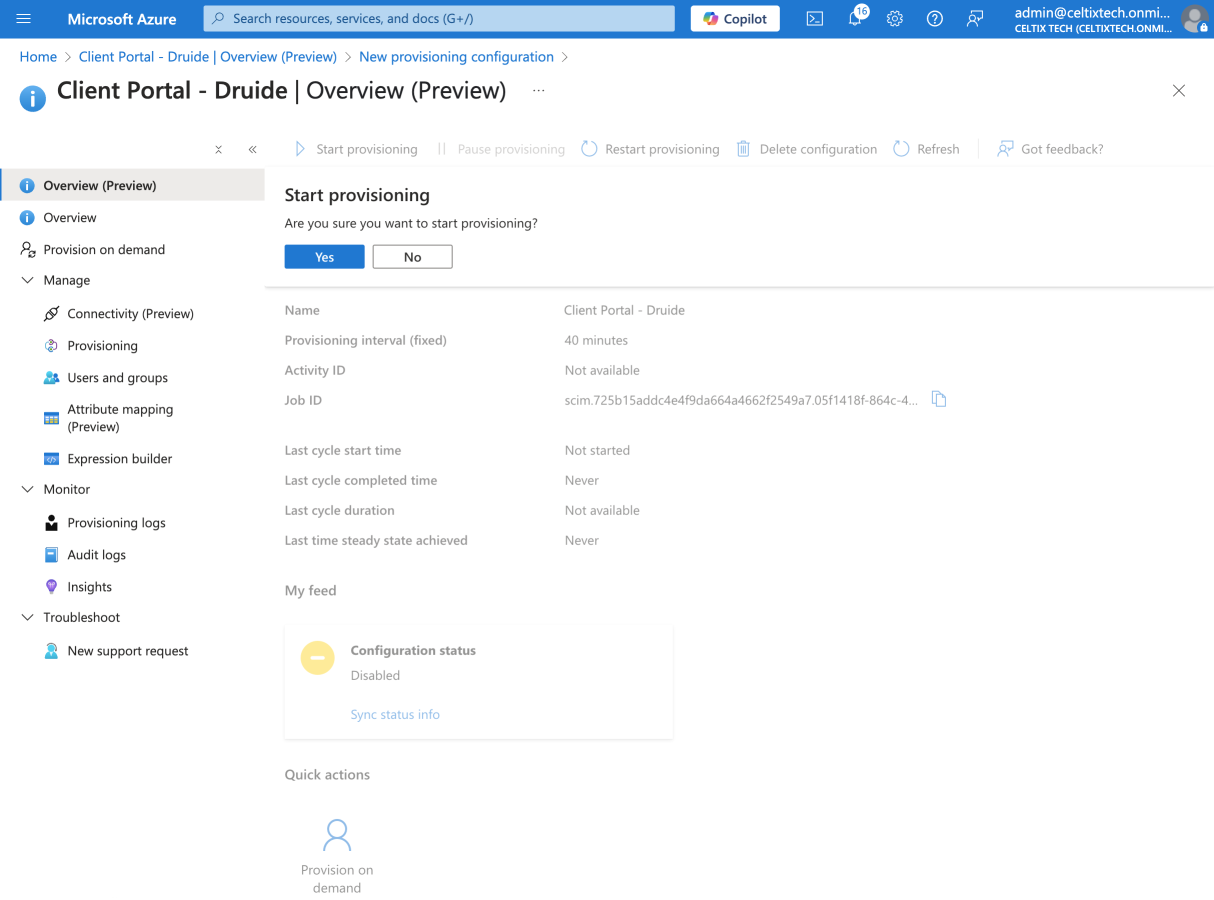
Return to the Overview (Preview) page and click Start provisioning.
-
10
-
-
A prompt will appear to confirm you want to start provisioning. Click Yes.
-
 11
11
-
User and group provisioning is now active. If the initial cycle was unsuccessful, the errors will be displayed on this screen.
The following sections describe optional settings for managing Antidote access and roles in the Client Portal from Entra ID.
D. Managing Antidote Access
You can manage access to Antidote from Entra ID by configuring the following settings in the Client Portal.
Important — Access management for Antidote through automated provisioning overrides any access configured through Authentication with SAML.
-
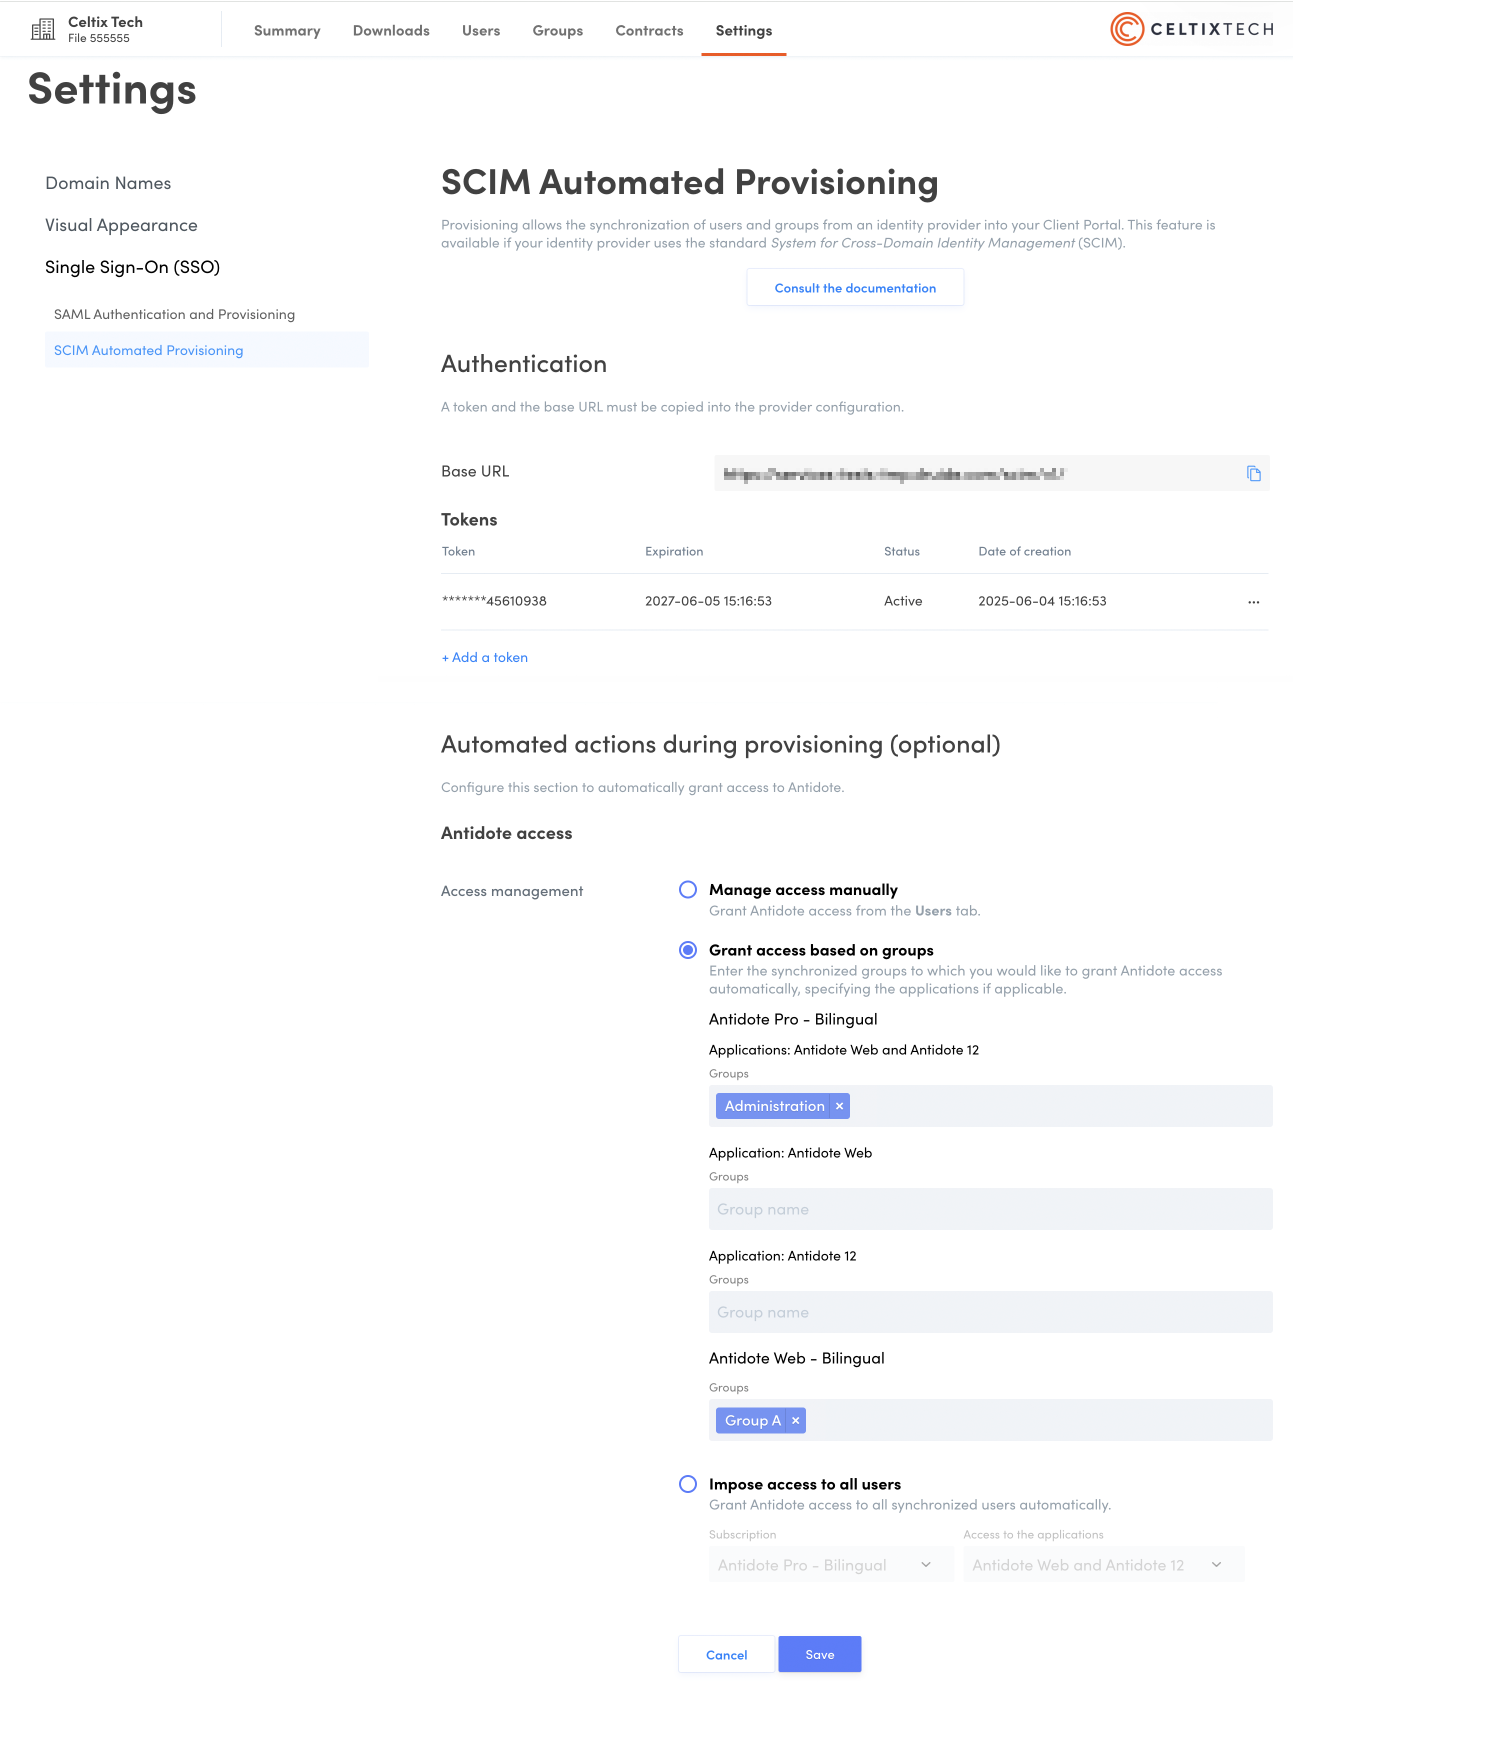
In the Client Portal, scroll down to the second part of the Automated provisioning settings.
-
Choose how you would like to manage Antidote access. You have three options:
- Manage access manually Choose this option if you do not want to grant Antidote access automatically or if you want to use the SAML authentication settings you have already configured. If this option is also selected under SAML authentication settings, no users will be automatically granted Antidote access. You can manage access manually from the Users tab in the Client Portal.
- Grant access based on groups Choose this option to grant Antidote access to users according to groups synchronized with automated provisioning. This option is particularly useful if your organization holds multiple subscriptions and you would like to give groups access to different ones. If you have an Antidote Pro subscription, specify the application as well—for example, grant one group access to Antidote Web and another access to both Antidote 12 and Antidote Web. To register synchronized groups, click the appropriate field and type the first letters of the group name, then select it from the list of corresponding groups that appears. To remove a group, click the X beside its name. When a user is removed from a group by SCIM synchronization, Antidote access will be automatically withdrawn from that user. This also applies to users added to a synchronized group; these users will be automatically granted access to the subscription associated with that group.
- Impose access to all users Choose this option to automatically grant Antidote access to all synchronized users. If your organization holds multiple subscriptions, indicate which one you want to use. For Antidote Pro, make sure to specify which application (Antidote 12, Antidote Web or both).
-
Click Save once you have made your choice.
-
 123
123
-
You do not need to send out invitations from the Client Portal for users to activate their Antidote access. You can simply send users an email explaining how they can connect.
E. Managing Roles in the Organization
You can manage roles in the organization assigned to accounts in the Client Portal from Entra ID by configuring the following settings in Entra ID. Begin by synchronizing the roles.
Synchronizing Roles
-
From within the application you created for Druide’s Client Portal when you configured SAML authentication, click Provisioning in the sidebar.
-
Expand the Mappings section.
-
Click Provision Microsoft Entra ID Users.
-
 123
123
-
-
Click the check box Show advanced options.
-
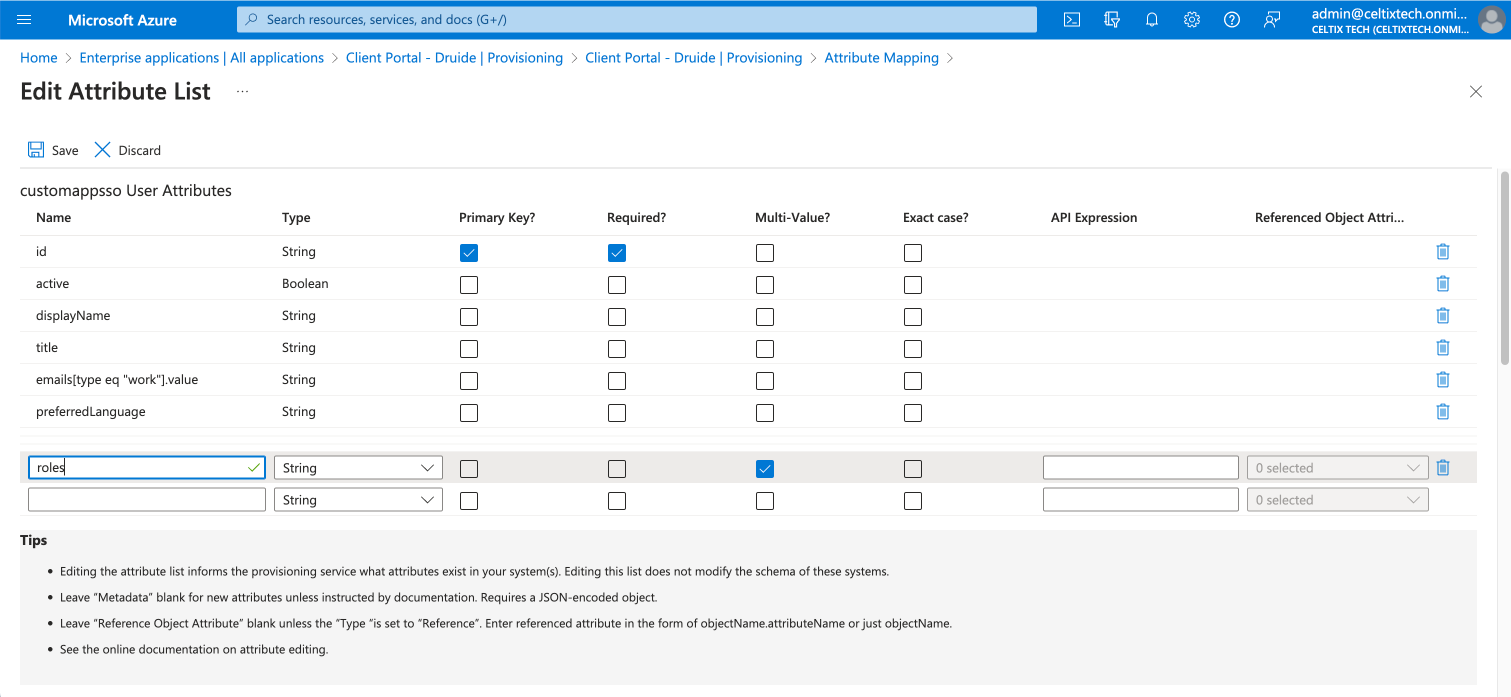
Click Edit attribute list for customappsso.
-
 45
45
-
-
At the bottom of the list, create a new line by entering
rolesin the field in the first column. -
Check the box for Multi-Value.
-
 67
67
-
-
Click Save.
-
Click Yes in the dialogue box that appears.
-
 89
89
-
-
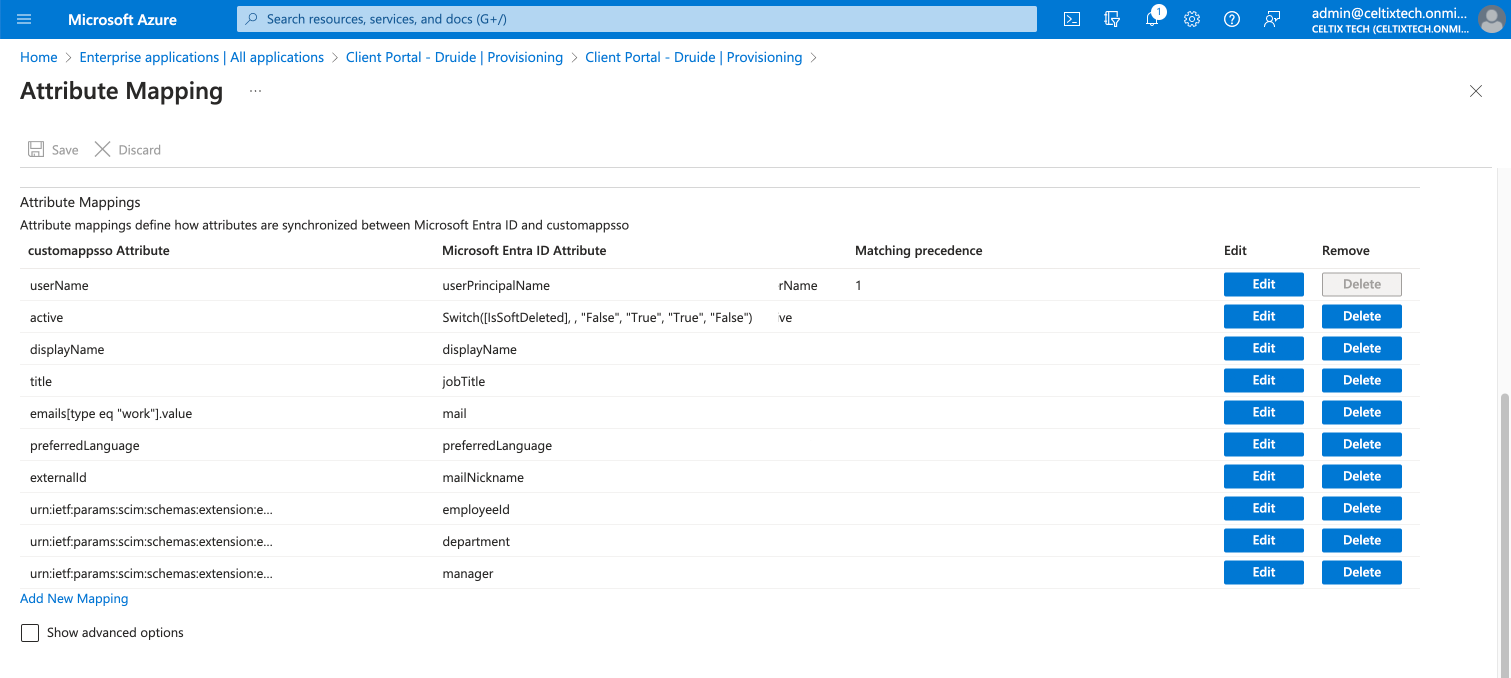
Click Add new mapping.
-
 10
10
-
-
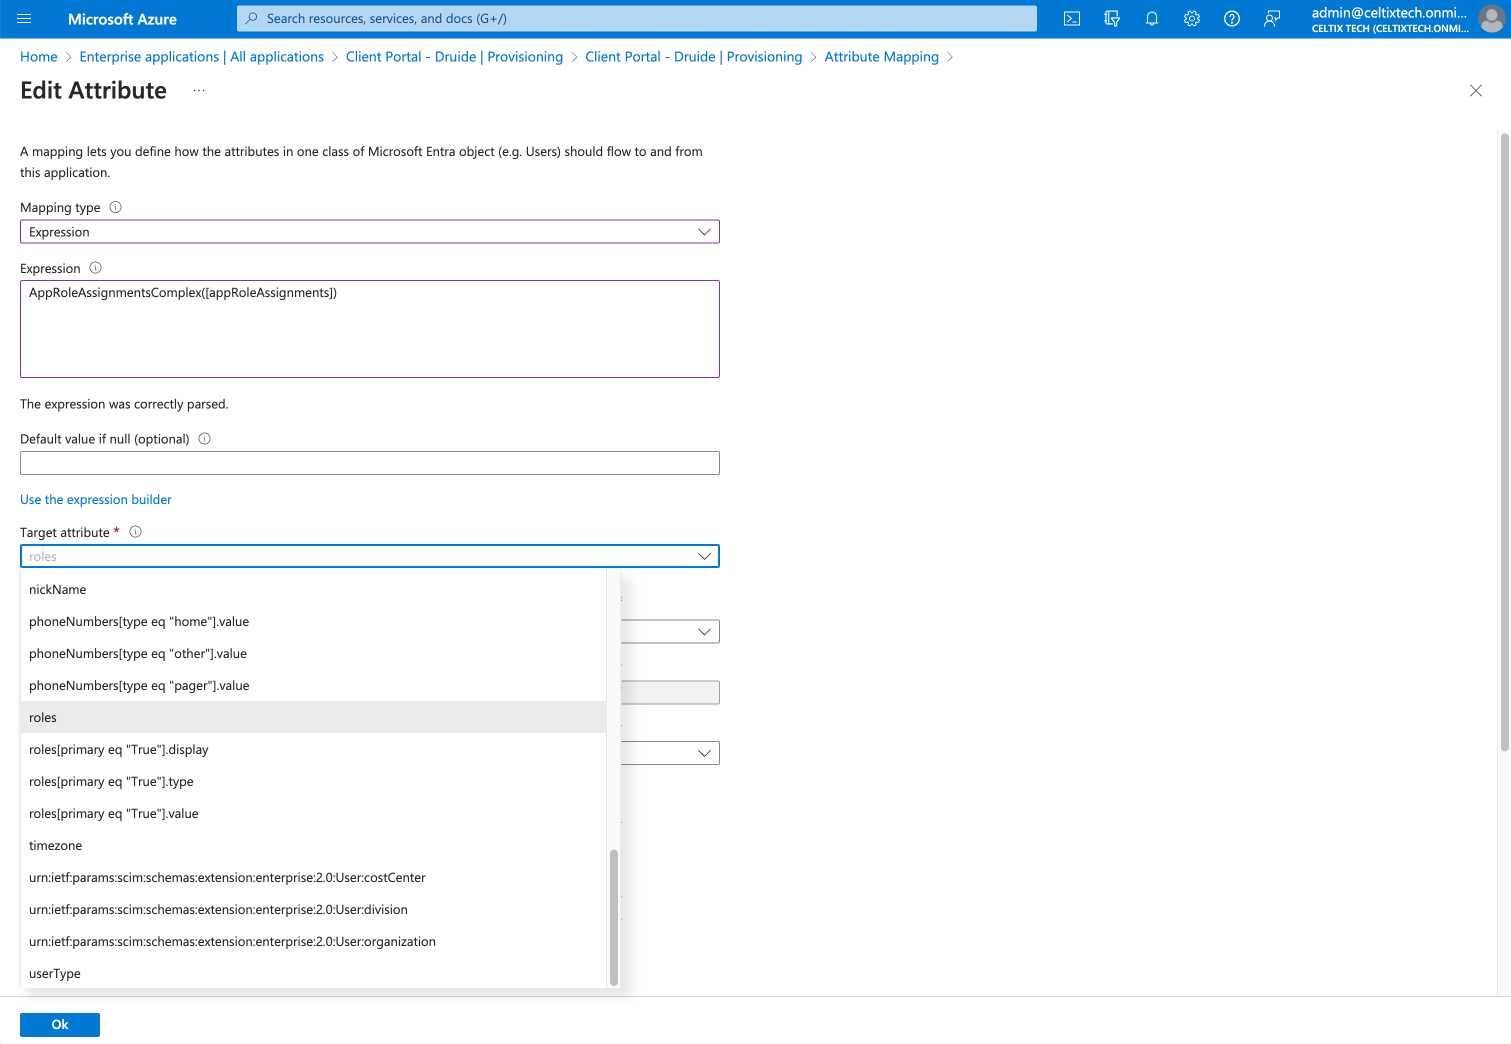
Select the mapping type Expression from the drop-down menu.
-
Enter the expression
AppRoleAssignmentsComplex([appRoleAssignments]). -
Select the target attribute roles from the next drop-down menu.
-
Click OK.
-
 11121314
-
-
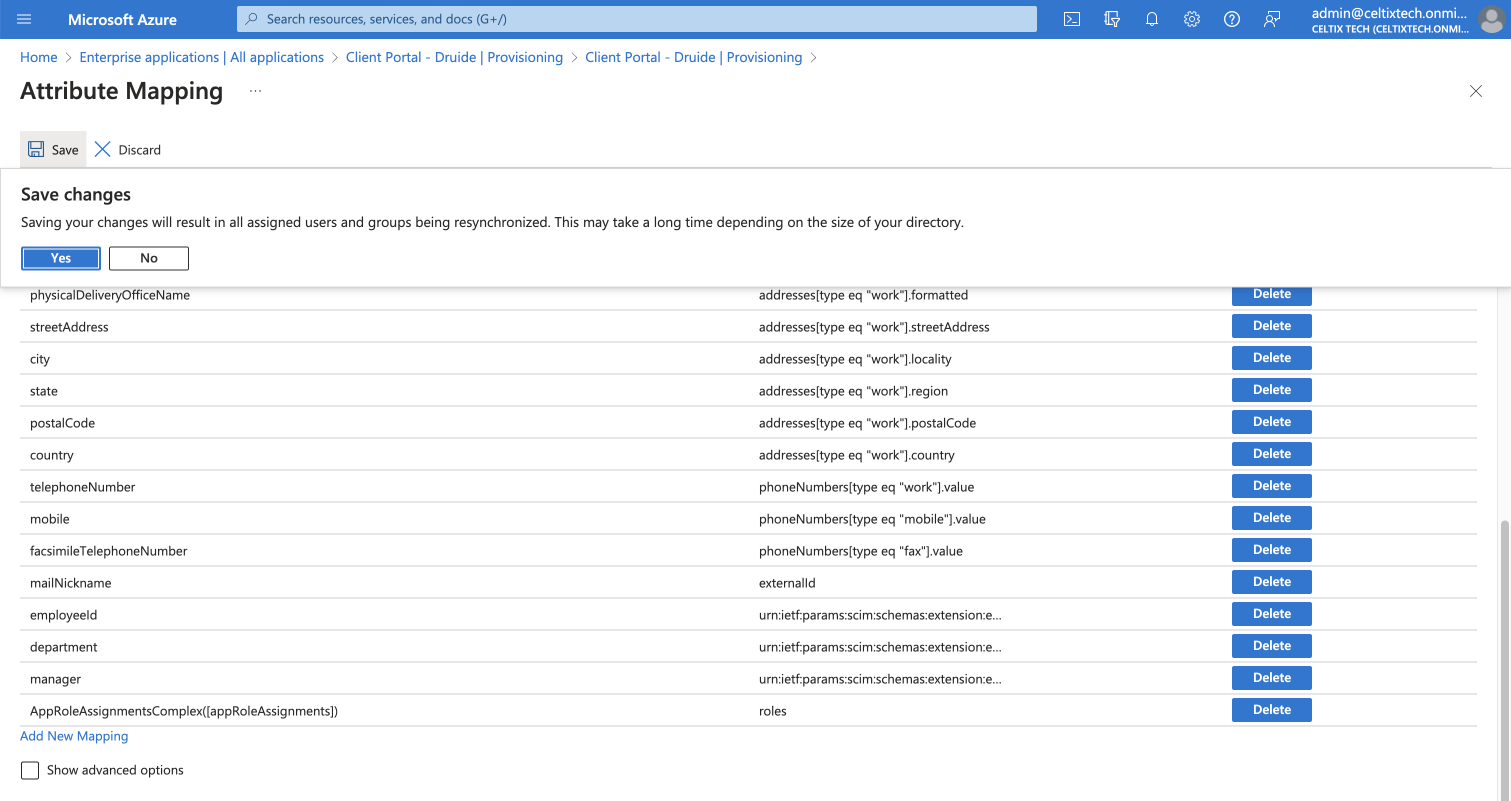
Click Save.
-
Click Yes in the dialogue box that appears.
-
 1516
1516
-
Roles are now synchronized through provisioning. Next, configure roles in the organization.
Configuring Roles
-
Change services in Azure, and go to the App registrations section. You can access it quickly by typing the first few characters of the section name in the search bar.
-
 1
1
-
-
Click All applications.
-
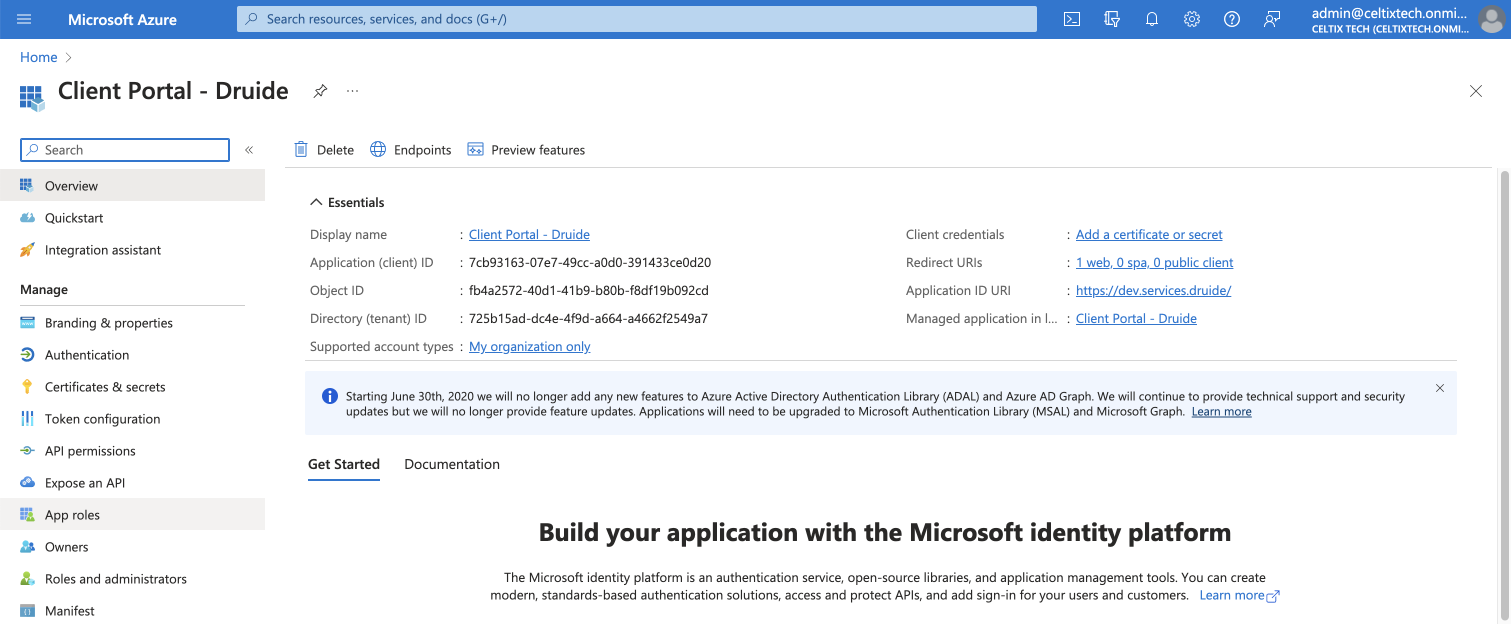
Select the application you created for Druide’s Client Portal.
-
 23
23
-
-
Click App roles in the sidebar, under the Manage section.
-
 4
4
-
-
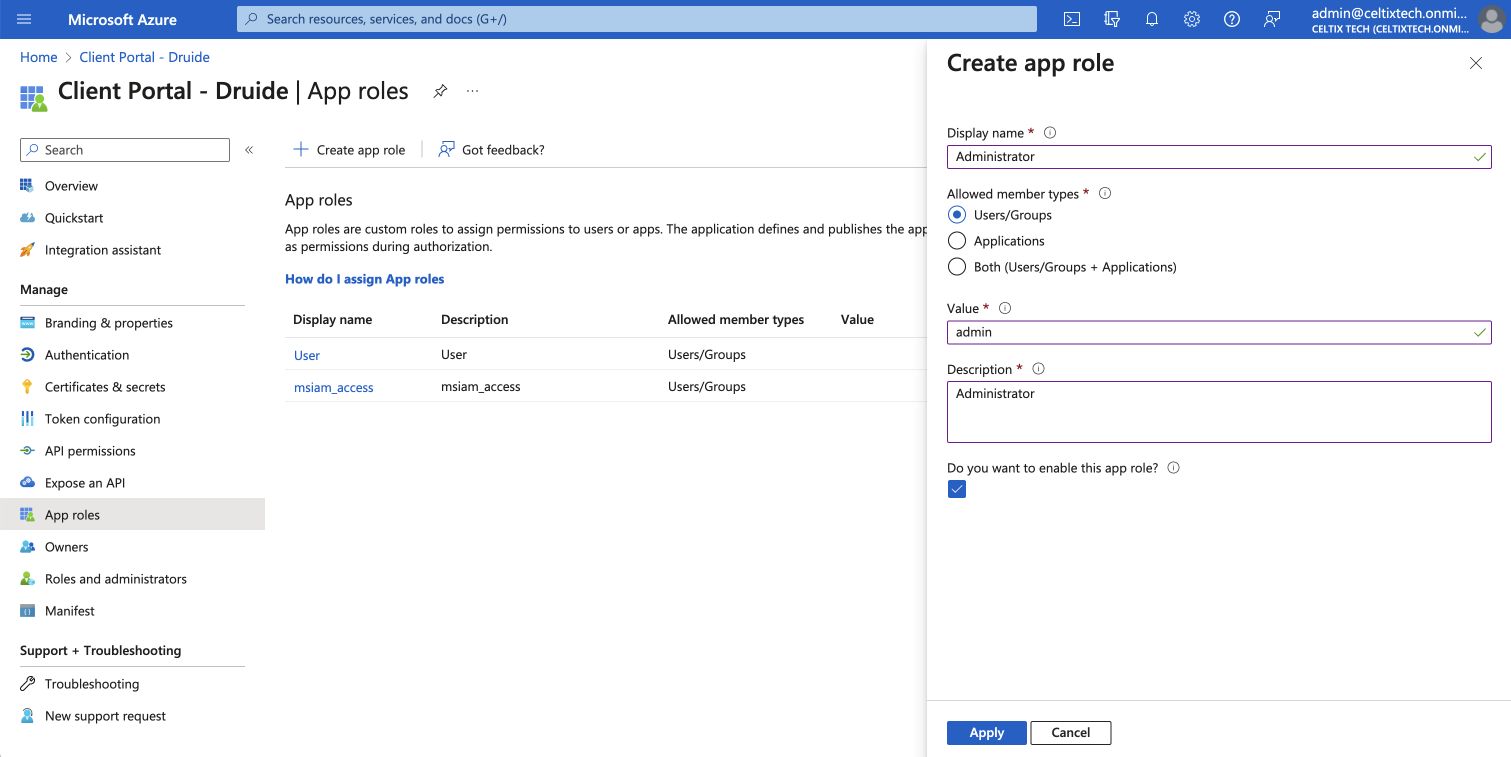
Click Create app role.
-
Configure the following settings: A) Display name: enter
Administrator. B) Allowed member types: select Users/Groups. C) Value: enteradmin(all lowercase). D) Description: enterAdministrator. E) Do you want to enable this app role?: leave the box checked. -
Click Apply.
-
 5ABCDE7
-
-
Repeat steps 5 to 7 for the technician role: A) Display name: enter
Technician. B) Allowed member types: select Users/Groups. C) Value: entertechnician(all lowercase). D) Description: enterTechnician. E) Do you want to enable this app role?: leave the box checked. -
Repeat steps 5 to 7 for the group supervisor role: A) Display name: enter
Group supervisor. B) Allowed member types: select Users/Groups. C) Value: entersupervisor(all lowercase). D) Description: enterGroup supervisor. E) Do you want to enable this app role?: leave the box checked.
Roles in the organization are now configured, and you can assign users to them.
Assigning Roles
-
Return to Enterprise applications.
-
1
-
-
Select the application.
-
2
-
-
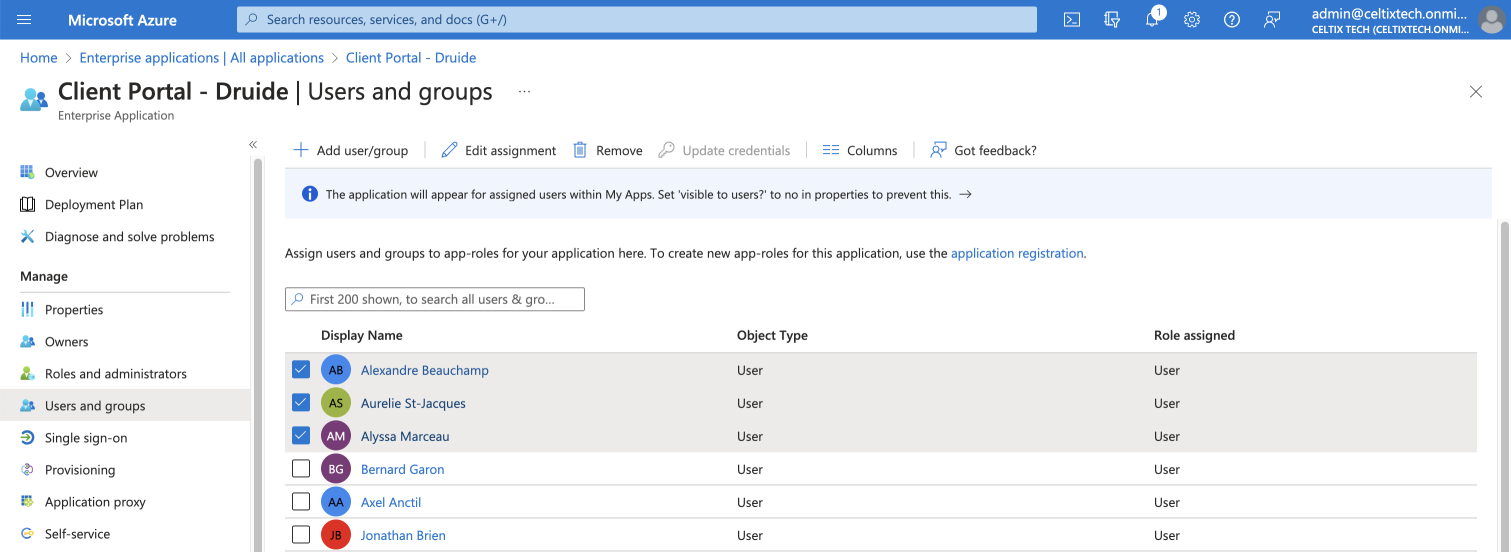
Click Users and groups in the sidebar.
-
Select the users to whom you want to assign a role.
-
Click Edit assignment.
-
 345
345
-
-
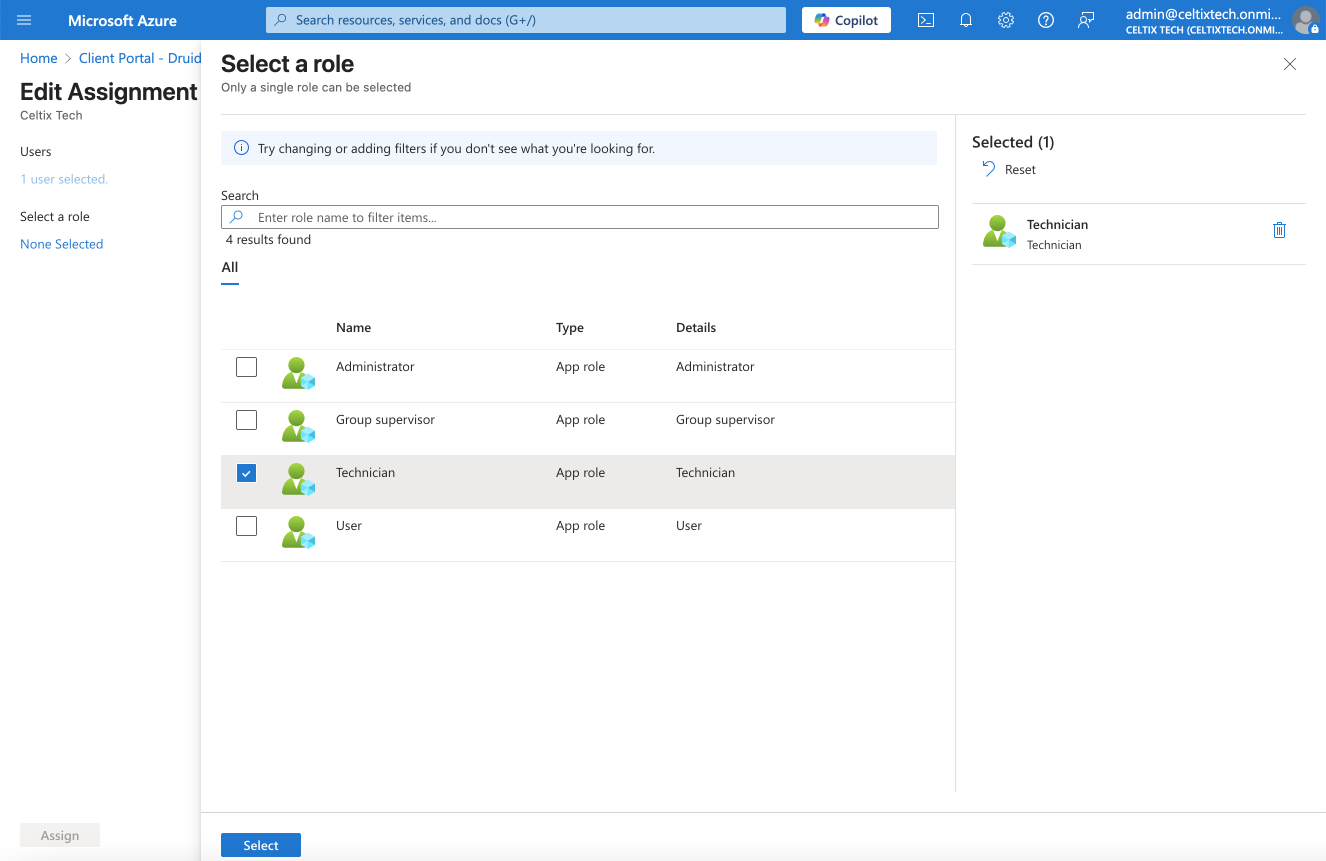
Click None Selected.
-
Choose the role in the organization you would like to assign from the panel on the right side of the screen.
-
Click Select.
-
Click Assign.
-
 6789
6789
-
-
Repeat steps 5 to 9 to assign other roles.
Client Portal roles in the organization are now managed from within Entra ID.