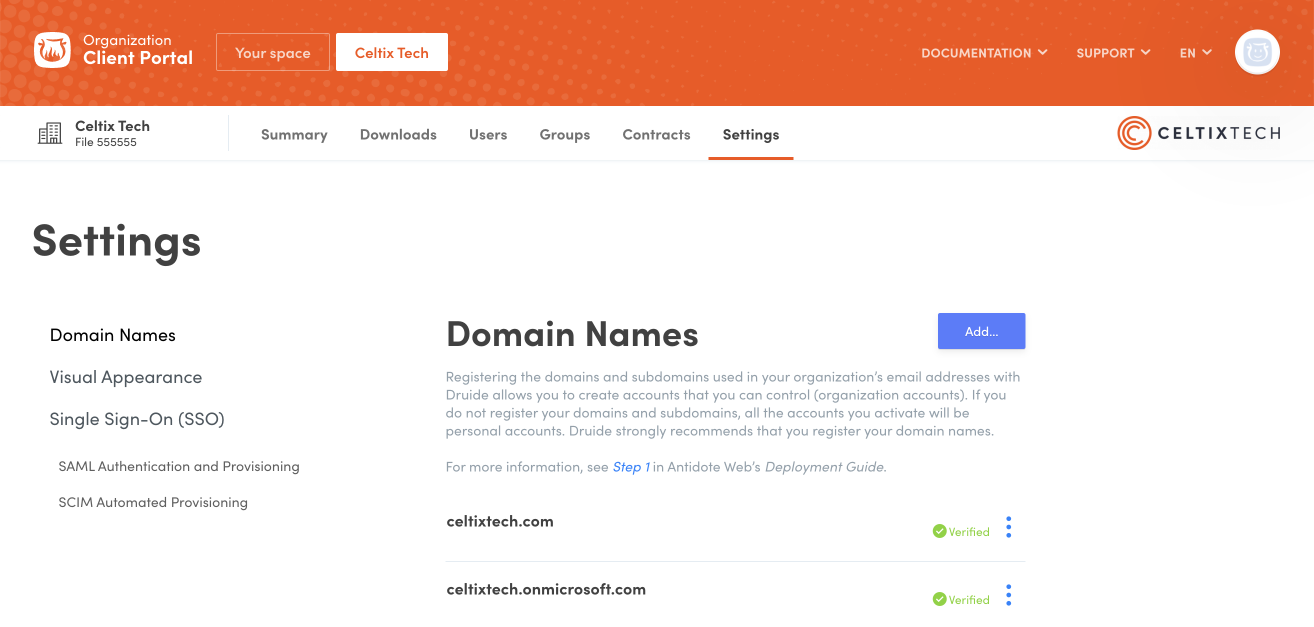
Make sure all domain names needed for SAML authentication have been added and verified. If you need to add one, see the instructions provided in the Domain Names section.
1
2
Go to the SAML Authentication and Provisioning section.
Begin Step 1 of the configuration process as indicated on the screen. Select Microsoft as your identity provider (ID Provider).
Select the domain name(s) involved in the authentication process.
Click Next.
3
4
5
6
On the next screen, Step 2: SAML Configuration, download the XML metadata file. Leave this window open and start preparing Entra ID in a new browser window.
7
B. Preparing Entra ID
In your Azure portal, go to the Enterprise applications section. You can access it quickly by typing the first few characters of the section name in the search bar.
1
Click New application.
2
On the next page, click Create your own application.
Name the application (e.g. Client Portal - Druide).
Select Integrate any other application you don’t find in the gallery (Non-gallery).
Click Create. Application creation can take several minutes.
3
4
5
6
Once the application has loaded, indicate which users can use it: all users (A) or only some (B).
A) For all users
Go to Properties (A1) and set Assignment required to No (A2).
A1
A2
Click Save and close the panel.
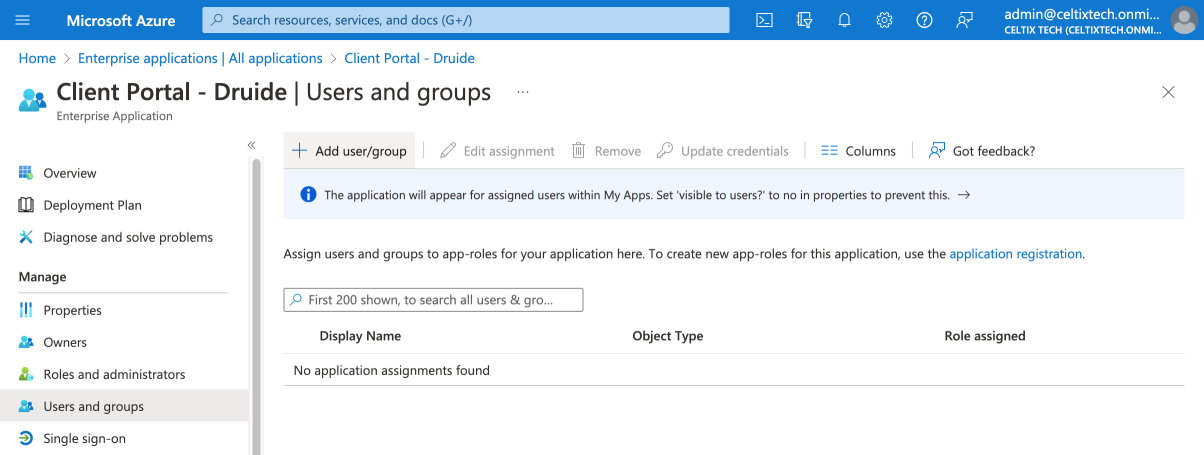
B) For certain users only
Go to Users and groups (B1) and click Add user/group (B2).
B1
B2
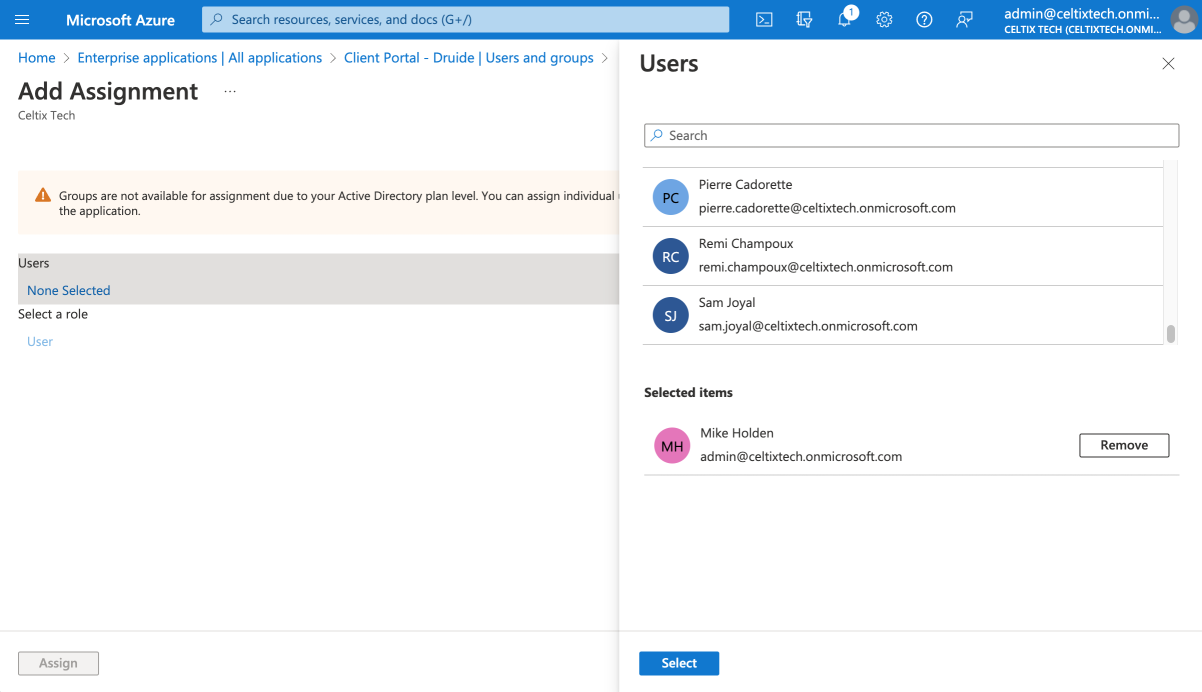
Click the names of the desired users (B3), then the Select button (B4).
B3
B4
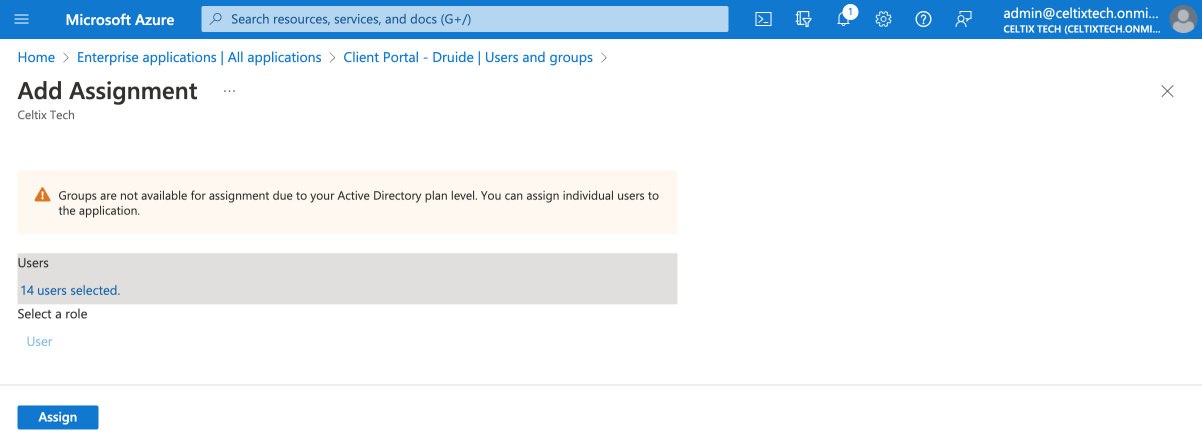
Finally, click Assign (B5).
B5
All preparations in Entra ID are now complete and you can begin SAML configuration.
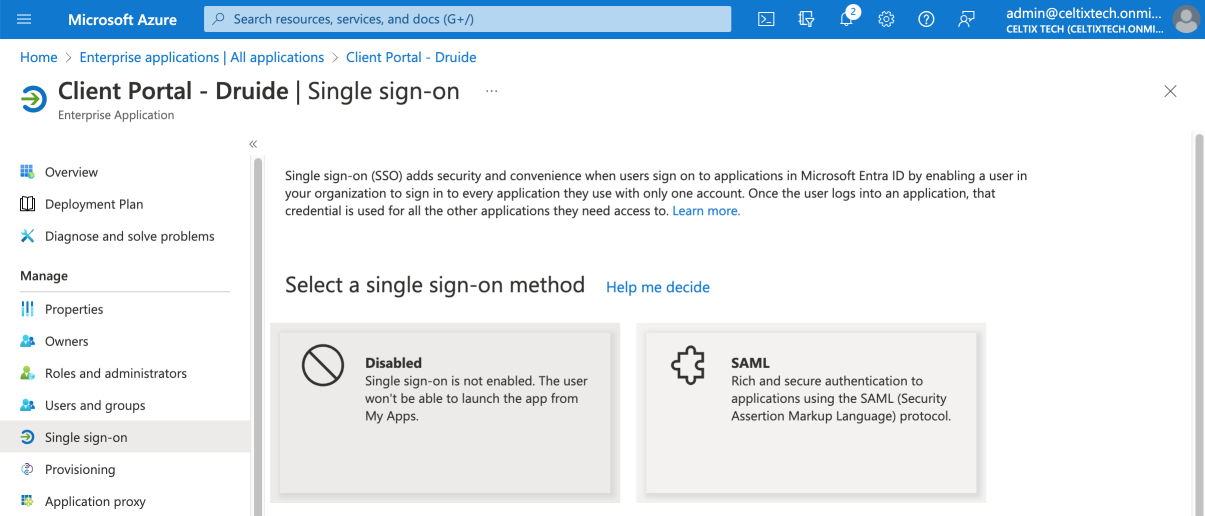
C. Configuring SAML With Entra ID
In the application you just created in Entra ID, go to the Single sign-on tab.
Select the SAML tile.
1
2
Click Upload metadata file.
Select the metadata file you downloaded earlier from the Client Portal (section A, step 7).
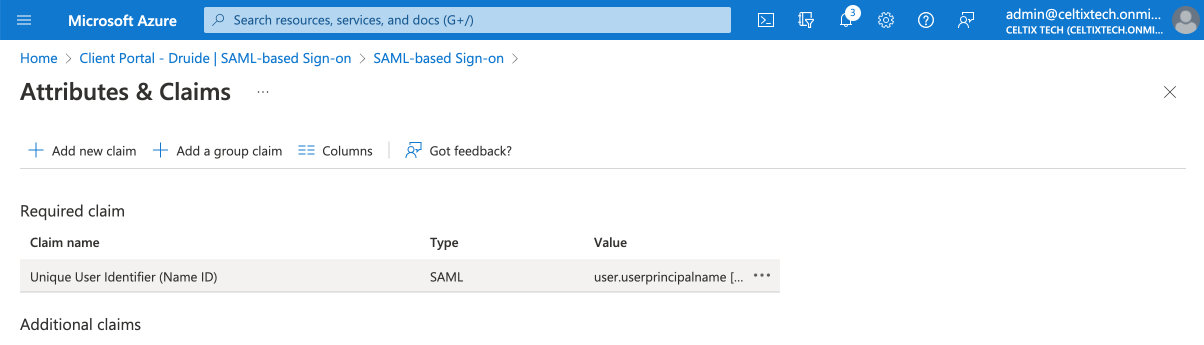
Next, click Unique User Identifier (Name ID) to make changes to the claim.
8
Click Choose name identifier format and change the format to Persistent.
Change the source attribute to user.objectid.
9
10
Important — You must do one final verification in Attributes & Claims. Make sure that your configuration of the claim emailaddress (set to the attribute user.mail by default) contains an email address. If this is not the case, use another attribute such as user.userprincipalname, which usually corresponds to the user’s email address.
Click Save and close the panel.
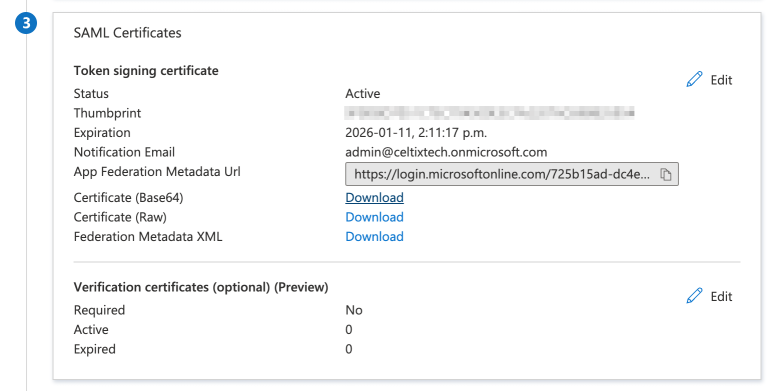
Go to the next block, SAML Certificates, and click Edit.
12
Select Sign SAML response and assertion in the signing options.
Click Save, then close the panel.
13
14
Download the Certificate (Base64) file.
Download the Federation Metadata XML file.
15
16
SAML configuration in Entra ID is now complete. Keep this window open in case you need to configure SAML manually in the Client Portal.
D. Configuring SAML in the Client Portal
Return to the Client Portal window and go to Step 2: SAML Configuration. Click Upload a file and select the XML metadata file you just downloaded from Entra ID.
It is recommended you assign a resource person to receive technical details in case of login or configuration issues.
Click Next.
2
3
If your organization has one or more active subscriptions to Antidote, choose how you would like to manage Antidote access. You have three options:
Manage access manuallyChoose this option to activate SAML authentication without automatically granting access to Antidote. You can grant users access to Antidote from the Users tab in the Client Portal.
Grant access to users who do not have itChoose this option to grant Antidote access upon login to users who do not already have it. For example, this option is useful if your organization has multiple subscriptions and you want new users to have access to a different subscription than those who already have one. Specify which subscription to give users, and for Antidote Pro, specify which application (Antidote 12, Antidote Web or both) as well.
Impose access to all usersChoose this option to automatically grant Antidote access to all users who log in with SAML authentication. If your organization has multiple subscriptions, specify which one should be used. For Antidote Pro, make sure to specify which application (Antidote 12, Antidote Web or both). If a user already has access to another subscription, their subscription will be changed the next time they log in.
Note — If you intend to set up SCIM automated provisioning later, please note that the Antidote access management settings defined by that configuration will override the options described here.
Click Next once you have made your choice.
4
5
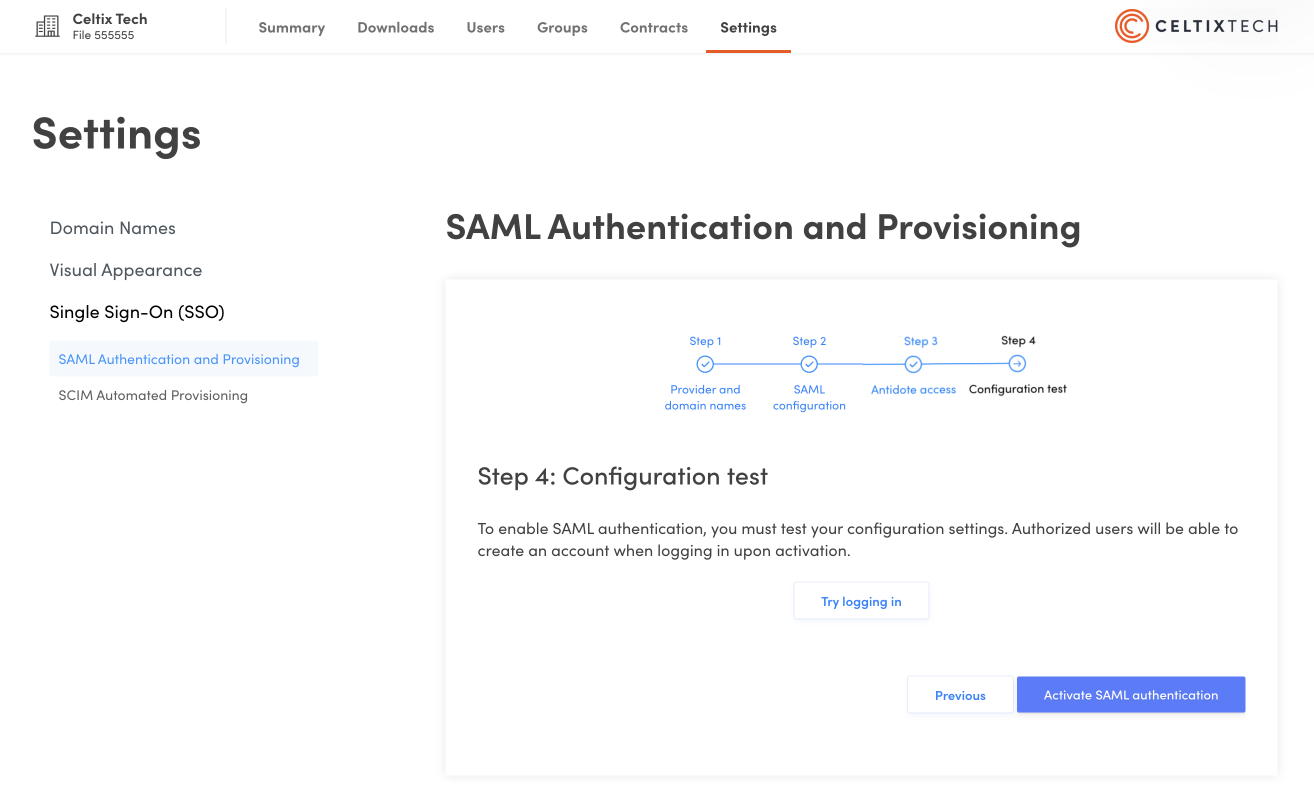
On the next screen, click Try logging in. The result of the test will appear in a new window, confirming a successful connection or providing an error report if the connection fails.
Finally, click Activate SAML authentication.
6
7
You do not need to send out invitations from the Client Portal for users to activate their Antidote access. You can simply send users an email explaining how they can connect.
E. Configuring Authentication for Antidote 12
This optional procedure allows you to automatically fill in the user account field or display the account picker when first logging in to Antidote 12. For the configuration to take effect, you must enable one of these two options in the Deployment Manager configuration. This procedure is only available on Windows and with an Antidote Pro subscription.
Change services in Azure, and go to the App registrations section. You can access it quickly by typing the first few characters of the section name in the search bar.
1
Click All applications.
Select the application you created for Druide’s Client Portal.
2
3
Copy the Application (client) ID.
4
Go to the Authentification section.
Click Add a platform.
5
6
Click Mobile and desktop applications.
7
Check the box next to https://login.microsoftonline.com/common/oauth2/nativeclient.
In the Custom redirect URIs field, enter ms-appx-web://Microsoft.AAD.BrokerPlugin/{ClientId} and replace {ClientId} with the Application (client) ID you copied in step 4.
8
9
Scroll down the page to the Advanced settings section. Click Yes to Enable mobile and desktop flows.
Click Save to complete the configuration.
10
11
Note — If you get an error message when you enable this option, follow the steps below, then complete steps 10 and 11.
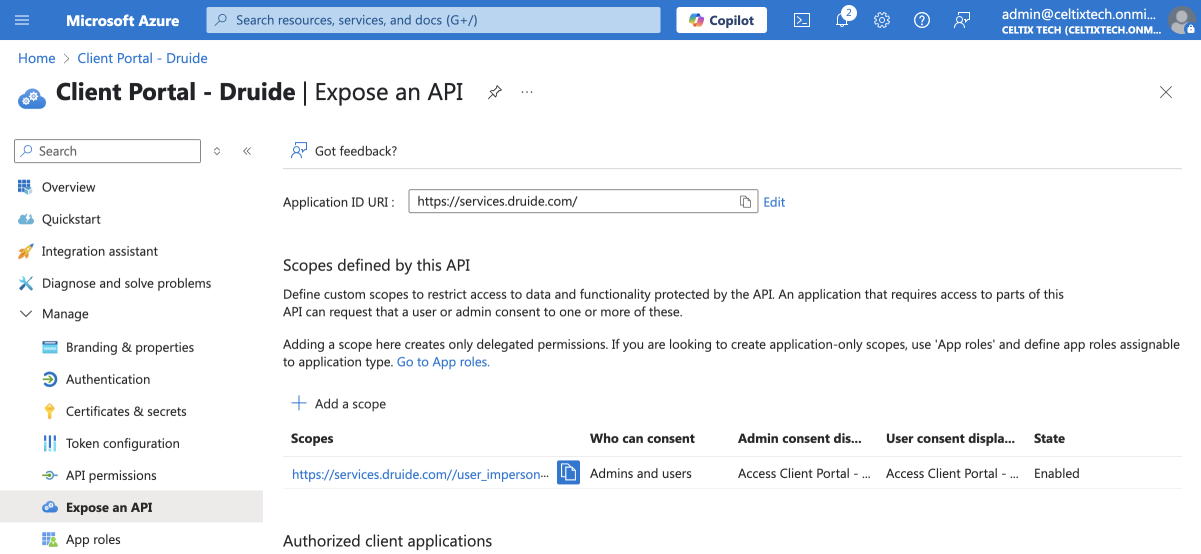
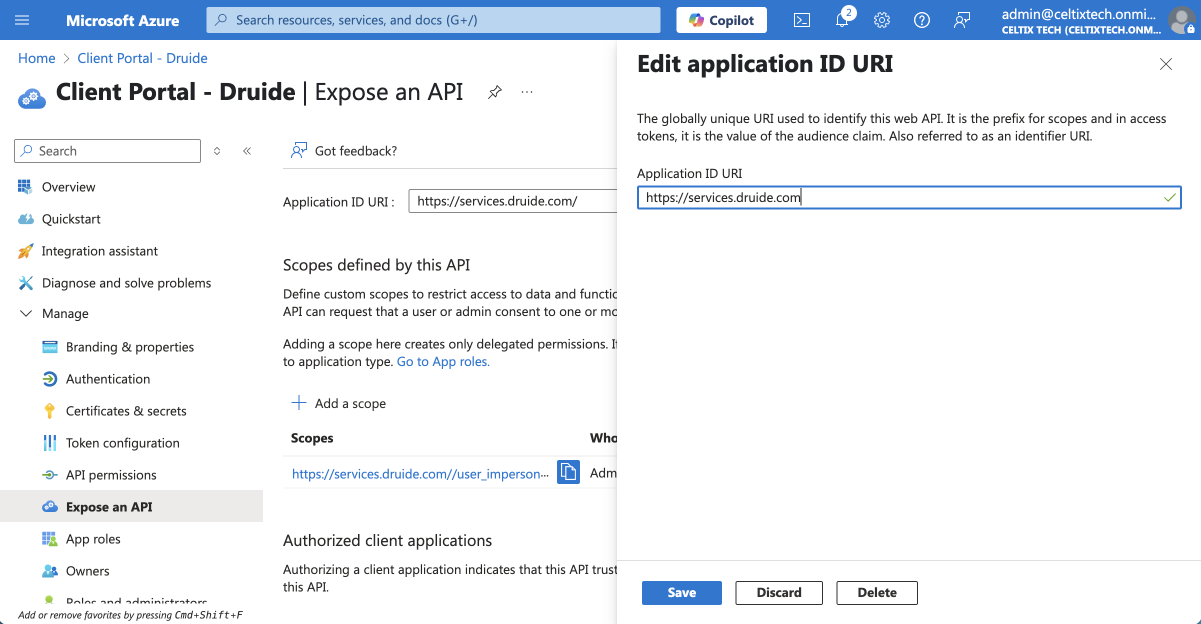
A) Go to the Expose an API section.
B) Click Edit.
A
B
C) Edit the Application ID URI field to remove the slash “/” at the end of the URI.
 12
12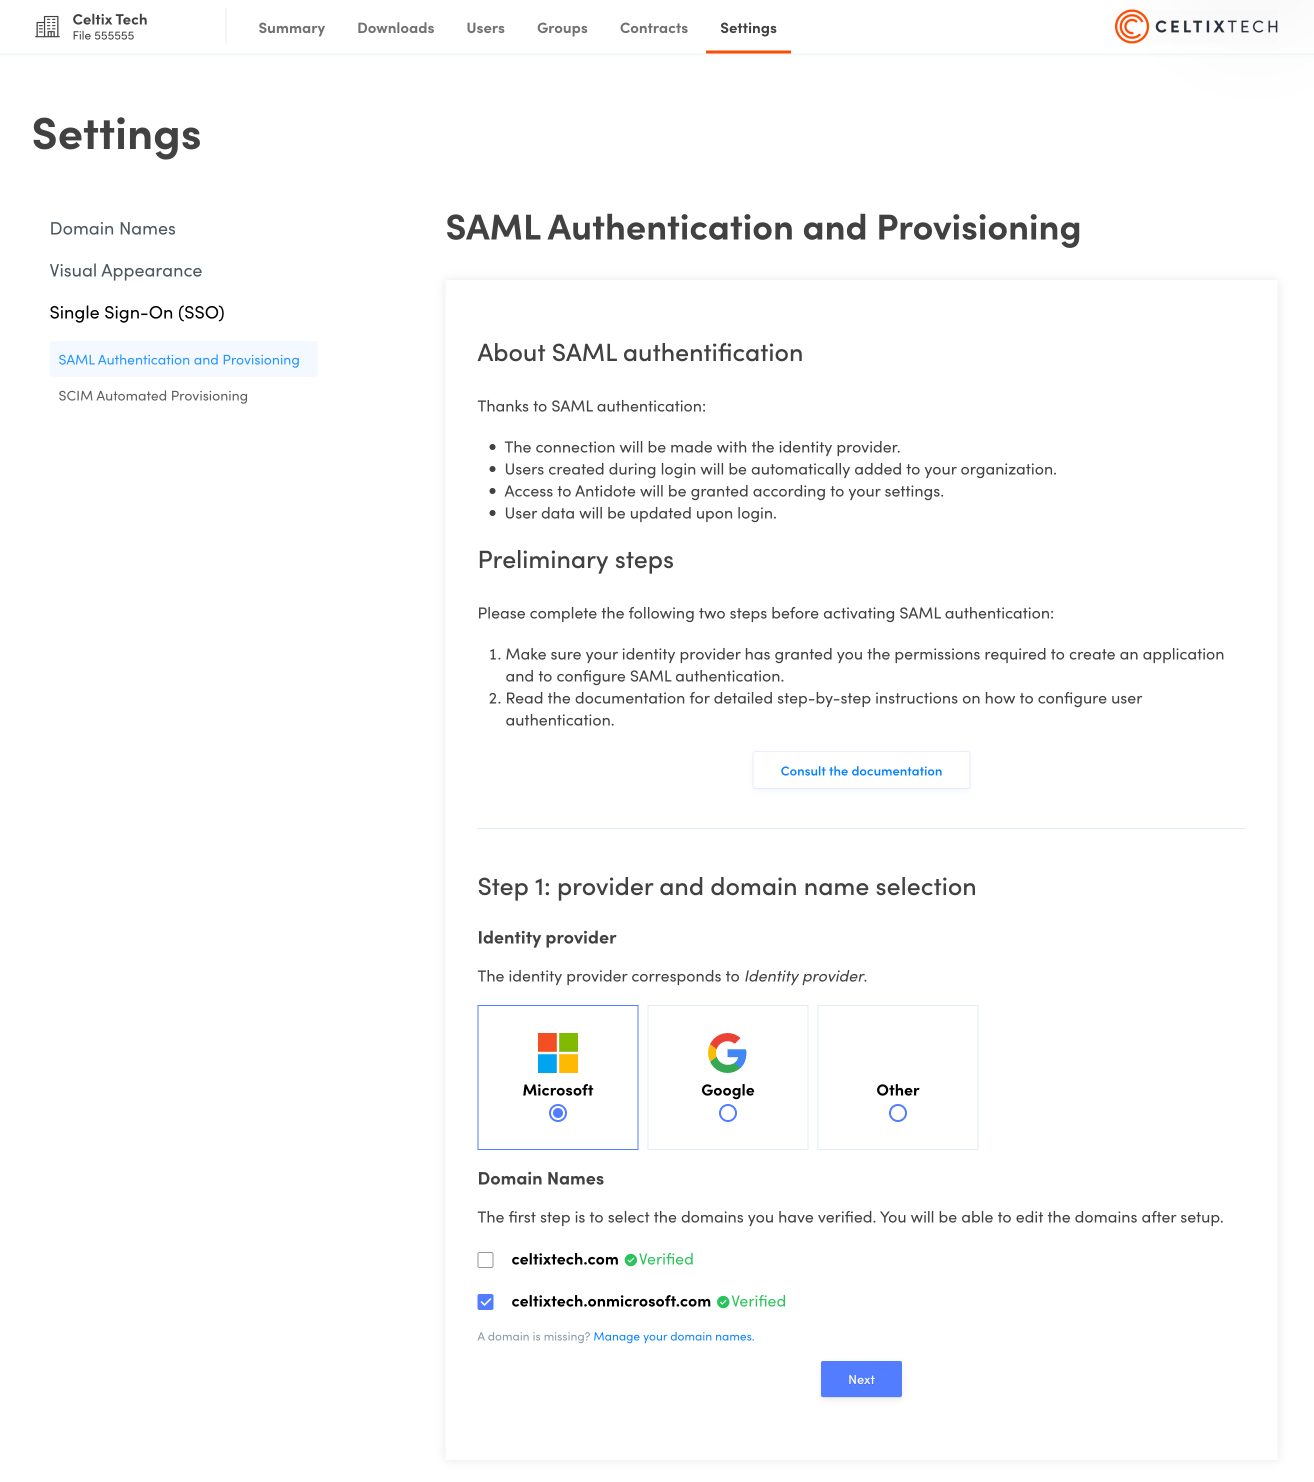 3456
3456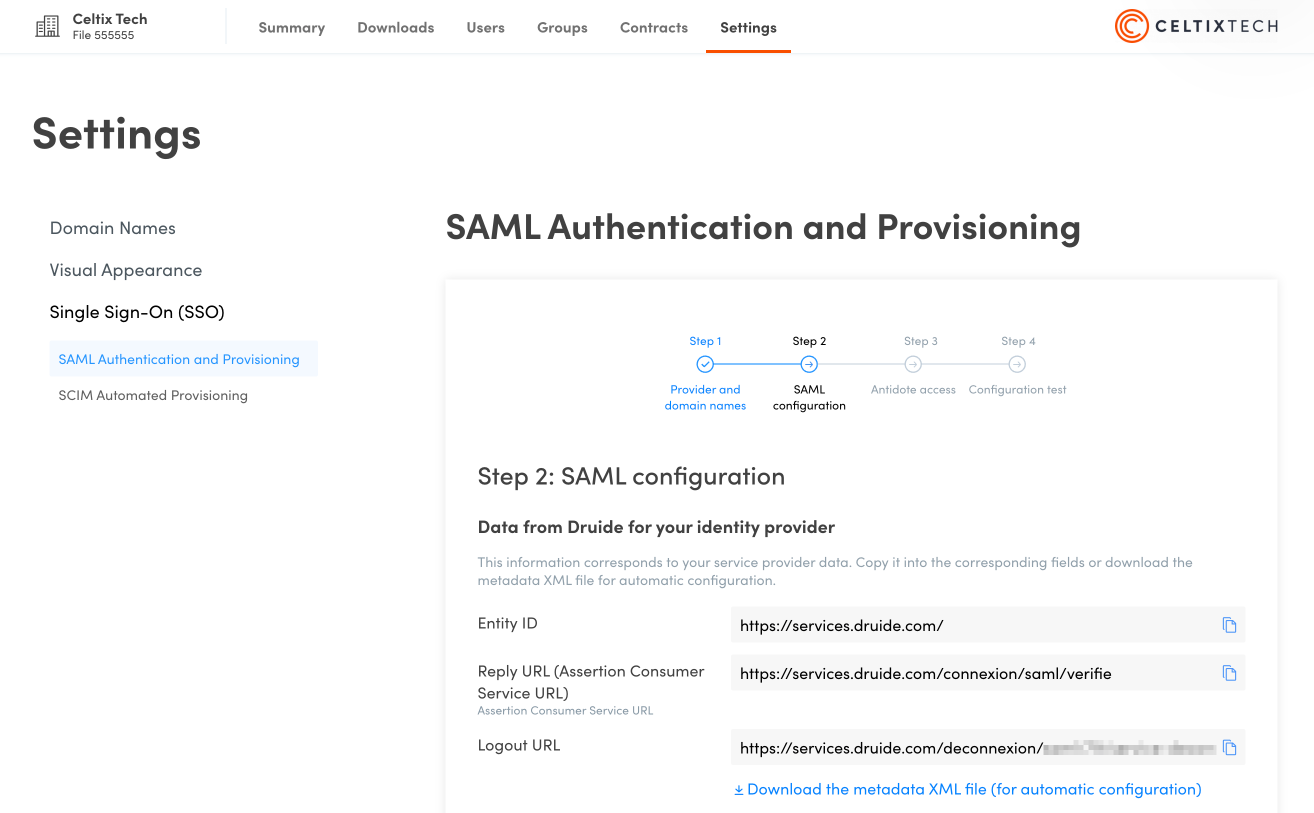 7
7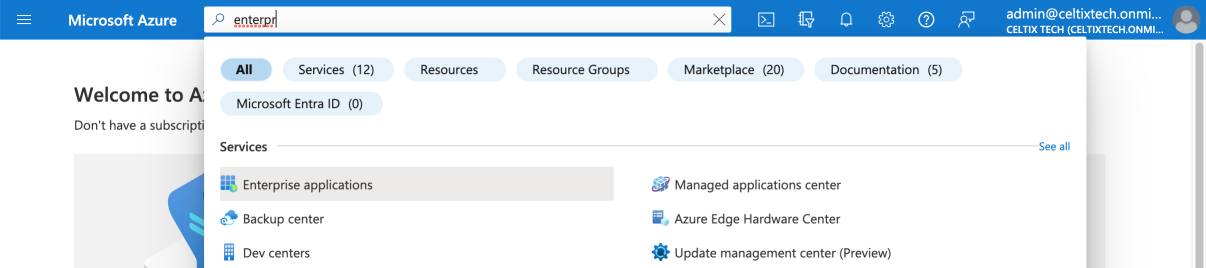 1
1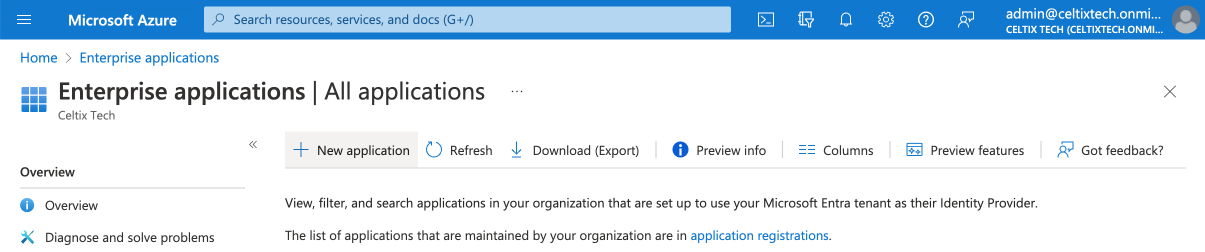 2
2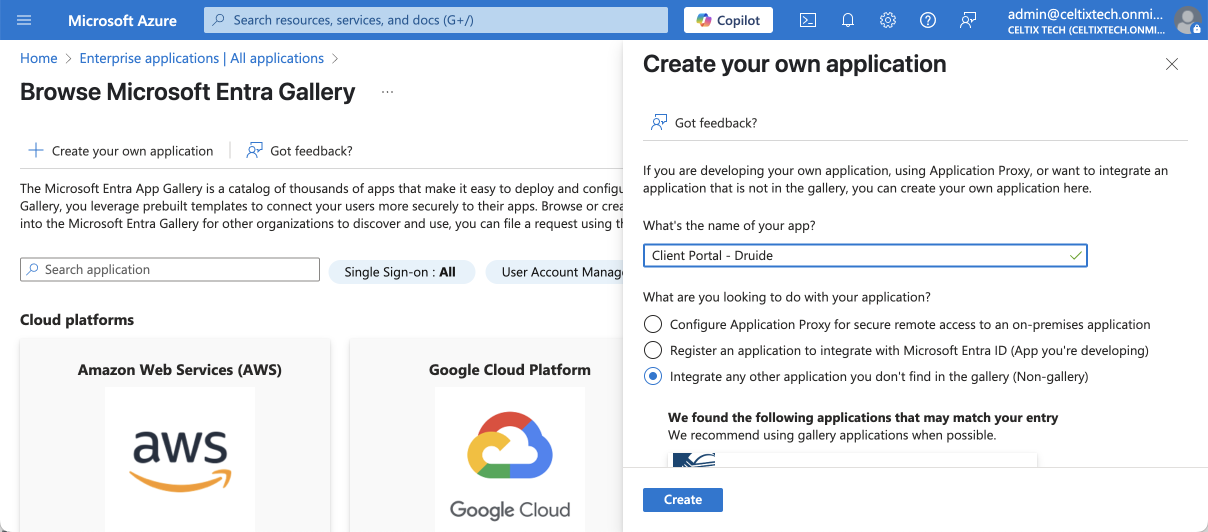 3456
3456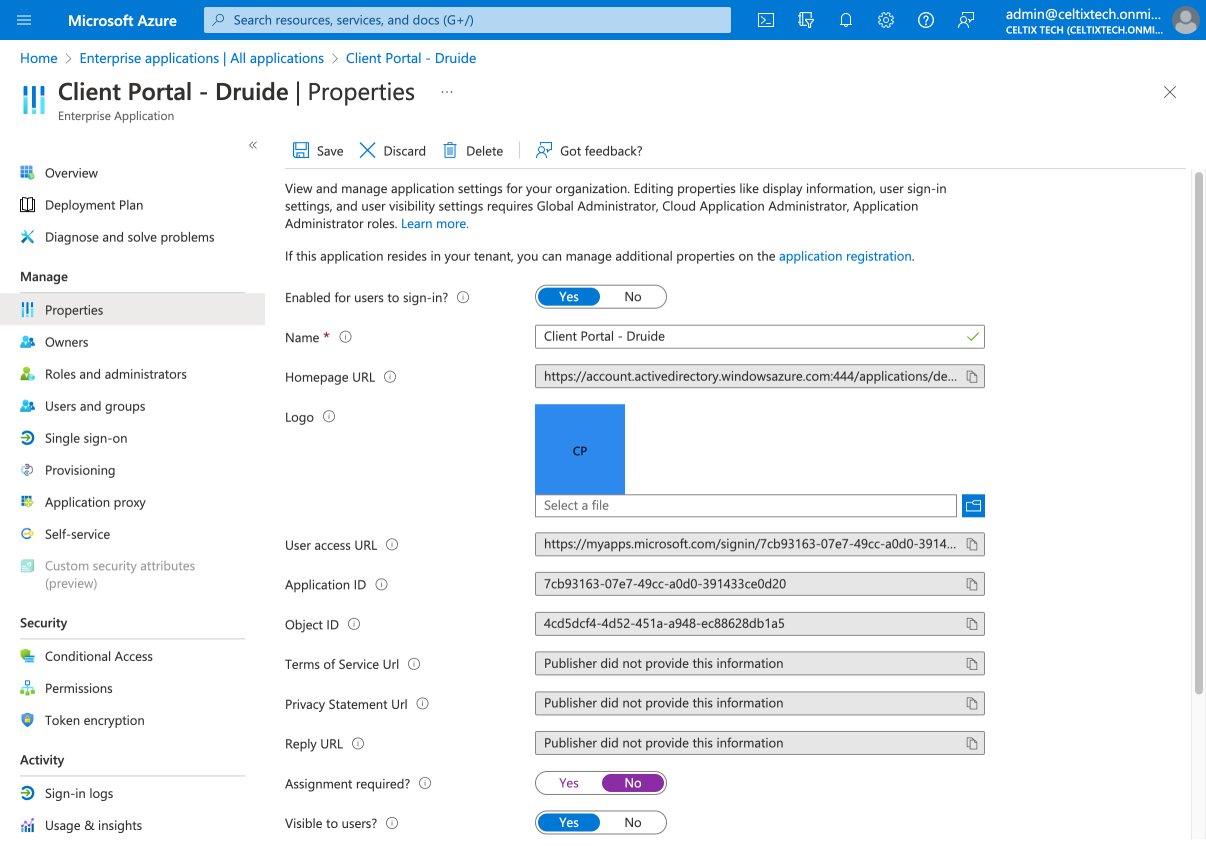
 12
12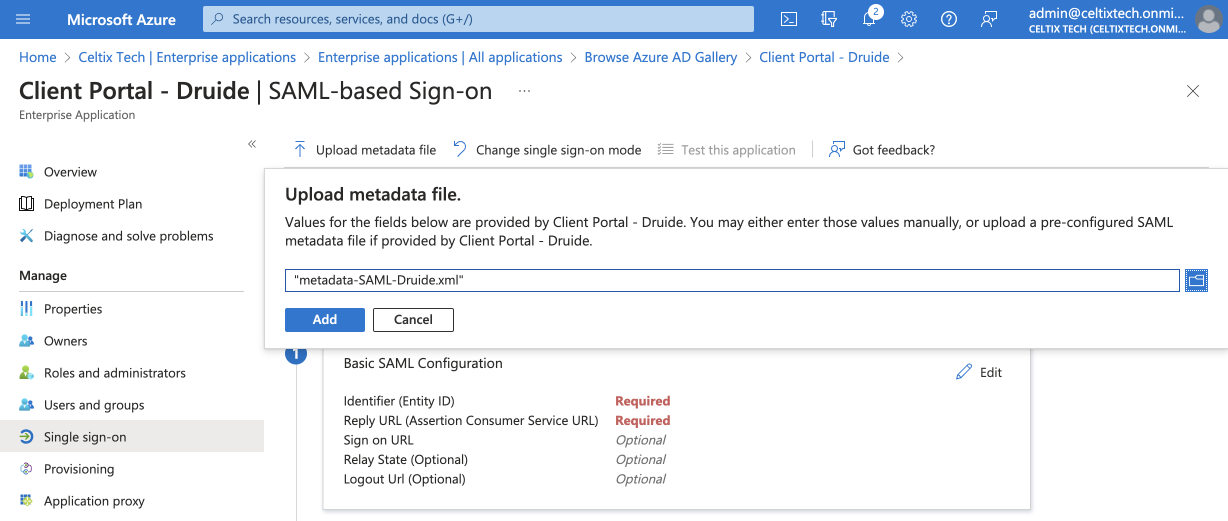 345
345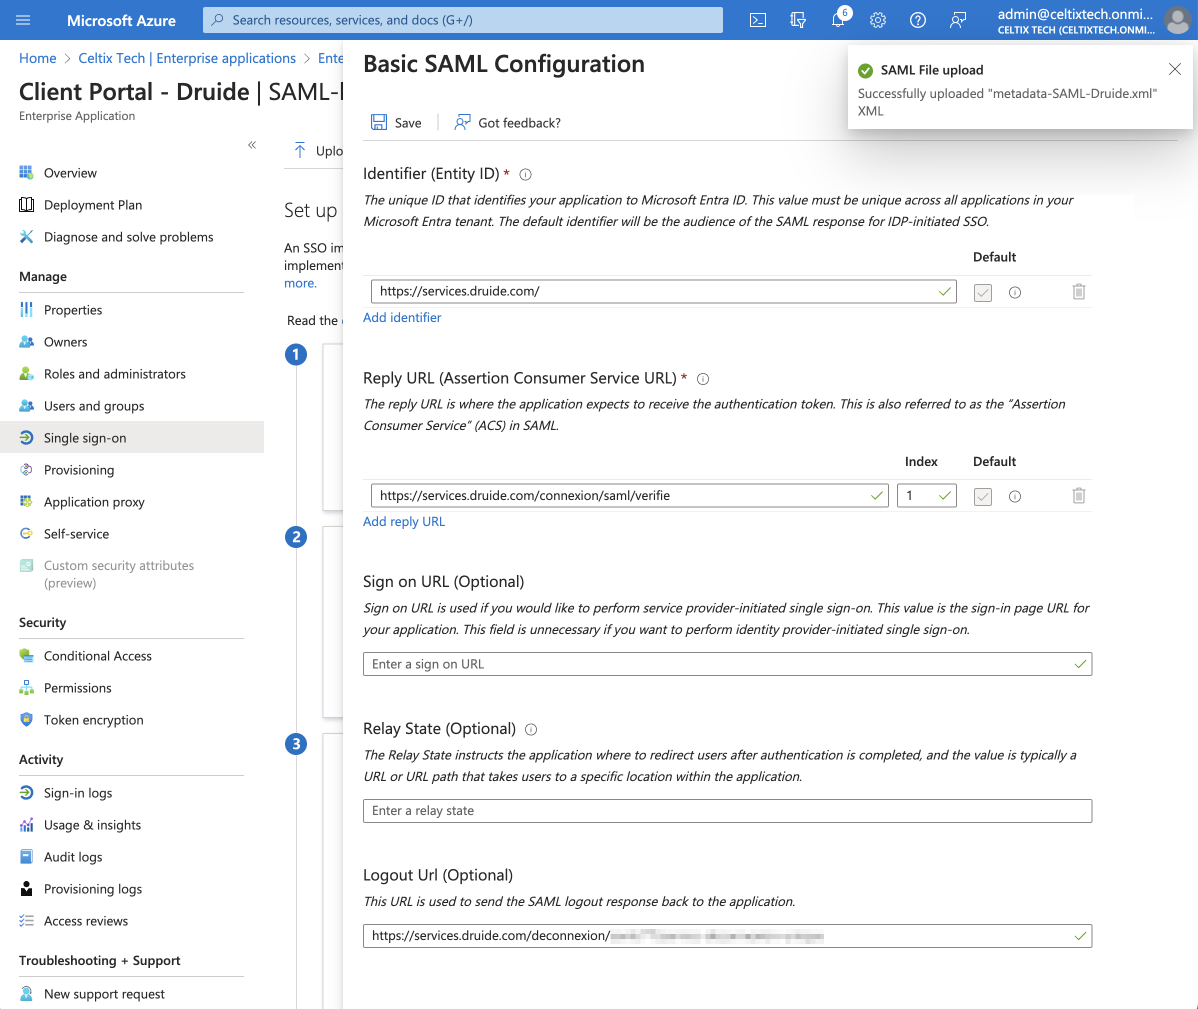 6
6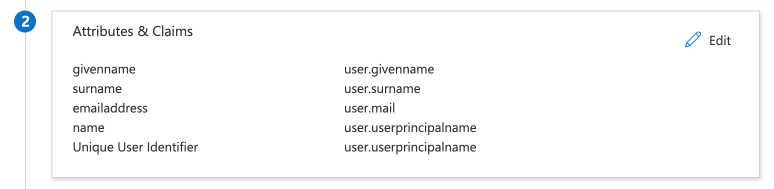
 8
8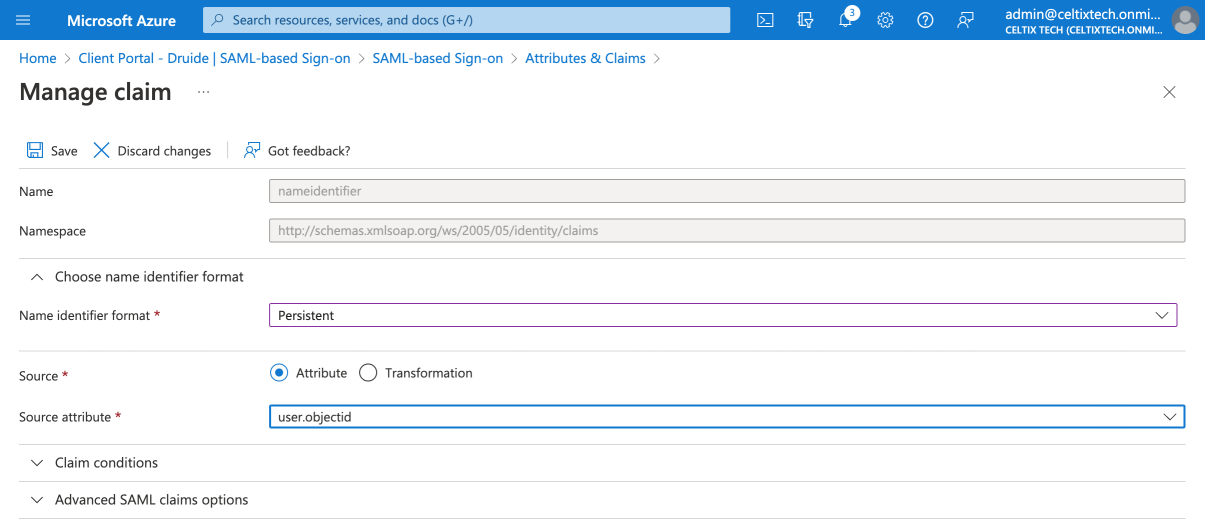 910
910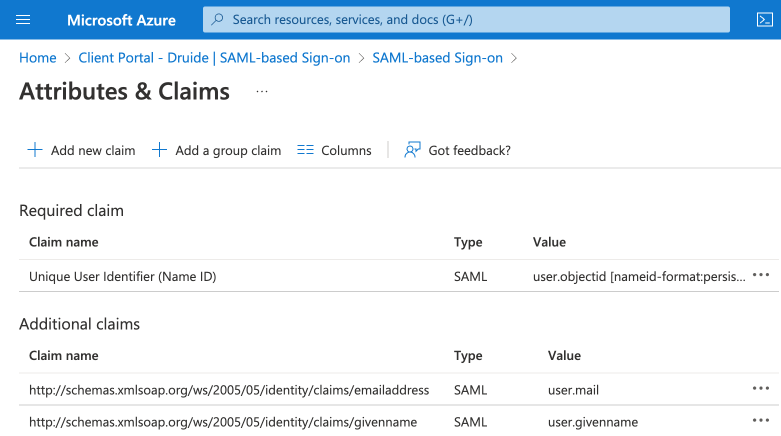
 12
12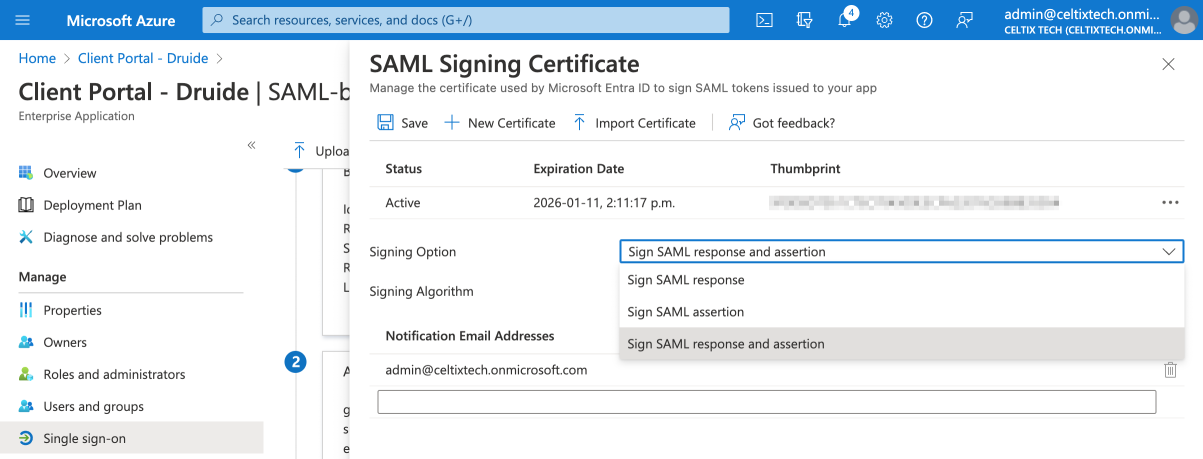 1314
1314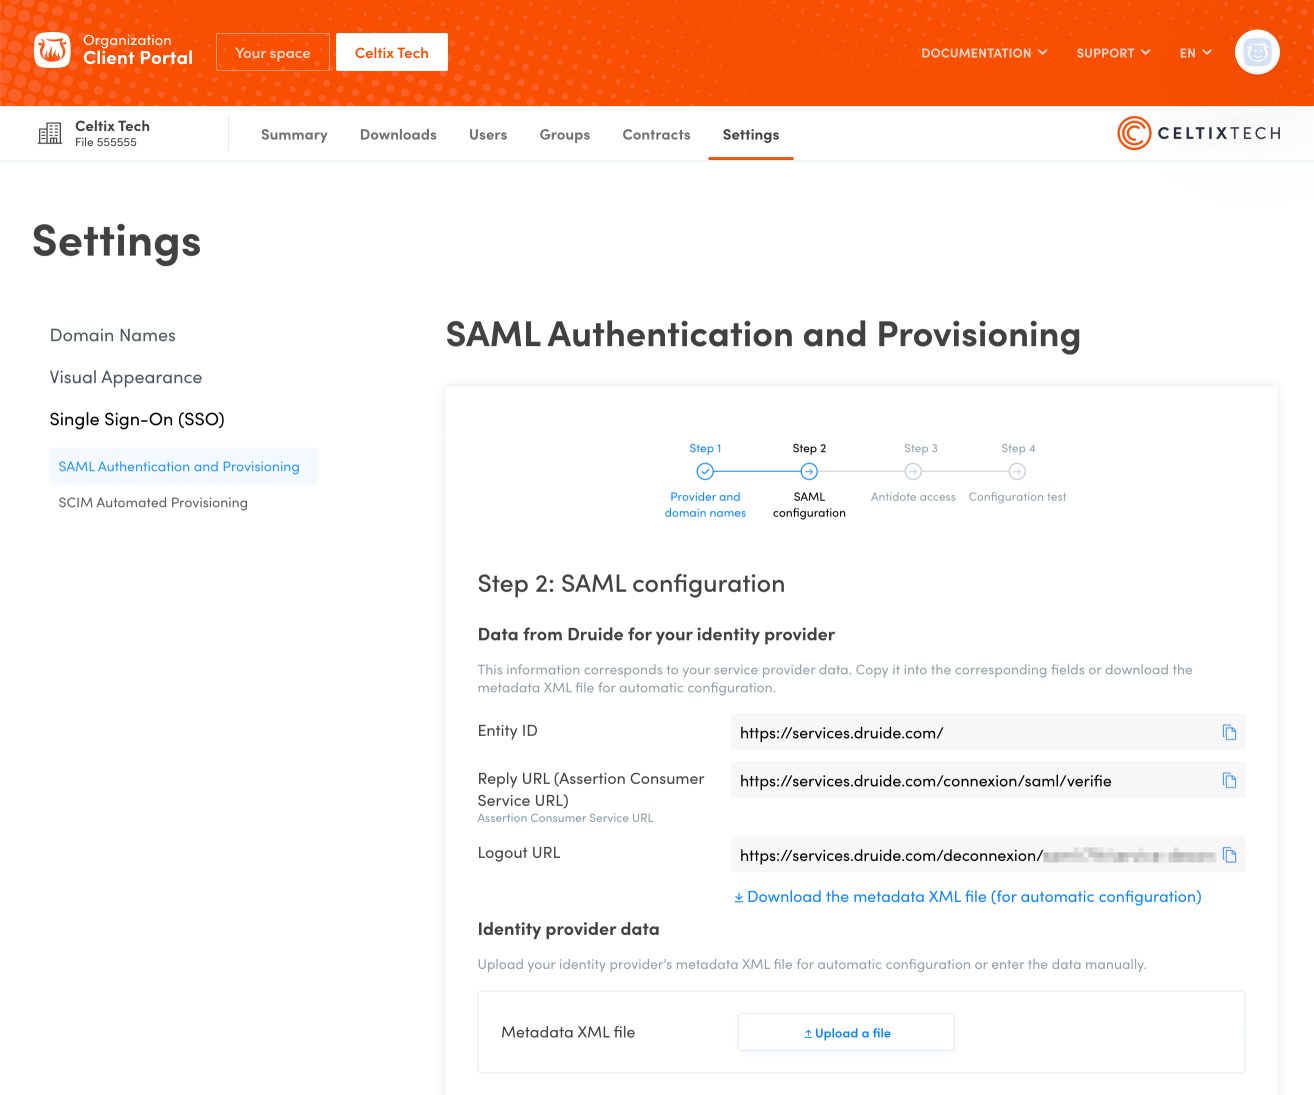
 23
23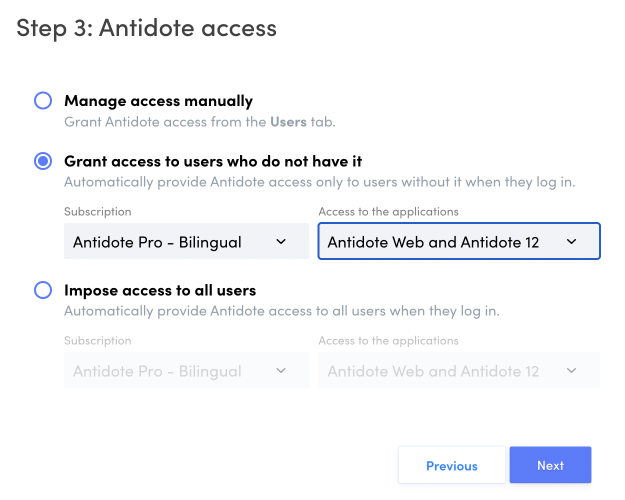
 67
67 1
1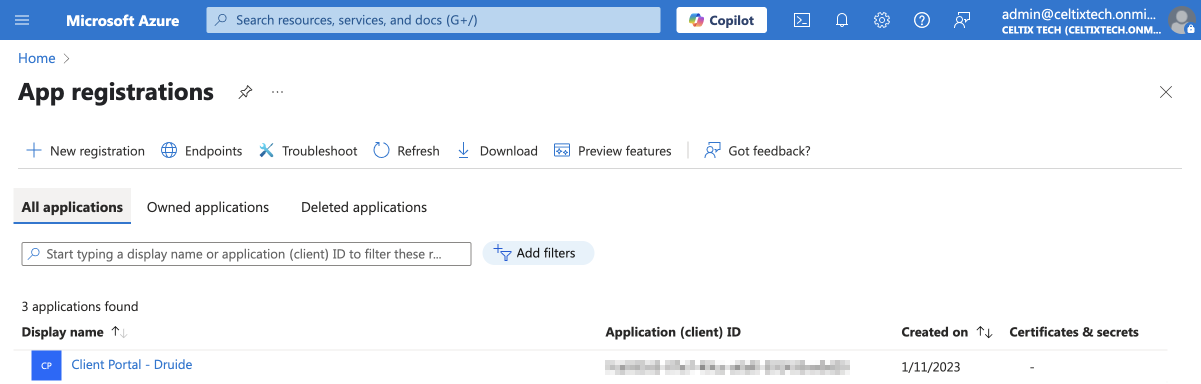 23
23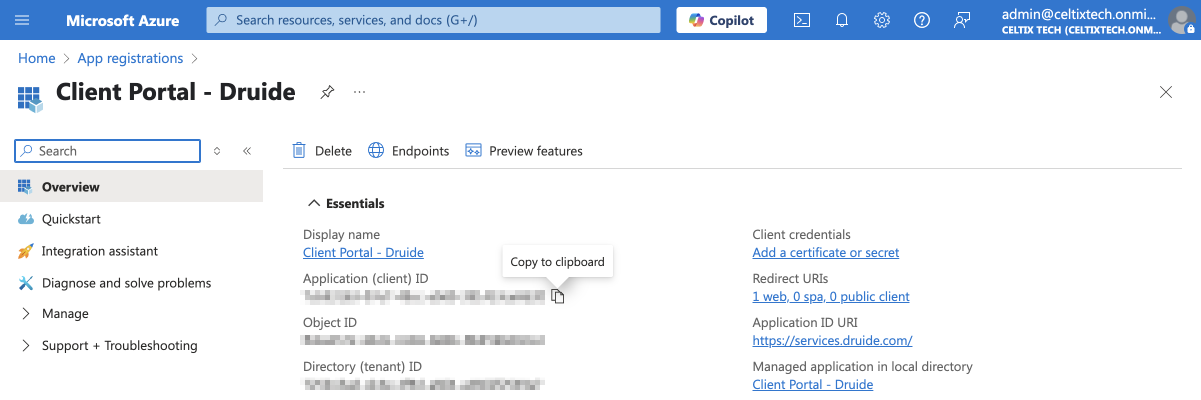 4
4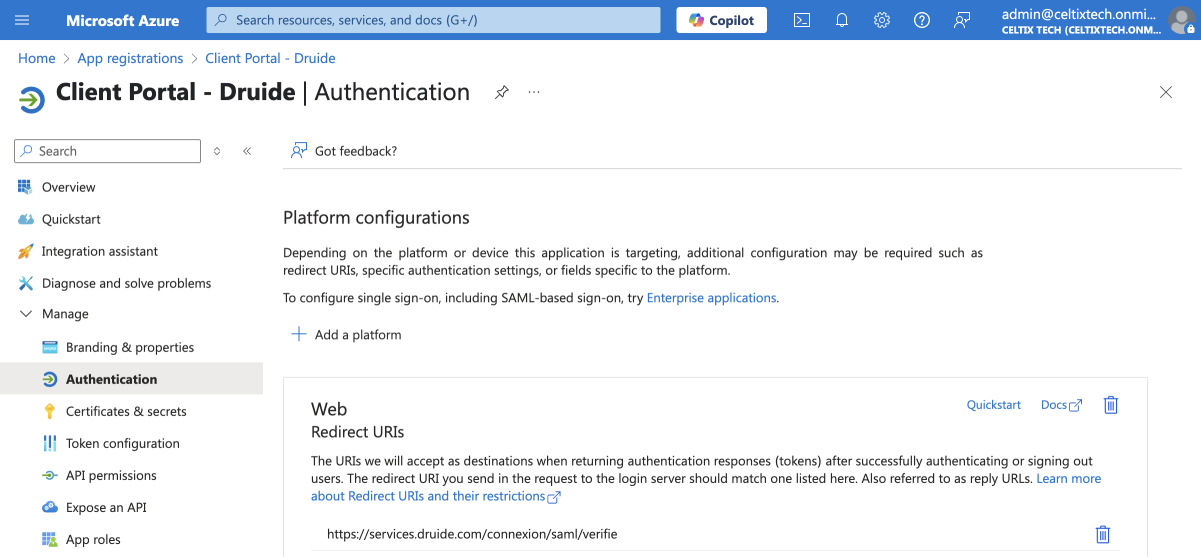 56
56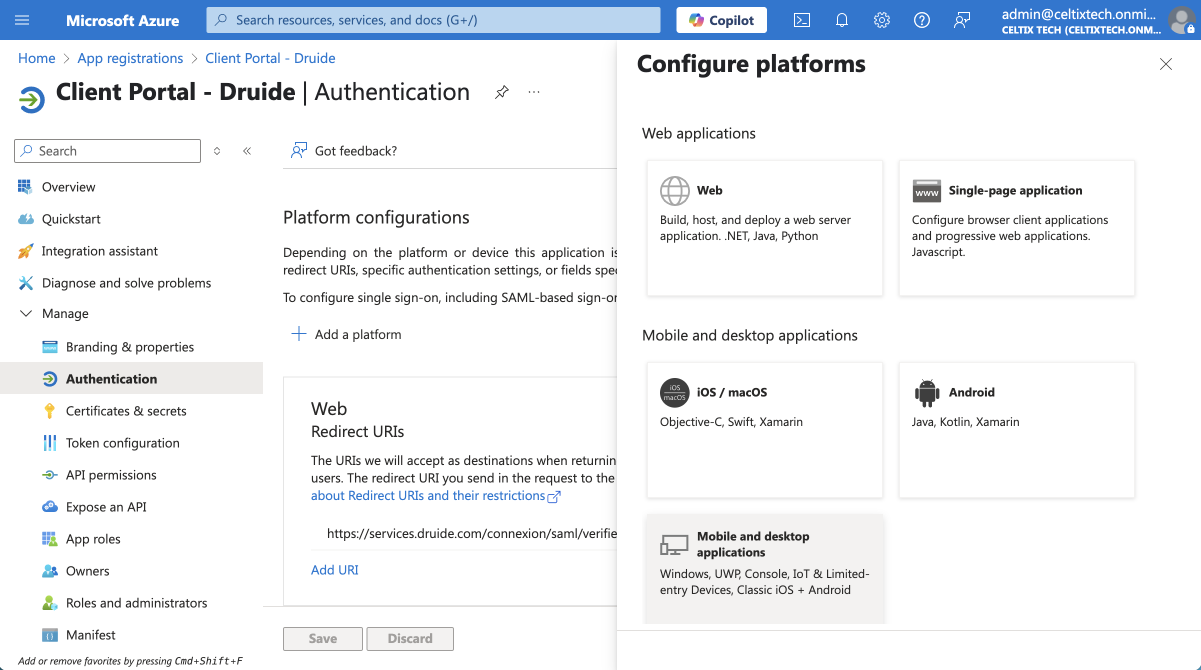 7
7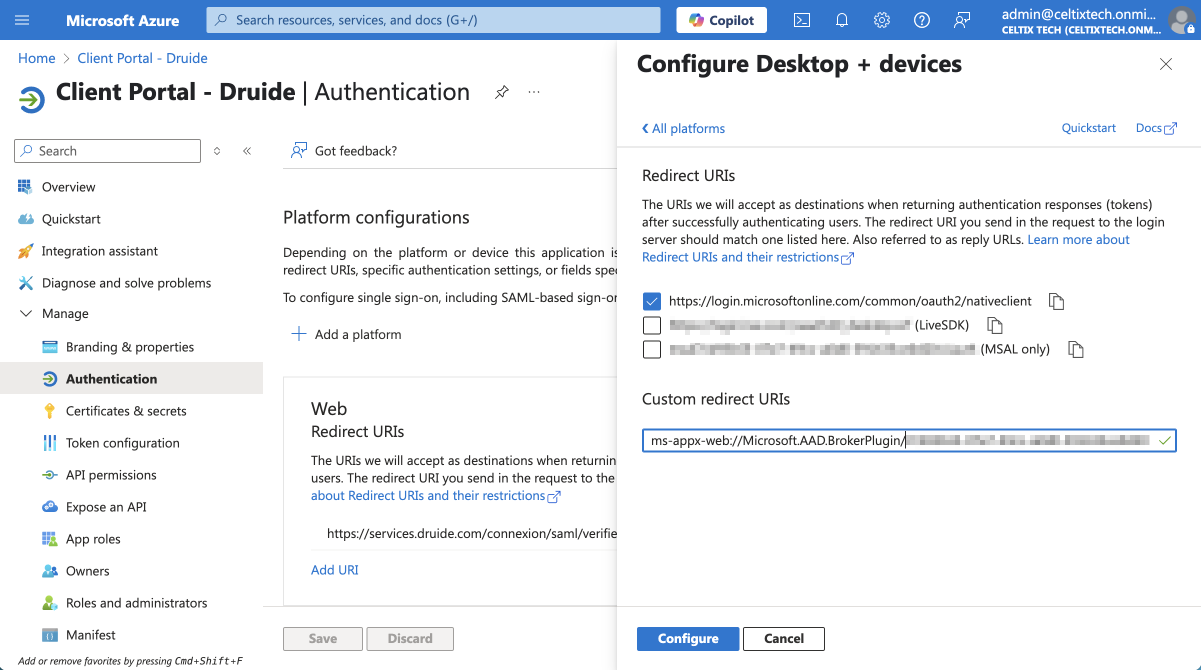 89
89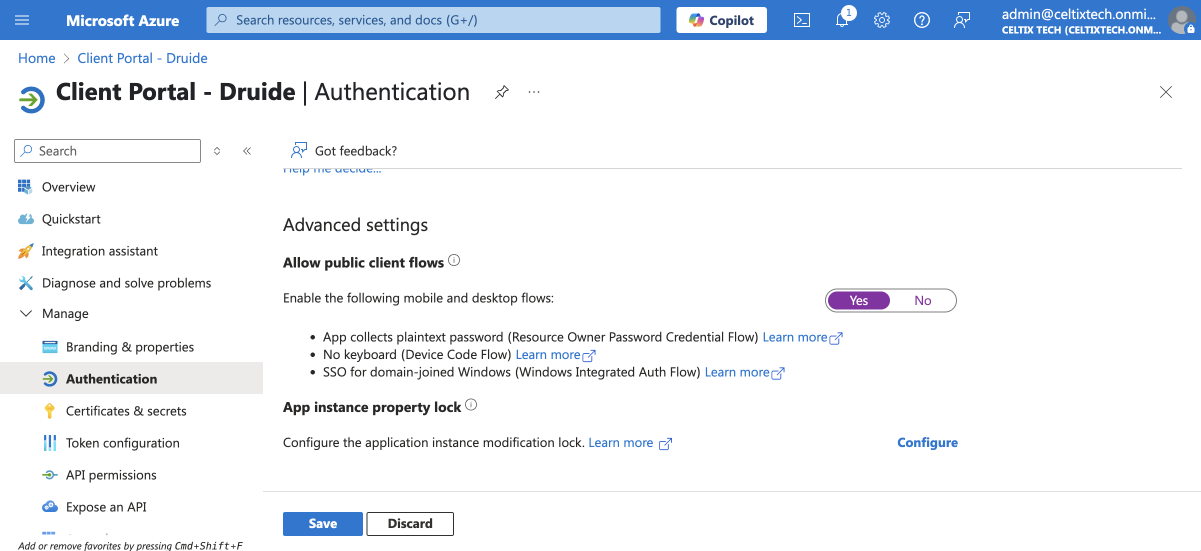 1011
1011